Table of content
Mung bean cakes, also known as ludougao or mung bean pastries, are a beloved traditional dessert across Asia, particularly in Chinese, Vietnamese, and Korean cuisines. These delicate treats boast a smooth, creamy texture and a subtly sweet flavor, making them a perfect accompaniment to tea or a standalone indulgence. While store-bought versions are readily available, crafting them at home allows for customization in sweetness, texture, and flavor profiles. This article will guide you through the process of creating authentic mung bean cakes from scratch, ensuring a rewarding culinary experience that blends tradition with creativity.
Understanding Mung Bean Cakes: A Brief Cultural Overview
Mung bean cakes have a rich history dating back centuries, rooted in East Asian culinary traditions. Originally, they were prepared as a seasonal treat during festivals or special occasions, symbolizing prosperity and good fortune. The use of mung beans—a nutrient-rich legume—reflected ancient wisdom in balancing indulgence with health-conscious ingredients. Today, these cakes are enjoyed year-round, appreciated for their versatility and ability to adapt to modern tastes.
Key Ingredients and Tools
Before diving into the recipe, gather the following ingredients and equipment to ensure a seamless cooking process:
Ingredients
- Split Mung Beans (Yellow Mung Beans): 1.5 cups (300g). These are hulled and split beans, easily found in Asian grocery stores or online.
- Granulated Sugar: ½ cup (100g), adjusted to taste.
- Unsalted Butter or Coconut Oil: 4 tbsp (60g). Butter adds richness, while coconut oil offers a dairy-free alternative.
- Whole Milk or Plant-Based Milk: ¼ cup (60ml), for creaminess.
- Optional Flavor Enhancers:
- Matcha powder (1 tsp for earthy notes)
- Sesame seeds (1 tbsp, toasted for garnish)
- Dried osmanthus flowers (1 tsp, for floral aroma)
- Salt: A pinch to balance sweetness.
Equipment
- Fine-Mesh Sieve: For achieving a silky-smooth texture.
- Steamer Basket or Pot: To cook the mung beans.
- Food Processor or Blender: To purée the cooked beans.
- Non-Stick Pan: For cooking the mung bean paste.
- Mooncake Mold or Cookie Cutters: To shape the cakes (optional but recommended for aesthetics).
- Parchment Paper: To prevent sticking.
Step-by-Step Guide to Making Mung Bean Cakes
Preparing the Mung Beans
- Soaking the Beans: Rinse the split mung beans under cold water to remove debris. Soak them in 3 cups of water for at least 4 hours, or overnight. Soaking softens the beans, reducing cooking time and ensuring even texture.
- Cooking the Beans: Drain the soaked beans and transfer them to a steamer basket lined with parchment paper (to prevent sticking). Steam over medium heat for 20–25 minutes, or until tender. Alternatively, boil them in a pot of water until easily mashed with a fork.
Creating the Mung Bean Paste
- Mashing the Beans: Once cooked, transfer the beans to a food processor. Add 2–3 tbsp of milk to aid blending. Process until smooth, scraping down the sides as needed. For a rustic texture, skip this step and mash manually with a potato masher.
- Sieving the Paste (Optional but Recommended): For ultra-smooth cakes, press the puréed beans through a fine-mesh sieve. This step removes any lumps, resulting in a velvety consistency.
Cooking the Paste to Perfection
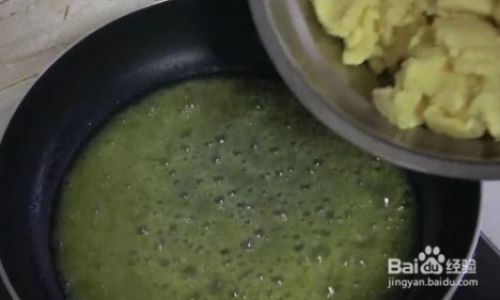
- Non-Stick Pan Method: Heat the non-stick pan over low heat. Add the mung bean paste, sugar, butter, and a pinch of salt. Stir continuously to prevent burning. The mixture will thicken as it cooks, taking 10–15 minutes.
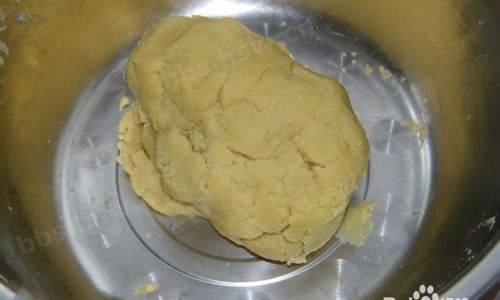
- Consistency Check: The paste is ready when it forms a cohesive ball that doesn’t stick to the pan. Overcooking will make it crumbly; undercooking will result in a sticky texture.
Flavor Customization
- Matcha Variation: Once the paste is cooked, stir in matcha powder until evenly distributed.
- Sesame-Infused: Mix toasted sesame seeds into the paste during the final minutes of cooking.
- Osmanthus Twist: Fold in dried osmanthus flowers after removing the paste from heat.
Shaping and Molding
- Cooling the Paste: Transfer the cooked paste to a shallow dish and let it cool slightly. Cover with plastic wrap pressed directly onto the surface to prevent a skin from forming. Chill in the refrigerator for 1–2 hours until firm but pliable.
- Portioning: Divide the paste into equal portions (20–25g each for small cakes, 30–35g for larger ones). Roll each portion into a smooth ball.
- Molding: Dust a mooncake mold or cookie cutter with cornstarch to prevent sticking. Press the mung bean ball into the mold, then gently tap to release. If using a mold with intricate designs, ensure the paste is chilled enough to hold its shape.
Final Touches and Presentation
- Garnishing: Lightly brush the cakes with melted butter or coconut oil for a subtle sheen. Sprinkle with toasted sesame seeds or edible rose petals.
- Chilling: Refrigerate the cakes for at least 30 minutes before serving to firm them up.
- Storage: Store in an airtight container in the refrigerator for up to 5 days. For longer storage, freeze individually wrapped cakes for up to 2 months.
Tips for Success
- Soaking Time: Do not skip soaking, as it reduces cooking time and ensures even texture.
- Sweetness Adjustment: Taste the paste after cooking and adjust sugar as needed. For a lower-glycemic option, substitute with coconut sugar or erythritol.
- Texture Control: For a lighter texture, replace 25% of the butter with whipped aquafaba (chickpea brine) or applesauce.
- Mold Alternatives: If no mold is available, shape the cakes into small patties or use a muffin tin lined with parchment paper.
Creative Variations to Explore
- Chocolate-Dipped Mung Bean Cakes: Dip half of each cake in melted dark chocolate and sprinkle with sea salt.
- Red Bean and Mung Bean Layered Cakes: Alternate layers of mung bean and red bean paste in a mold for a striking visual effect.
- Savory Twist: Add a pinch of black pepper, crushed Sichuan peppercorns, or dried shrimp powder to the paste for an unexpected flavor explosion.
- Gluten-Free and Vegan Options: Use certified gluten-free molds and ensure all ingredients are vegan-friendly.
Troubleshooting Common Issues
- Crumbly Texture: Overcooking the paste removes moisture. Next time, reduce cooking time by 2–3 minutes.
- Sticky Paste: Undercooking leaves excess moisture. Continue cooking until the paste forms a ball.
- Mold Sticking: Ensure the paste is chilled and the mold is well-dusted with cornstarch.
Cultural Significance and Modern Adaptations
Mung bean cakes have evolved beyond traditional boundaries, with contemporary bakers experimenting with flavors like yuzu, charcoal, and even savory iterations. However, the essence of humility and simplicity—a hallmark of East Asian desserts—remains. Serving these cakes during holidays like Mid-Autumn Festival or Lunar New Year connects modern families to their heritage, while DIY enthusiasts appreciate the meditative process of handcrafting each piece.
Conclusion
Crafting mung bean cakes at home is a labor of love that rewards you with a dessert both visually stunning and deeply satisfying. Whether you adhere to tradition or innovate with bold flavors, the process celebrates the harmony of simplicity and refinement. Share these treats with loved ones, gift them as tokens of appreciation, or savor them as a quiet indulgence—each bite carries the legacy of generations past, reimagined for today’s kitchen.
By mastering this recipe, you join a timeless tradition of turning humble ingredients into edible art. So, roll up your sleeves, embrace the rhythm of the kitchen, and let the aroma of steaming mung beans fill your home with warmth and possibility. Your journey into the world of DIY mung bean cakes begins here—one delicate, delicious cake at a time.


0 comments