Table of content
Introduction
Introducing solid foods to your baby is an exciting milestone, and ensuring those foods are both nutritious and appealing is every parent’s priority. One such ingredient that combines flavor, texture, and health benefits is baby meat floss. This versatile food item, often referred to as “meat wool” or “pork floss” in some cultures, is a shredded, dried meat product that can be added to porridges, purees, or served as a finger food. Unlike store-bought versions, which may contain additives or excess sodium, homemade baby meat floss allows you to control the ingredients, ensuring it’s tailored to your child’s dietary needs. This article will guide you through the process of creating wholesome, tender meat floss at home, complete with tips for customization, safety, and storage.

What Is Baby Meat Floss?
Baby meat floss is a light, airy, and finely shredded meat product made by slow-cooking meat until it’s tender enough to pull apart, then drying and fluffing it into delicate strands. The result is a soft, melt-in-the-mouth texture that’s easy for infants to chew and swallow. It’s rich in protein, iron, and essential nutrients, making it an excellent addition to a baby’s diet, especially during the transition to solids.
Why Make Homemade Baby Meat Floss?
- Control Over Ingredients: Avoid preservatives, excess salt, or artificial flavors.
- Nutritional Customization: Use organic, grass-fed, or free-range meats for added benefits.
- Texture Adaptability: Adjust the coarseness based on your baby’s chewing ability.
- Cost-Effective: Homemade versions are often more economical than premium store-bought options.
Ingredients and Equipment
Ingredients
- Meat: Choose lean cuts of chicken breast, pork tenderloin, or beef sirloin. Avoid fatty or gristly parts.
- Broth or Water: For cooking the meat (homemade bone broth adds extra nutrients).
- Seasonings (Optional): A pinch of garlic powder, onion powder, or a tiny drizzle of sesame oil (for babies over 12 months).
- Sweetener (Optional): A touch of apple juice or a date syrup for natural sweetness (use sparingly).
Equipment
- Slow Cooker or Pressure Cooker: To tenderize the meat.
- Food Processor or Blender: For shredding (or use forks for a hands-on approach).
- Baking Sheet: For drying the meat floss.
- Non-Stick Pan: For low-heat drying (alternative to oven).
- Fine Sieve or Cheesecloth: For draining excess liquid.
Step-by-Step Guide to Making Baby Meat Floss
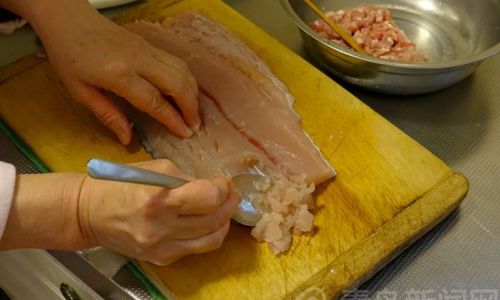
Step 1: Preparing the Meat
-
Select the Meat:
- Chicken: Breast meat is leanest; thighs can be used for added flavor but remove skin and fat.
- Pork: Tenderloin is ideal; avoid processed varieties like ham.
- Beef: Sirloin or round cuts work best; trim visible fat.
-
Clean and Cut:
- Rinse the meat under cold water.
- Remove tendons, sinew, or excess fat.
- Cut into 2-inch chunks for even cooking.
Step 2: Cooking the Meat
-
Slow Cooker Method:
- Place meat in the slow cooker with 1 cup of broth or water per pound of meat.
- Add a slice of ginger or a garlic clove (optional) for mild flavor.
- Cook on low for 6–8 hours or high for 3–4 hours until tender.
-
Pressure Cooker Method:
- Add meat and broth/water (1:1 ratio).
- Cook on high pressure for 15–20 minutes, then natural release.
-
Stovetop Method:
Simmer meat in a covered pot with broth/water for 1–2 hours until fork-tender.
Step 3: Shredding the Meat
-
Drain Excess Liquid:
Use a sieve or cheesecloth to separate the meat from cooking liquid (reserve the liquid for soups or purees).
-
Shred Using Tools:

- Food Processor: Pulse the meat in short bursts until finely shredded.
- Forks: Use two forks to pull the meat into strands manually.
- Stand Mixer: Attach the paddle attachment and mix on low speed for a hands-off approach.
Step 4: Seasoning (If Desired)
For babies under 12 months, avoid salt. For older infants:
- Add a tiny pinch of salt (less than 1/8 tsp per pound of meat).
- Sprinkle a pinch of herbs like thyme or parsley.
- Drizzle 1/4 tsp of sesame oil or olive oil for richness.
Step 5: Drying the Meat Floss
-
Oven Method:
- Preheat the oven to 175°F (80°C).
- Spread shredded meat evenly on a baking sheet lined with parchment paper.
- Bake for 1–2 hours, stirring every 15 minutes to prevent burning.
- The floss is ready when it’s dry, fluffy, and slightly golden.
-
Stovetop Method:
- Heat a non-stick pan over low heat.
- Add the meat floss and stir continuously for 20–30 minutes until dried.
-
Dehydrator Method:
Spread meat on dehydrator trays and dry at 145°F (63°C) for 4–6 hours.
Step 6: Cooling and Storing
- Let the meat floss cool completely on the baking sheet.
- Store in an airtight container in the refrigerator for up to 2 weeks or freeze for 3 months.
Tips for Success
-
Texture Control:
- For younger babies (6–9 months), process the floss until powdery.
- For older babies (10–12 months), leave slightly coarse for chewing practice.
-
Flavor Variations:
- Add a teaspoon of nutritional yeast for a cheesy taste.
- Mix in pureed vegetables like carrots or spinach during cooking for added nutrients.
-
Batch Cooking:
Double the recipe and freeze portions in ice cube trays for quick meals.
-
Safety First:

- Ensure meat is cooked to an internal temperature of 165°F (74°C) to kill bacteria.
- Avoid honey or choking-hazard additives like nuts.
Nutritional Benefits of Baby Meat Floss
- Protein: Essential for growth and muscle development.
- Iron: Prevents anemia and supports brain function.
- Zinc: Boosts immunity and metabolism.
- Vitamin B12: Critical for nerve health and red blood cell production.
Common Mistakes to Avoid
-
Overcooking:
Drying the floss too long can make it brittle. Stop when it’s dry but still slightly pliable.
-
Under-Shredding:
Large chunks are hard for babies to manage. Ensure meat is fully shredded.
-
Using Fatty Meats:
Fat can make the floss greasy and spoil faster. Stick to lean cuts.
-
Skipping Cooling:
Storing warm floss creates condensation, leading to sogginess.
Serving Ideas for Baby Meat Floss
-
Mixed with Grains:
Stir into rice cereal, quinoa, or oatmeal for added protein.

-
Finger Food:
Roll into tiny balls or sprinkle on soft-cooked veggie sticks.
-
Egg Dishes:
Mix into scrambled eggs or omelets for a savory twist.
-
Soup Topper:
Add a pinch to warm broths or noodle soups.
Allergy and Dietary Considerations
- Gluten-Free: Ensure no soy sauce or wheat-based seasonings are used.
- Dairy-Free: Avoid butter or cheese additives.
- Vegetarian Alternative: Use shredded tofu or tempeh (fermented soy) for a plant-based version.
Troubleshooting Guide
- Floss Too Dry: Next time, reduce drying time by 10–15 minutes.
- Floss Too Moist: Return to the oven/pan for another 5–10 minutes.
- Burnt Flavor: Use a lower oven temperature or stir more frequently.
Conclusion
Homemade baby meat floss is a game-changer in your infant’s mealtime repertoire. It’s simple to prepare, packed with nutrients, and endlessly adaptable to your child’s tastes and needs. By avoiding additives and controlling seasonings, you’re offering a wholesome food that supports growth while introducing exciting textures. Whether you’re a first-time parent or a seasoned pro, this recipe is sure to become a staple in your kitchen. Experiment with meats, seasonings, and serving styles to keep your little one engaged and nourished. Remember, the goal is to make mealtime enjoyable and stress-free—and with this guide, you’re well-equipped to do just that.
Final Tip: Always consult your pediatrician before introducing new foods, especially if your baby has a history of allergies or digestive issues. Happy cooking!

0 comments