Table of content
- 1 Measuring with Precision
- 2 Assessing Wall Structure
- 3 Gathering the Right Tools
- 1 Material Matters
- 2 Diameter and Length
- 3 Bracket and Finial Styles
- 1 Marking the Wall
- 2 Drilling and Mounting
- 3 Attaching the Rod
- 1 Skipping the Level
- 2 Underestimating Weight Capacity
- 3 Incorrect Anchor Usage
- 4 Neglecting Obstructions
- 1 Layering Curtains
- 2 Motorized Options
- 3 Energy Efficiency
Introduction
Installing curtain rods may seem like a straightforward DIY task, but achieving a flawless, functional, and visually appealing result requires careful planning and attention to detail. Curtain rods serve both practical and aesthetic purposes: they support window treatments, control light entry, and contribute to a room’s decor. However, improper installation can lead to sagging rods, uneven curtains, or even damage to walls. This guide explores the critical steps, tools, and pitfalls to avoid when mounting curtain rods, ensuring durability and enhancing your space’s ambiance.
Pre-Installation Preparation: The Foundation of Success
Before drilling a single hole, thorough preparation is key. Skipping this phase often results in costly mistakes, such as misaligned rods or unstable brackets.

1 Measuring with Precision
Accurate measurements are non-negotiable. Start by deciding whether to mount the rod inside or outside the window frame:
- Inside Mount: Rods are fitted within the window recess, creating a minimalist look. Measure the recess’s width (subtract 1/4 inch for ease of movement) and depth to ensure curtains don’t rub against the glass.
- Outside Mount: Rods extend beyond the frame, making windows appear larger. Add 8–12 inches to the window’s width for optimal light coverage and visual balance.
Height Matters: Standard practice places rods 4–6 inches above the window trim. For ceilings taller than 8 feet, position them closer to the ceiling to elongate the room’s perceived height.
2 Assessing Wall Structure
Wall material dictates hardware choices:
- Drywall: Requires hollow-wall anchors (toggle bolts or self-drilling anchors) to prevent sagging.
- Concrete/Brick: Use masonry bits and plastic anchors designed for heavy loads.
- Wood Studs: Direct screw mounting is ideal but requires a stud finder to locate framing.
3 Gathering the Right Tools
Equip yourself with:
- Stud Finder: Locates wall studs for secure mounting.
- Level: Ensures rod alignment (a laser level offers precision).
- Drill: Cordless models are convenient; use the correct bit size for anchors.
- Screwdriver: Manual or electric, depending on screw type.
- Tape Measure: Stainless steel for accuracy.
- Pencil: For marking drill points.
Selecting the Perfect Curtain Rod
The rod’s design and material should complement your curtains and room style while supporting their weight.
1 Material Matters
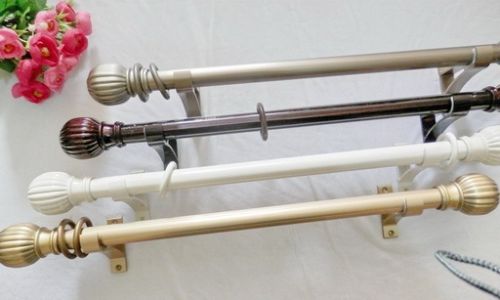
- Metal Rods (Steel/Brass): Durable and sleek, ideal for heavy drapes.
- Wood Rods: Add warmth; choose stained or painted finishes to match decor.
- PVC/Plastic: Lightweight and budget-friendly but may warp under heavy use.
2 Diameter and Length
- Diameter: Thicker rods (1–1.5 inches) support heavier fabrics; thinner rods suit lightweight sheers.
- Adjustable Rods: Telescoping designs accommodate varying window widths.
3 Bracket and Finial Styles
- Brackets: Opt for double brackets for layered curtains. Ensure they’re spaced 4–6 inches from the window edge.
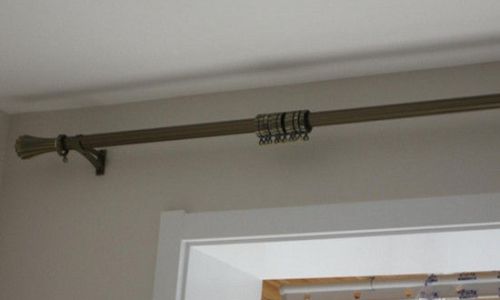
- Finials: Decorative ends (spheres, crystals, or geometric shapes) should align with the room’s aesthetic.
Step-by-Step Installation Guide
Follow this sequence to avoid errors:

1 Marking the Wall
- Use a pencil to mark the rod’s endpoints based on your measurements.
- Place brackets 3–6 inches beyond the window frame (adjust for rod length).
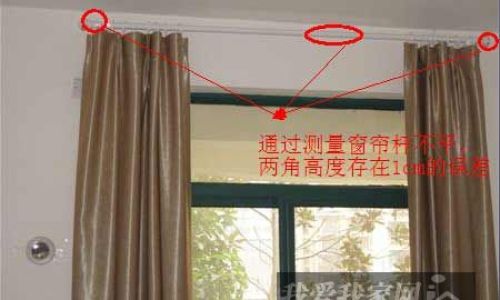
- Double-check alignment with a level; even slight tilts are noticeable post-installation.
2 Drilling and Mounting
- For Drywall: Drill pilot holes, insert anchors, then secure brackets with screws.
- For Studs: Drill directly into studs; no anchors needed.
- For Concrete: Use a masonry bit, then hammer in plastic anchors before screwing.
3 Attaching the Rod
- Slide the rod through the brackets.
- Tighten screws to secure it, ensuring smooth operation for curtains.
- Hang curtains and adjust gathers for even fullness.
Common Mistakes and How to Avoid Them
Even seasoned DIYers stumble—here’s how to sidestep pitfalls:
1 Skipping the Level
A rod that’s even slightly crooked disrupts symmetry. Always verify alignment with a level before drilling.
2 Underestimating Weight Capacity
Heavy velvet curtains on a flimsy rod lead to sagging. Check the manufacturer’s weight limit and upgrade hardware if needed.
3 Incorrect Anchor Usage
Using drywall anchors on concrete guarantees failure. Match anchors to wall type.
4 Neglecting Obstructions
Window cranks, thermostats, or molding can block rod placement. Measure twice to avoid conflicts.
Maintenance and Longevity
Proper care extends the rod’s life:

- Dust Regularly: Use a microfiber cloth to prevent grime buildup.
- Tighten Screws Annually: Walls shift, loosening brackets.
- Avoid Overloading: Remove curtains before cleaning windows to prevent rod strain.
Advanced Tips for Perfect Results
Elevate your installation with these pro strategies:
1 Layering Curtains
Install double rods to combine sheer panels with blackout drapes. Ensure brackets support combined weight.
2 Motorized Options
Smart rods with remote controls offer convenience, though professional installation may be required.
3 Energy Efficiency
Thermal-lined curtains paired with properly sealed rods reduce drafts.
Troubleshooting Guide
- Sagging Rod: Add a center bracket or replace with a thicker rod.
- Uneven Curtains: Readjust hooks or rings; ensure the rod is level.
- Wall Damage: Patch holes with spackle; repaint if necessary.
Conclusion
Installing curtain rods is a blend of precision and creativity. By prioritizing measurements, wall assessment, and hardware selection, you’ll achieve a polished look that stands the test of time. Avoid shortcuts, double-check alignments, and don’t hesitate to consult professionals for complex installations. With patience and this guide, your windows will transform into focal points that marry functionality and elegance. Whether you’re a novice or seasoned DIY enthusiast, meticulous planning ensures your curtain rods become a source of pride—and admiration—for years to come.


0 comments