Introduction
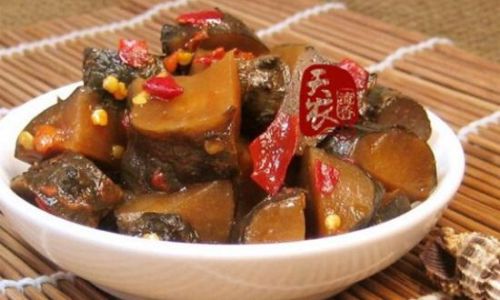
Jerusalem artichokes, scientifically known as Helianthus tuberosus, are a unique and versatile root vegetable often overlooked in the culinary world. Native to North America, these tuberous sunflowers have been cultivated for their edible roots for centuries. Unlike traditional potatoes, Jerusalem artichokes offer a nutty, slightly sweet flavor with a crisp texture when cooked. However, their versatility extends beyond fresh consumption; dried Jerusalem artichokes can be a valuable addition to your pantry, providing a long-lasting storage solution and enhancing the flavor profile of various dishes.
In this comprehensive guide, we will explore the process of drying Jerusalem artichokes, from preparation to storage, ensuring you harness the full potential of this underappreciated root vegetable. We’ll cover the reasons for drying, the best methods, essential tips for successful drying, and how to use your dried Jerusalem artichokes in the kitchen.
Why Dry Jerusalem Artichokes?
Before diving into the drying process, it’s essential to understand the benefits of drying Jerusalem artichokes:
-
Extended Shelf Life: Drying removes moisture from the roots, significantly extending their shelf life. Properly dried Jerusalem artichokes can last for several years when stored in a cool, dry place.
-
Enhanced Flavor: Drying concentrates the natural sugars and flavors of the roots, making them sweeter and more intense. This intensified flavor can elevate dishes like soups, stews, and roasted vegetables.
-
Space-Saving Storage: Dried roots take up much less space than fresh ones, making them ideal for small kitchens or limited storage areas.
-
Versatility in Cooking: Dried Jerusalem artichokes can be rehydrated for use in various recipes or ground into a flour for gluten-free baking.
Preparing Jerusalem Artichokes for Drying
Before you begin the drying process, there are a few crucial steps to ensure success:
-
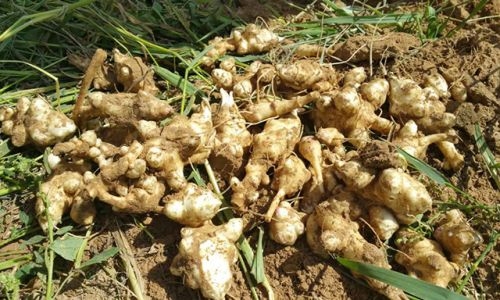
Selection and Harvesting: Choose healthy, mature Jerusalem artichokes with firm, unblemished skin. Harvest them in the fall after the foliage has died back but before the first frost. Use a garden fork to loosen the soil around the roots and carefully lift them out.
-
Cleaning: Thoroughly wash the roots to remove any dirt and debris. Use a vegetable brush if necessary to scrub off stubborn soil. Pat them dry with a clean towel.
-
Peeling and Slicing: While some people prefer to dry whole small roots, slicing larger ones into thinner pieces can speed up the drying process and ensure more consistent results. Peel the roots if you prefer a smoother texture; otherwise, they can be dried with the skin on for added fiber and nutrients.
-
Blanching (Optional): Blanching helps to inactivate enzymes that could cause discoloration and soften the flesh, making it easier to dry. To blanch, submerge the sliced or whole roots in boiling water for 2-3 minutes, then plunge them into ice water to stop the cooking process. Pat them dry again before proceeding.
Drying Methods
There are several methods to dry Jerusalem artichokes, each with its own set of pros and cons. Here are the most popular options:
-
Sun-Drying
- Setup: Lay the prepared roots on clean, mesh drying trays or directly on a clean, flat surface in full sunlight. Ensure good air circulation by spacing the roots out evenly.
- Duration: Sun-drying can take several days to a week, depending on the intensity of the sunlight and humidity levels.
- Considerations: Sun-dried foods can be at risk of contamination from dust, insects, and birds. Cover the drying area with a clean, breathable cloth or net if necessary.
-
Dehydrator
- Setup: Use a food dehydrator set to a temperature of around 125-135°F (52-57°C). Arrange the roots on the dehydrator trays in a single layer.
- Duration: Drying in a dehydrator typically takes 6-12 hours, depending on the thickness of the slices and the model of the dehydrator.
- Considerations: Dehydrators provide a controlled environment, reducing the risk of contamination and allowing for more precise temperature control.
-
Oven-Drying
- Setup: Preheat your oven to its lowest setting, usually around 150°F (65°C). Use the oven’s convection setting if available to improve air circulation. Arrange the roots on baking sheets in a single layer.
- Duration: Oven-drying can take 4-8 hours, depending on the oven’s efficiency and the thickness of the slices.
- Considerations: Oven-drying can be less energy-efficient than using a dehydrator and may require closer monitoring to prevent overcooking.
Testing for Dryness
Properly dried Jerusalem artichokes should be completely devoid of moisture, with a tough, leathery texture. To test for dryness:
- Touch Test: Feel the roots; they should be dry to the touch and slightly flexible but not bendable.
- Weight Test: Weigh a small sample before and after drying; the final weight should be about 20-30% of the original.
- Moisture Meter: Use a food moisture meter for a more precise measurement. Properly dried roots should have a moisture content of 10% or less.
Storing Dried Jerusalem Artichokes
Once your Jerusalem artichokes are fully dried, store them in an airtight container in a cool, dark place. A pantry or cupboard away from direct sunlight and heat sources is ideal. If you live in a very humid climate, consider using desiccant packets or silicone gel packs to absorb any excess moisture.
Using Dried Jerusalem Artichokes in Cooking
Dried Jerusalem artichokes can be rehydrated by soaking them in water for a few hours or overnight. Once rehydrated, they can be used in any recipe calling for fresh roots. Here are a few creative ways to incorporate them into your meals:
- Soups and Stews: Add rehydrated roots for a nutty, earthy flavor.
- Roasted Vegetables: Toss them with olive oil, salt, and pepper for a crispy, caramelized side dish.
- Baking: Grind dried roots into a flour and use it as a gluten-free alternative in baking bread, cakes, and cookies.
- Salads: Rehydrate and slice thinly for a crunchy, sweet addition to salads.
- Stocks and Broths: Use them to create a rich, flavorful base for soups and sauces.
Conclusion
Drying Jerusalem artichokes is a rewarding process that not only preserves this unique root vegetable but also enhances its flavor and versatility. By following the steps outlined in this guide, you can successfully dry your own Jerusalem artichokes, ensuring a steady supply of this nutritious, delicious ingredient throughout the year. Whether you choose sun-drying, using a dehydrator, or oven-drying, the key to success lies in patience, attention to detail, and proper storage. With dried Jerusalem artichokes at your fingertips, the culinary possibilities are endless. Happy drying!

0 comments