Table of content
- 1 Variety Choice
- 2 Timing is Key
- 3 Health and Pest-Free
- 1 Removing Leaves and Thorns
- 2 Trimming the Stems
- 3 Grouping by Size and Color
- 1 Air-Drying Method
- 2 Hanging Method
- 3 Microwave Drying Method
- 4 Dehydrator Method
- 1 Conditioning the Roses
- 2 Storing the Dried Roses
- 1 Dried Flower Arrangements
- 2 Potpourri
- 3 Craft Projects
Introduction
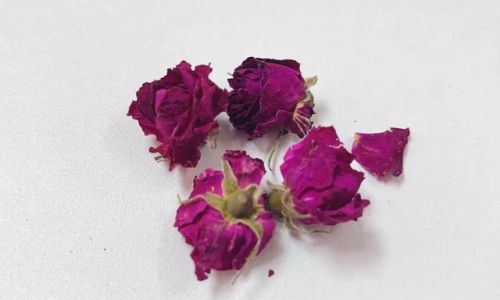
Dried roses are a beautiful and timeless way to preserve the natural beauty and fragrance of fresh blooms. Whether you’re looking to create homemade potpourri, dried flower arrangements, or simply want to extend the life of your garden roses, learning how to dry fresh roses effectively is a valuable skill. This comprehensive guide will walk you through the entire process, from selecting the perfect roses to storing your dried flowers, ensuring you achieve the best possible results.
Chapter 1: Selecting the Right Roses
Before you begin the drying process, it’s crucial to start with high-quality fresh roses. Here are some key factors to consider when selecting your roses:
1 Variety Choice
Different rose varieties have varying characteristics that can affect their suitability for drying. Generally, roses with thicker petals and stronger stems tend to dry better than those with thinner, more delicate petals. Hybrid teas, floribundas, and grandifloras are often good choices, as they have sturdy blooms and retain their shape well after drying. Avoid roses with soft, fragile petals, as these may fall apart during the drying process.
2 Timing is Key
The best time to harvest roses for drying is when the blooms are fully open but still have some firmness to their petals. Harvesting too early can result in underdeveloped blooms that may not retain their shape, while harvesting too late can lead to petals that are too fragile and prone to falling apart. Typically, this means harvesting roses in the morning, when the dew has dried but the sun has not yet made the petals too soft.

3 Health and Pest-Free
Ensure that your roses are free from pests, diseases, and damage. Roses with spots, mold, or insect bites will not dry well and may spread these issues to other flowers in your drying batch. Inspect each rose carefully before harvesting, and discard any that show signs of distress.
Chapter 2: Preparing the Roses for Drying
Once you’ve selected your roses, it’s time to prepare them for the drying process. Proper preparation can significantly improve the final appearance and quality of your dried roses.
1 Removing Leaves and Thorns
Before drying, remove all leaves and thorns from the rose stems. Leaves can interfere with the drying process and may cause mold or mildew if they remain damp for too long. Thorns can be a hazard during handling and storage, so it’s best to remove them before proceeding.
2 Trimming the Stems
Trim the rose stems to a length that suits your drying method. For hanging methods, you’ll need stems that are long enough to suspend the flowers without touching each other or the drying surface. For air-drying methods, shorter stems may be more convenient. Use sharp pruning shears to make clean cuts, as jagged or crushed stems can harbor bacteria and moisture, which can lead to rot.
3 Grouping by Size and Color
Separate your roses by size and color before drying. This will help ensure that flowers of similar size and color dry evenly, resulting in a more uniform final product. Grouping also makes it easier to handle and store the dried roses once they’re ready.

Chapter 3: Drying Methods
There are several methods you can use to dry fresh roses, each with its own set of pros and cons. The method you choose will depend on your preferences, the available space, and the desired outcome.
1 Air-Drying Method
Air-drying is one of the simplest and most popular methods for drying roses. Here’s how to do it:
- Step 1: Lay the prepared roses on a clean, dry surface in a well-ventilated area. You can use a rack, screen, or even a piece of cardboard lined with paper towels to prevent sticking.
- Step 2: Ensure that the roses are not touching each other to prevent molding. Space them out evenly to allow for good air circulation.
- Step 3: Place a fan in the room to circulate air and speed up the drying process. Avoid direct sunlight, as this can bleach the petals and fade their color.
- Step 4: Check the roses daily, and turn them over if necessary to ensure even drying. Depending on the humidity and temperature, the drying process can take anywhere from a few days to a week or more.
2 Hanging Method
The hanging method is another effective way to dry roses, particularly if you have a lot of space and want to dry multiple batches simultaneously.
- Step 1: Use string, twine, or fishing line to tie the rose stems together in small bunches. Make sure the knots are tight to prevent the stems from slipping.
- Step 2: Hang the bunches from a clothesline, hook, or rack in a well-ventilated area. Ensure that the bunches are not touching each other or any surfaces to prevent molding.
- Step 3: As with air-drying, avoid direct sunlight and use a fan to circulate air. Check the roses regularly, and adjust the bunches if necessary to ensure even drying.
- Step 4: The drying time for the hanging method can vary, but it’s generally similar to air-drying.
3 Microwave Drying Method
For those who want to speed up the drying process, microwave drying is an option. However, it requires careful monitoring to avoid burning the petals.
- Step 1: Place a few individual roses on a microwave-safe plate, ensuring they are not touching each other.
- Step 2: Microwave on a low setting for short intervals (e.g., 30 seconds to 1 minute), checking the roses frequently. The exact time will depend on your microwave’s power and the size of the roses.
- Step 3: Once the petals feel dry and brittle to the touch, remove the roses from the microwave and let them cool completely before handling.
- Note: Microwave drying can sometimes result in a slightly different texture and color compared to air-drying or hanging methods. It’s best to test a few roses first to see if you like the results.
4 Dehydrator Method
Using a food dehydrator is another effective way to dry roses quickly and evenly.

- Step 1: Arrange the prepared roses on the dehydrator trays, spacing them out to ensure good air circulation.
- Step 2: Set the dehydrator to a temperature between 95°F and 115°F (35°C to 46°C). The exact temperature may vary depending on your dehydrator’s settings and the desired outcome.
- Step 3: Allow the roses to dry for several hours to a day, depending on the size and humidity of the blooms. Check them regularly to ensure they are not over-dried.
- Step 4: Once the petals are dry and brittle, remove the roses from the dehydrator and let them cool before handling.
Chapter 4: Finishing Touches and Storage
Once your roses are fully dried, there are a few final steps you can take to enhance their appearance and ensure long-term storage.
1 Conditioning the Roses
Conditioning helps to soften the dried petals and make them more flexible, which can improve their appearance in arrangements. To condition your roses:
- Place the dried roses in a sealed container with a desiccant, such as silica gel or dry rice, for a few days. This will absorb any remaining moisture and help the petals relax.
- Alternatively, you can place the roses in a container with a piece of damp (not wet) paper towel at the bottom. Seal the container and let it sit for a couple of days, then remove the paper towel and let the roses air out completely before storing.
2 Storing the Dried Roses
Proper storage is essential to keep your dried roses looking their best for as long as possible. Here are some tips for storing dried roses:
- Use an airtight container made of materials that won’t trap moisture, such as glass or plastic with a tight-fitting lid.
- Add a desiccant, such as silica gel packets, to the container to absorb any moisture that may accumulate over time.
- Store the container in a cool, dark place to prevent fading and discoloration. Avoid direct sunlight and extreme temperatures.
- Check the roses periodically to ensure they are still dry and free from mold or mildew. If you notice any moisture or mold, remove the affected roses immediately and consider adding more desiccant to the container.
Chapter 5: Creative Uses for Dried Roses
Now that you’ve successfully dried your roses, it’s time to enjoy them! Here are some creative ways to use your dried roses:

1 Dried Flower Arrangements
Dried roses can be used to create beautiful, long-lasting arrangements. Mix them with other dried flowers, greenery, and decorative elements to create unique and personalized designs.
2 Potpourri
Combine dried roses with other dried botanicals, essential oils, and fragrance grains to make homemade potpourri. This natural air freshener can be placed in sachets, bowls, or diffusers to scent your home.


0 comments