Introduction
In the vast realm of culinary arts, the fusion of flavors often leads to unexpected delights that tantalize the taste buds and spark culinary creativity. One such delightful fusion is the Mulberry Lemon Jelly Milk Collision—a refreshing and visually stunning dessert that combines the tangy zest of lemon, the sweet juiciness of mulberries, and the creamy richness of milk in a unique jelly-milk format. This dessert is not only a feast for the senses but also a testament to the art of blending traditional ingredients with modern culinary techniques.
In this guide, we will embark on a culinary journey to uncover the secrets behind crafting this exquisite dessert. From sourcing the freshest ingredients to mastering the delicate balance of flavors and textures, we will explore each step in detail, ensuring that you can recreate this delightful fusion in your own kitchen.
Section 1: Ingredients and Preparation
Before diving into the recipe, it’s crucial to gather all the necessary ingredients and ensure they are of the highest quality. Here’s what you’ll need:
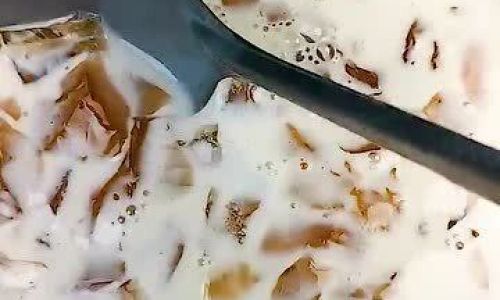
- Fresh Mulberries: 2 cups (preferably ripe and sweet)
- Fresh Lemon Juice: 1/2 cup (extracted from about 2-3 lemons)
- Granulated Sugar: 1/2 cup (adjust to taste)
- Water: 2 cups
- Gelatin Powder: 2 tablespoons (unflavored, for setting the jelly)
- Milk: 2 cups (full-fat or semi-skimmed, based on your preference)
- Ice Cubes: A few handfuls (for chilling the milk)
- Fresh Mint Leaves: A few sprigs (for garnish)
- Edible Flowers (optional): A few petals (for an added touch of elegance)
Preparation Tips:
- Ensure your mulberries are thoroughly washed and checked for any stems or leaves.
- Use freshly squeezed lemon juice to capture the pure essence of lemon.
- Measure the gelatin powder accurately, as too much can make the jelly too firm, while too little may prevent it from setting properly.
Section 2: Making the Mulberry Lemon Jelly
Step 1: Cooking the Mulberry Syrup
- Begin by placing the mulberries, sugar, and water in a medium saucepan.
- Cook over medium heat, stirring occasionally, until the mulberries break down and release their juices, forming a syrupy consistency. This should take about 10-15 minutes.
- Once done, strain the mixture through a fine-mesh sieve to remove the mulberry pulp and seeds, leaving behind a clear, sweet mulberry syrup.
Step 2: Infusing the Lemon Juice
- While the mulberry syrup is still warm, stir in the lemon juice. This will add a tangy, refreshing flavor to the jelly.
- Allow the mixture to cool slightly but not completely, as you will need to dissolve the gelatin in it.
Step 3: Adding Gelatin and Setting the Jelly
- In a small bowl, sprinkle the gelatin powder over 1/4 cup of cold water. Let it sit for about 5 minutes to bloom (absorb the water).
- Once the mulberry-lemon mixture has cooled to a lukewarm temperature, stir in the bloomed gelatin until fully dissolved.
- Pour the mixture into a shallow dish or mold, ensuring it is evenly spread out. This will help in achieving an even jelly texture.
- Refrigerate for at least 4 hours or until the jelly is fully set.
Section 3: Preparing the Chilled Milk

While the jelly is setting, it’s time to prepare the chilled milk. This step is crucial as it enhances the contrast between the cold, creamy milk and the refreshing jelly.
- Pour the milk into a large bowl or jug.
- Add a few handfuls of ice cubes to the milk and stir occasionally until it reaches a chilled temperature. You can also place the bowl in the refrigerator for about 30 minutes to an hour if you prefer a more controlled chilling process.
Section 4: Creating the Jelly Milk Collision
Once the jelly is fully set and the milk is chilled, it’s time to assemble your Mulberry Lemon Jelly Milk Collision.
Step 1: Cutting the Jelly
- Carefully remove the set jelly from the dish or mold.
- Using a sharp knife, cut the jelly into small, bite-sized cubes. Aim for uniform sizes to ensure an even texture when mixed with the milk.
Step 2: Mixing the Jelly with Milk
- Place the chilled milk in a serving glass or bowl.
- Gently add the jelly cubes, allowing them to float and sink naturally in the milk. The collision of colors and textures will create a visually stunning effect.
Section 5: Garnishing and Serving
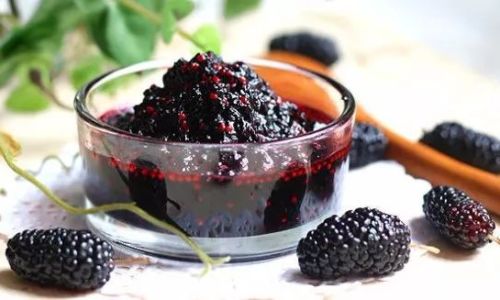
To elevate your Mulberry Lemon Jelly Milk Collision to the next level, consider adding a few decorative touches before serving.
- Garnish with fresh mint leaves for a refreshing aroma and a touch of green color.
- If using, scatter a few edible flower petals on top for an added burst of color and elegance.
- Serve immediately to maintain the chilled temperature and enjoy the delightful contrast of flavors and textures.
Section 6: Tips for Perfecting Your Dish
- Experiment with Flavors: Feel free to adjust the sweetness and tanginess according to your taste preferences. You can add a pinch of salt to enhance the flavors or a drop of vanilla extract for added complexity.
- Texture Variations: For a fun twist, try incorporating different textures like crushed ice or whipped cream alongside the jelly cubes.
- Presentation Matters: Serving your Mulberry Lemon Jelly Milk Collision in clear glasses or bowls allows the vibrant colors and textures to shine, making it a visually appealing dish.
- Storage: If you have leftovers, store the jelly and milk separately in the refrigerator. Reassemble before serving to maintain the best texture and flavor.
Conclusion
The Mulberry Lemon Jelly Milk Collision is a delightful fusion of flavors and textures that combines the best of nature’s bounty with culinary creativity. By following this guide, you can bring this exquisite dessert to life in your own kitchen, delighting your family and friends with its unique charm. Whether enjoyed as a refreshing summer treat or a sophisticated dessert for a special occasion, this dish promises to leave a lasting impression on your taste buds. Happy cooking, and bon appétit!

0 comments