Introduction
In the realm of traditional pickled vegetables, pickled dried radish stands out as a unique and flavorful delight. This preserved delicacy, often referred to as “sauce-dried radish” or “pickled radish strips,” combines the tangy, savory notes of pickling with the crunchy texture of dried vegetables. It is a staple in many Asian cuisines, particularly in China, Korea, and Japan, where it is enjoyed as a side dish, a topping for rice or noodles, or even as an ingredient in stir-fries and soups.
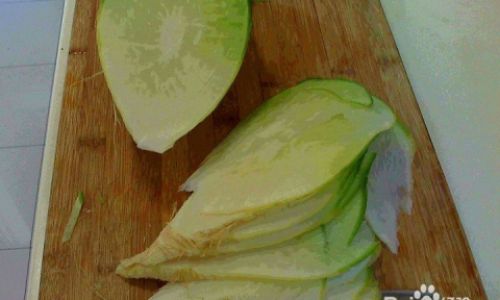
The art of making pickled dried radish involves several steps, from selecting the right radishes to carefully drying and pickling them. Each stage plays a crucial role in developing the final taste and texture. This guide aims to provide a comprehensive, step-by-step approach to crafting the perfect pickled dried radish, ensuring that even home cooks with minimal experience can achieve professional-quality results.
Section 1: Understanding the Ingredients
Before diving into the recipe, it’s essential to understand the key ingredients and their roles:
-
Radishes: Choose fresh, firm radishes with smooth, unblemished skin. Daikon radishes (large, white, and cylindrical) are preferred for their crisp texture and mild flavor, but smaller varieties can also be used.
-
Salt: Salt acts as a preservative and helps draw out moisture from the radishes during the drying process. It also enhances the overall flavor.
-
Sugar: Sugar balances the acidity and bitterness of the pickling liquid, adding a touch of sweetness that complements the tangy vinegar.
-
Vinegar: Rice vinegar or apple cider vinegar are commonly used. They provide the tangy, sour taste that defines pickled vegetables.
-
Soy Sauce: Adds depth and umami to the pickling sauce. Dark soy sauce can be used for a richer color.
-
Spices and Aromatics: Ingredients like garlic, ginger, chili peppers, and Sichuan peppercorns add complexity and layers of flavor to the pickled radish.
-
Water: Used to create the pickling brine.
Section 2: Preparation and Drying
Step 1: Preparing the Radishes
-
Cleaning: Wash the radishes thoroughly under running water to remove any dirt or impurities. Pat them dry using a clean kitchen towel.
-
Peeling: Peel the radishes if desired, especially if their skin is thick or tough. For daikon radishes, peeling is often optional as their skin can be thin and edible.
-
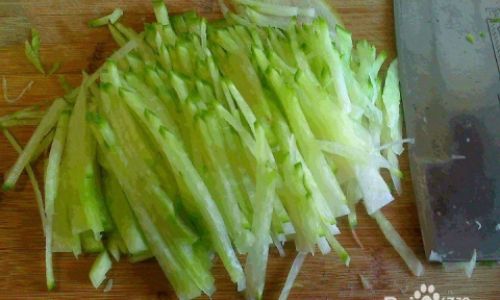
Slicing: Cut the radishes into thin strips or matchsticks. The thickness of the strips will affect the drying time and final texture. Thinner strips dry faster and tend to be crunchier.
Step 2: Salting and Draining
-
Salting: Place the sliced radishes in a large bowl and sprinkle them evenly with salt. The amount of salt will depend on the size and quantity of the radishes, but a general guideline is about 1-2 tablespoons of salt per pound of radishes.
-
Mixing: Toss the radishes gently to ensure they are evenly coated with salt. Let them sit for about 30 minutes to an hour, allowing the salt to draw out moisture.
-
Draining: After the salting period, transfer the radishes to a colander placed over a bowl or sink. Let them drain for several hours or overnight, discarding the liquid that accumulates in the bowl. The radishes should appear slightly wilted and have lost some of their original volume.
Step 3: Drying the Radishes
There are several methods for drying radishes:
-
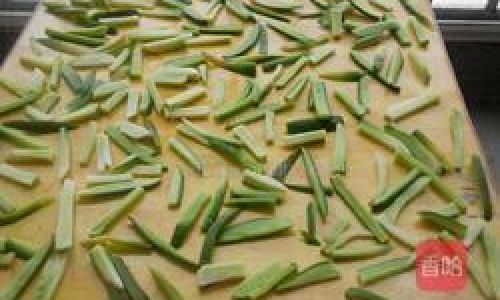
Sun-Drying: Spread the salted and drained radishes on a clean, mesh screen or baking tray. Place it in direct sunlight for several days, turning the radishes occasionally to ensure even drying. This method is weather-dependent and may take 2-5 days.
-
Dehydrator: Use a food dehydrator set to a temperature of around 135°F (57°C). Spread the radishes in a single layer on the dehydrator trays and dry them for about 6-12 hours, depending on the thickness and desired texture.
-
Oven-Drying: Preheat your oven to its lowest setting, typically around 150°F (65°C). Spread the radishes on baking sheets lined with parchment paper. Prop the oven door open slightly with a wooden spoon to allow moisture to escape. Dry for 4-6 hours, checking frequently to prevent over-drying.
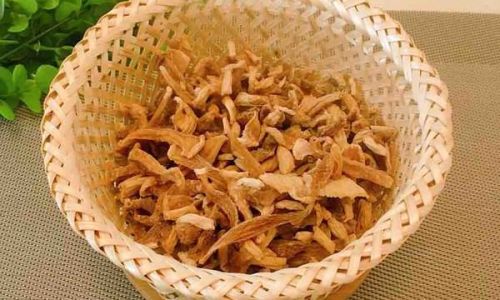
The dried radishes should be flexible but not brittle. They should snap cleanly when bent but not crumble into dust.
Section 3: Making the Pickling Sauce
Step 1: Gathering Ingredients
Measure out the following ingredients for the pickling sauce:
- Vinegar: 1 cup
- Water: 1 cup
- Sugar: 1/4 cup (adjust to taste)
- Soy sauce: 1/4 cup (use dark soy sauce for a deeper color)
- Garlic: 3-4 cloves, thinly sliced
- Ginger: 1 tablespoon, finely grated or sliced
- Chili peppers: 1-2, thinly sliced (optional)
- Sichuan peppercorns: 1 teaspoon (optional, for added flavor complexity)
Step 2: Combining Ingredients
-
Heating: In a medium saucepan, combine the vinegar, water, sugar, and soy sauce. Heat over medium heat, stirring occasionally, until the sugar is fully dissolved.
-
Adding Aromatics: Once the mixture is hot but not boiling, add the sliced garlic, grated ginger, chili peppers, and Sichuan peppercorns. Reduce the heat to low and let the sauce simmer for about 5 minutes to allow the flavors to meld.
-
Cooling: Remove the saucepan from heat and let the pickling sauce cool to room temperature. It’s important to let it cool completely before using it to avoid cooking the already-dried radishes.
Section 4: Pickling the Dried Radishes
Step 1: Preparing the Jar
-
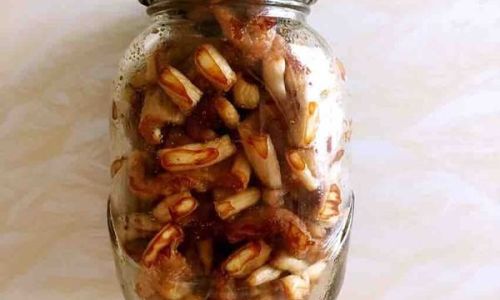
Sterilizing: Choose a clean, glass jar with a tight-fitting lid. Sterilize it by boiling it in water for a few minutes or running it through the dishwasher on the hottest setting.
-
Layering: Begin layering the dried radishes in the jar. You can add a few slices of garlic, ginger, and chili peppers between layers if desired for extra flavor.
Step 2: Pouring in the Sauce
-
Pouring: Carefully pour the cooled pickling sauce over the radishes in the jar, ensuring they are fully submerged. If necessary, use a weight (like a smaller jar filled with water) to keep the radishes submerged.
-
Sealing: Tightly close the jar’s lid and shake gently to distribute the sauce evenly.
Step 3: Storing and Aging
-
Initial Storage: Place the jar in a cool, dark place. The pickled radishes need to sit for at least a week to allow the flavors to fully develop.
-
Aging: For best results, let the pickled radishes age for 2-4 weeks before opening. The longer they sit, the more the flavors will meld and intensify.
Section 5: Serving and Enjoying
Once your pickled dried radishes have reached their prime, it’s time to enjoy them. Here are a few serving suggestions:
- As a Side Dish: Serve them as a tangy, crunchy accompaniment to rice, noodles, or grilled meats.
- Toppings: Use them as a topping for salads, bowls, or even sushi rolls.
- Cooking: Incorporate them into stir-fries, soups, or stews for an added layer of flavor and texture.
Conclusion
Making pickled dried radish is a rewarding culinary endeavor that combines the art of preservation with the joy of creating a unique and delicious dish. By following this detailed guide, you’ll be able to craft a batch of pickled radishes that are not only flavorful and crunchy but also bursting with the essence of traditional pickling techniques. Whether you’re preserving a bounty of fresh radishes from your garden or simply looking to add a new twist to your culinary repertoire, pickled dried radish is a versatile and delicious addition to your pantry. Enjoy the process and the delicious results!



0 comments