Introduction
Mulberry wine, a delightful and often underappreciated libation, holds a unique place in the world of fermented beverages. With its rich, fruity aroma and subtly sweet flavor, mulberry wine offers a refreshing escape from the mundane, inviting wine enthusiasts and casual drinkers alike to explore its depths. While commercial versions can be found in select markets, nothing beats the satisfaction of crafting your own mulberry wine at home. This guide will take you through the entire process, from selecting the perfect mulberries to bottling your finished product, ensuring you end up with a bottle of mulberry wine that is as beautiful as it is tasty.
Chapter 1: Understanding Mulberries and Their Wine-Making Potential
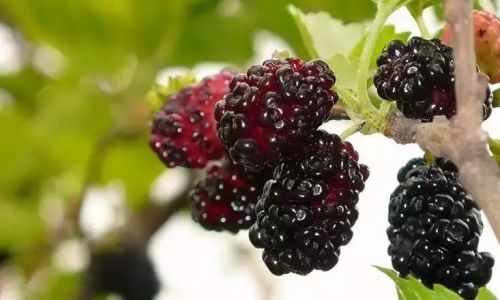
Mulberries (Morus species) are the edible fruits of the mulberry tree, native to warm temperate regions of Asia, Africa, and parts of Europe. These fruits come in various colors, including red, purple, white, and black, each offering a slightly different flavor profile. For wine-making, black and purple mulberries are preferred due to their higher anthocyanin content, which contributes to the wine’s color and antioxidant properties.

Mulberries are rich in natural sugars, acids, and tannins, making them ideal for fermentation. Their high sugar content provides the yeast with the necessary substrate to produce alcohol, while acids and tannins help balance the wine’s taste and structure. The key to crafting a successful mulberry wine lies in understanding and harnessing these natural attributes.
Chapter 2: Preparing for the Fermentation
Before diving into the fermentation process, there are a few essential preparations to undertake:
Selecting the Mulberries:
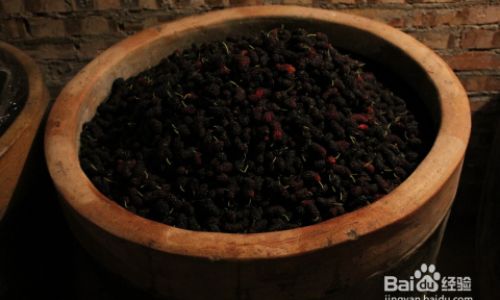
- Choose ripe, firm mulberries with no signs of mold or decay.
- If possible, pick mulberries directly from the tree to ensure freshness.
- Avoid using mulberries that have been exposed to pesticides or other contaminants.
Equipment and Supplies:
- Fermentation vessel (glass carboy, food-grade plastic bucket, or stainless steel tank)
- Airlock and stopper
- Siphon tube
- Cheesecloth or fine-mesh strainer
- Measuring cups and spoons
- Wine yeast (e.g., Saccharomyces cerevisiae)
- Campden tablets (for sterilization)
- Sugar (optional, to adjust sweetness)
- Acid blend (optional, to adjust acidity)
- Pectic enzyme (optional, to break down pectin and improve clarity)
Sanitization:
- Clean all equipment thoroughly with hot water and a mild detergent.
- Rinse well and sanitize using a solution of water and Campden tablets.
- Allow equipment to air-dry or dry with a clean, lint-free cloth.
Chapter 3: The Fermentation Process
Crushing and Mixing:

- Gently crush the mulberries using a potato masher or your hands to release their juices.
- Place the crushed mulberries in the fermentation vessel.
- If desired, add sugar to taste, aiming for a ratio of about 2-3 pounds of sugar per gallon of mulberry juice.
- Stir in the pectic enzyme, if using, to help break down pectin and improve clarity.
Adding Yeast:
- Activate the wine yeast by sprinkling it over a small amount of warm water (about 100°F or 38°C) and allowing it to sit for about 10 minutes.
- Stir the activated yeast into the mulberry mixture.
Sealing and Fermenting:
- Attach the airlock and stopper to the fermentation vessel.
- Place the vessel in a cool, dark place with a temperature between 65-75°F (18-24°C).
- Allow the mixture to ferment for about 7-10 days, or until bubbling stops and the specific gravity reaches about 1.000.
Chapter 4: Racking and Secondary Fermentation
Racking:
- Once primary fermentation is complete, use a siphon tube to transfer the wine from the fermentation vessel to a clean, sanitized secondary vessel, leaving behind the sediment (lees).
- This process is called racking and helps clarify the wine by separating it from solid particles.
Secondary Fermentation (Optional):
- If desired, add more sugar and yeast for a second round of fermentation to increase alcohol content or sweetness.
- Allow the wine to ferment for an additional 7-14 days in the secondary vessel.
Chapter 5: Aging and Clarifying
Aging:
- Transfer the wine to a clean, sanitized aging vessel (such as a carboy) and allow it to age for at least 3-6 months.
- During this time, the wine will continue to mature, developing complex flavors and aromas.
Clarifying:

- To improve clarity, you can add fining agents such as bentonite or gelatin.
- Follow the manufacturer’s instructions for adding fining agents and allow the wine to sit for a few days to a week.
- Rack the wine again, removing any remaining sediment.
Chapter 6: Bottling and Enjoying
Bottling:
- Once the wine is clear and has reached your desired taste profile, it’s ready to bottle.
- Use clean, sanitized bottles and fill them using a siphon tube.
- Cork or cap the bottles tightly and store them in a cool, dark place.
Enjoying:
- Allow the bottled wine to age for at least a few weeks before opening to allow any remaining sediments to settle.
- Pour and enjoy your homemade mulberry wine, savoring its unique flavor and the satisfaction of a DIY accomplishment.
Conclusion
Crafting mulberry wine is a rewarding endeavor that combines the art of fermentation with the joy of creating something delicious from nature’s bounty. By following this guide, you’ll be able to produce a bottle of mulberry wine that is not only visually stunning but also bursting with flavor. So, gather your mulberries, assemble your equipment, and embark on this delightful journey of wine-making. Cheers to your success!


0 comments