Introduction:
In the realm of natural remedies and gourmet delights, mulberry honey paste stands out as a unique and nutritious treat. Combining the sweet, earthy flavors of mulberries with the rich, golden essence of honey, this paste not only tantalizes the taste buds but also offers a myriad of health benefits. From boosting the immune system to promoting digestive health, mulberry honey paste is a versatile addition to your pantry. In this comprehensive guide, we will delve into the art of crafting mulberry honey paste, highlighting each step with precision and attention to detail. By the end, you’ll be equipped with the knowledge and skills to make your own batch of this delightful elixir.
Section 1: Understanding the Ingredients
Before diving into the recipe, it’s crucial to understand the magic behind the two main ingredients: mulberries and honey.
Mulberries (Morus nigra/alba/rubra): These small, sweet-tart berries are native to many parts of the world, particularly Asia and Europe. They are rich in antioxidants, vitamins, and minerals, making them a powerhouse of nutrition. The different varieties—black, white, and red mulberries—each offer unique flavors and health benefits. For this recipe, fresh or dried mulberries can be used, though fresh berries will yield a more vibrant and fresh-tasting paste.
Honey: Known for its sweetening properties and natural healing abilities, honey is a staple in many households. It contains enzymes, antioxidants, and trace minerals that contribute to its unique taste and health-promoting qualities. When choosing honey for your paste, opt for a high-quality, unfiltered variety to ensure maximum nutritional benefits and flavor.
Section 2: Gathering Equipment and Supplies
To make mulberry honey paste, you’ll need a few essential tools and supplies:
- A large mixing bowl
- A blender or food processor
- A fine-mesh sieve or cheesecloth
- A medium-sized saucepan
- A wooden spoon or silicone spatula
- Clean, airtight jars for storage
- A kitchen scale (optional, but helpful for precise measurements)
Section 3: The Recipe – Step-by-Step
Step 1: Preparation
Begin by washing your mulberries thoroughly if using fresh ones. If using dried mulberries, skip this step. Pat them dry to remove any excess moisture.
Step 2: Blending the Mulberries
Place the cleaned mulberries in your blender or food processor. Blend until you achieve a smooth puree, scraping down the sides as needed. If the puree is too thick, you can add a small amount of water, but be mindful not to add too much as it will prolong the cooking process.
Step 3: Cooking the Puree
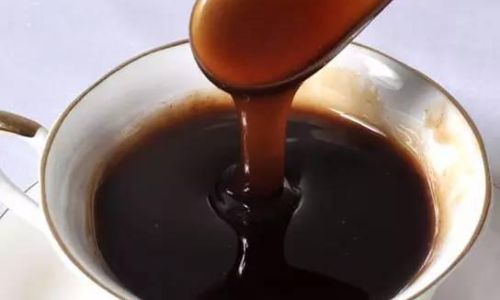
Transfer the mulberry puree to your saucepan. Set the heat to medium-low and allow the puree to simmer gently. Stir frequently to prevent sticking and burning. As the puree cooks, it will begin to thicken and darken in color. This process can take anywhere from 30 minutes to an hour, depending on the quantity and moisture content of your mulberries.
Step 4: Adding the Honey
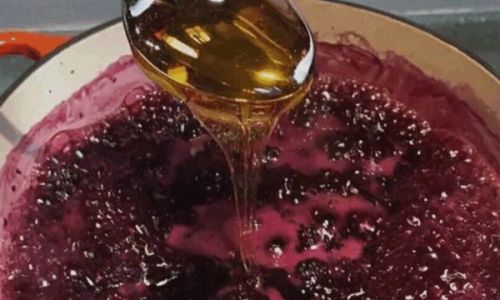
Once the mulberry puree has reached a thick, jam-like consistency, it’s time to add the honey. Measure out the desired amount of honey (typically, a 1:1 ratio with the mulberry puree works well, but you can adjust to taste). Gradually stir the honey into the puree, continuing to cook and stir until the mixture is well combined and has reached your desired consistency.
Step 5: Sieving for Smoothness
For an ultra-smooth paste, pour the mixture through a fine-mesh sieve or cheesecloth lined over a bowl. Use the back of a spoon or a spatula to press the mixture through, leaving behind any seeds or larger pieces. If you prefer a more rustic texture, you can skip this step.
Step 6: Cooling and Storing
Allow the mulberry honey paste to cool completely at room temperature. Once cooled, transfer it to clean, airtight jars. Label the jars with the date and contents, and store them in a cool, dark place. For longer storage, you can refrigerate the paste, which will help preserve its freshness and flavor.
Section 4: Tips and Tricks for Perfect Results
- Taste Testing: Throughout the cooking process, periodically taste the paste to ensure it meets your sweetness preference. You can adjust the honey level accordingly.
- Patience is Key: The cooking process may seem slow, but patience is crucial for achieving the perfect consistency. Rushing it can result in a runny paste.
- Storage Considerations: Proper storage is vital to maintaining the quality of your mulberry honey paste. Airtight containers and cool temperatures will help keep it fresh for longer periods.
- Creative Uses: Beyond spreading on toast or adding to yogurt, mulberry honey paste can be used in baking, as a glaze for meats, or even mixed into oatmeal for a nutritious breakfast boost.
Conclusion:
Crafting mulberry honey paste is not only a rewarding culinary endeavor but also a journey into the realm of natural wellness. By following this detailed guide, you’ll be able to create a delicious, nutritious paste that can be enjoyed in various ways. Whether you’re looking to indulge your taste buds or incorporate more natural remedies into your lifestyle, mulberry honey paste is a perfect choice. Happy cooking, and enjoy the sweet, earthy delight of your homemade mulberry honey paste!


0 comments