Introduction
In the realm of refreshing summer desserts, few dishes captivate the senses quite like Cherry Bingfen. This delightful treat, often associated with the vibrant streets of East Asia, combines the sweet tanginess of cherries with the silky smoothness of ice powder (or bingfen in Chinese). While traditional recipes may vary slightly across regions, the essence of Cherry Bingfen remains the same: a harmonious blend of flavors and textures that cools you down on even the hottest days.
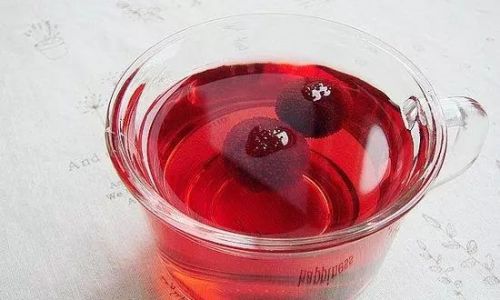
Bingfen, in its purest form, is a translucent jelly-like dessert made from starch syrup and water, which is then chilled to set. It’s akin to a lighter, more delicate version of Jell-O, with a unique chewy yet smooth consistency. When infused with the sweet-tart juice of cherries and adorned with whole cherries or their syrupy goodness, Cherry Bingfen becomes a culinary masterpiece that’s as visually appealing as it is delicious.
In this comprehensive guide, we’ll delve into the art of crafting the perfect Cherry Bingfen. From sourcing the finest ingredients to mastering the delicate balance of flavors, we’ll cover every step in detail, ensuring that you can recreate this exquisite dessert at home with ease.
Section 1: Understanding the Ingredients

Before diving into the recipe, it’s crucial to understand the role each ingredient plays in creating the perfect Cherry Bingfen.
1 Cherry Juice
The cornerstone of Cherry Bingfen is, of course, cherry juice. Fresh cherries provide the most authentic flavor, but you can also use canned or bottled cherry juice if fresh ones are unavailable. Look for juices that are unsweetened or minimally sweetened to avoid an overly sugary final product. The tartness of cherries adds a refreshing zing that complements the sweetness of the syrup and the softness of the bingfen.
2 Starch Syrup
Starch syrup, often made from rice, corn, or potato starch, is the key to achieving the unique texture of bingfen. It acts as a thickening agent, transforming the liquid mixture into a solid yet tender jelly. When choosing a starch syrup, opt for one that is pure and free from artificial additives. The quality of the starch syrup will directly impact the texture and mouthfeel of your final dessert.
3 Water
Water is essential for diluting the starch syrup and creating the base mixture for your bingfen. Use filtered or bottled water to ensure a clean, neutral taste that doesn’t interfere with the cherry flavor.
4 Sugar
While cherry juice provides some natural sweetness, additional sugar is often needed to balance the tartness and enhance the overall flavor profile. Adjust the amount of sugar according to your taste preferences, but remember that a little goes a long way in this dessert.
5 Optional Ingredients
- Gelatin: For an extra firm texture, you can add a small amount of gelatin to the mixture. However, this is purely optional and may alter the traditional taste and texture slightly.
- Edible Flowers or Fruit Slices: For garnish, consider using edible flowers, thin slices of other fruits, or even a sprinkle of chia seeds to add a pop of color and texture.
- Whipped Cream or Ice Cream: Serve your Cherry Bingfen with a dollop of whipped cream or a scoop of vanilla ice cream for an indulgent twist.
Section 2: Preparing the Ingredients

Now that you’re familiar with the ingredients, let’s move on to preparing them for the recipe.
1 Preparing the Cherry Juice
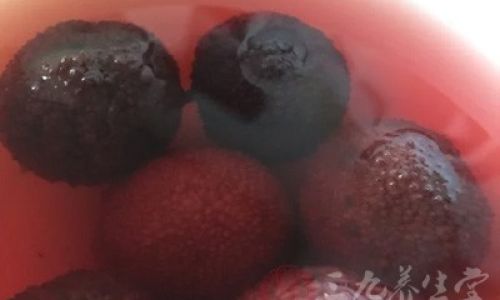
If using fresh cherries, start by washing them thoroughly under running water. Pit the cherries and place them in a blender or food processor. Blend until smooth, then strain the mixture through a fine-mesh sieve to remove the pulp and seeds. You should have a vibrant cherry juice ready for use.
If using canned or bottled cherry juice, simply pour it into a measuring cup and set it aside.
2 Making the Starch Syrup Mixture
In a medium bowl, combine the starch syrup with a small amount of water (about 1/4 of the total water needed for the recipe). Stir until well combined and free of lumps. This will make it easier to incorporate into the cherry juice mixture without forming clumps.
3 Preparing the Sugar Solution
In a saucepan, combine the remaining water with the sugar. Heat over medium heat, stirring occasionally, until the sugar is fully dissolved. Remove from heat and let it cool slightly.
Section 3: Cooking the Bingfen Base
With your ingredients prepared, it’s time to cook the bingfen base.
1 Combining Ingredients

Pour the cherry juice into the saucepan containing the sugar solution. Stir well to combine. Now, slowly pour in the starch syrup mixture, stirring constantly to prevent lumps from forming.
2 Cooking the Mixture
Place the saucepan back on medium heat and cook, stirring continuously, until the mixture begins to thicken. This can take anywhere from 5 to 10 minutes, depending on the heat level and the specific starch syrup used. Be patient and keep stirring to avoid scorching the bottom of the pan.
Once the mixture reaches a consistency similar to thick pudding, remove it from heat immediately. Overcooking can result in a rubbery texture, so it’s important to monitor the mixture closely.
Section 4: Setting the Bingfen
Now that your bingfen base is cooked, it’s time to set it.
1 Pouring into Molds
Pour the hot mixture into your chosen molds. Traditional molds for bingfen are shallow, wide bowls or molds with flat bottoms, but you can use any container that suits your preference. Be sure to grease the molds lightly with oil or line them with parchment paper to ease the removal of the set bingfen later.
2 Cooling and Setting
Allow the mixture to cool to room temperature, then cover and refrigerate for at least 2-4 hours, or until fully set. The longer it chills, the firmer the texture will be.
Section 5: Preparing the Garnish and Serving

With your bingfen set, it’s time to add the finishing touches.
1 Preparing the Garnish
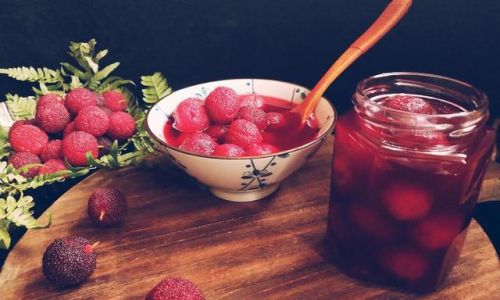
If using fresh cherries for garnish, wash and pit them. You can halve or quarter them depending on their size and your preference. Alternatively, you can use cherry syrup, cherry jam, or even a cherry glaze to drizzle over the top.
2 Assembling the Dessert
Once the bingfen is fully set, carefully remove it from the molds. Place each piece on a serving plate or in a serving bowl. Garnish with fresh cherries, a drizzle of cherry syrup, and any other optional toppings you desire.
For an added touch of elegance, you can use a piping bag to add decorative swirls of whipped cream or a light dusting of powdered sugar.
Section 6: Tips and Tricks for Perfect Cherry Bingfen
- Stirring is Key: Throughout the cooking process, stirring is crucial to prevent lumps and ensure a smooth texture.
- Temperature Control: Be mindful of the temperature of your ingredients and the cooking surface. Too high heat can cause the mixture to scorch or become too firm.
- Chilling Time: Allow enough time for the bingfen to set in the refrigerator. Rushing this step can result in a softer, less firm texture.
- Creative Garnishes: Don’t be afraid to experiment with different garnishes and toppings. Fresh mint leaves, edible flowers, or even a sprinkle of nuts can add unique flavors and textures.
- Storage: Store leftover Cherry Bingfen in an airtight container in the refrigerator for up to 3 days. It’s best enjoyed chilled.
Conclusion
Crafting the perfect Cherry Bingfen is a rewarding culinary endeavor that combines the art of dessert making with the science of ingredient interaction. By following this detailed guide, you’ll be able to create a dessert that’s not only visually stunning but also bursting with flavor and texture. Whether you’re serving it at a summer gathering or enjoying it as a personal treat, Cherry Bingfen is sure to delight the senses and leave a lasting impression.
So, gather your ingredients, roll up your sleeves, and embark on a culinary journey that will take you from the heart of East Asia to the comfort of your own home. With each bite, you’ll be transported to a world of sweet-tart harmony, where the simple pleasure of a chilled dessert becomes an unforgettable experience. Happy cooking!

0 comments