Introduction
In the realm of artisanal beverages, mulberry wine stands out as a unique and delightful treat. The deep purple hue of mulberries, coupled with their naturally sweet and slightly tart flavor, makes them an ideal candidate for fermentation into a rich, aromatic wine. While commercial mulberry wines are available, crafting your own at home offers a sense of accomplishment and allows you to tailor the taste to your preferences. This comprehensive guide will walk you through the process of making mulberry wine, from selecting the perfect berries to bottling your finished product.
Section 1: Understanding Mulberries and Their Wine Potential
Mulberries (Morus species) are the fruits of mulberry trees, which have been cultivated for thousands of years, primarily for their leaves, which are fed to silkworms. However, the fruits themselves are edible and nutritious, containing vitamins, minerals, and antioxidants. There are several varieties of mulberries, including white, red, and black (or dark purple) mulberries, each with its own unique flavor profile. For wine-making, dark mulberries are preferred due to their higher sugar content and intense color, which contributes to the wine’s body and appearance.
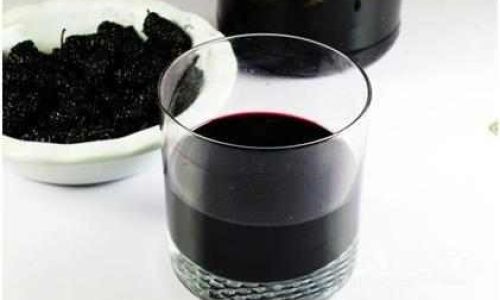
Mulberry wine can range from sweet to dry, depending on the fermentation process and the addition of sugars or acids. Its flavor profile often includes notes of berries, cherries, and a hint of floral undertones, making it a versatile wine that pairs well with a variety of foods.
Section 2: Preparing for the Wine-Making Process
Before diving into the wine-making process, it’s essential to gather all necessary equipment and ingredients. Here’s a checklist of what you’ll need:
- Fresh mulberries (preferably dark purple ones)
- Sugar or honey (for sweetness, adjust according to taste preference)
- Yeast (wine yeast is recommended for controlled fermentation)
- Pectic enzyme (optional, helps break down pectin in the berries for clearer wine)
- Campden tablets (to sterilize equipment and kill wild yeast)
- Fermentation vessel (a large, food-grade plastic bucket or glass carboy)
- Secondary fermentation vessel (another clean bucket or carboy)
- Siphoning hose or racking cane (for transferring wine without disturbing sediment)
- Airlock and stopper (to allow gas escape during fermentation while preventing contamination)
- Funnel and bottling equipment (bottles, corks, or screw caps)
- pH meter and hydrometer (for monitoring acidity and sugar levels)
- Clean cloths and sanitizing solution
Section 3: Harvesting and Preparing the Mulberries
The quality of your mulberries will directly impact the quality of your wine. Choose ripe, firm berries without mold or bruises. If possible, pick them on a dry day to minimize moisture content. Once harvested, sort through the berries, removing any stems, leaves, or imperfect fruits.
To sanitize the berries, rinse them gently in cool water and then drain thoroughly. Some wine-makers prefer not to wash the berries to avoid diluting the natural yeast on their surfaces, but this practice can increase the risk of contamination. If you decide to wash them, use a mild vinegar solution and ensure they are completely dry before proceeding.
Section 4: Initial Fermentation
-
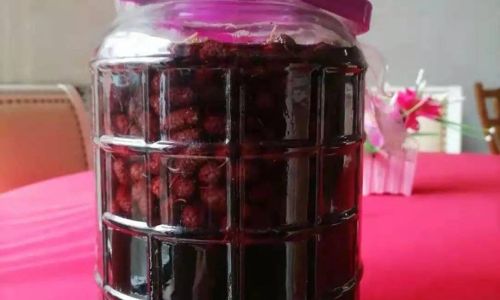
Crushing the Berries: In a clean, sanitized fermentation vessel, crush the mulberries using a potato masher or your hands. This releases the juices and natural sugars, initiating fermentation.
-
Adding Sugar and Yeast: Measure out the desired amount of sugar (typically around 1-2 pounds per gallon of berries, but adjust based on taste and the berries’ natural sweetness). Dissolve the sugar in a small amount of warm water and add it to the crushed berries. Sprinkle the wine yeast over the surface and gently stir to distribute evenly. If using pectic enzyme, add it at this stage.
-
Attaching the Airlock: Fit the fermentation vessel with an airlock and stopper. This allows carbon dioxide to escape during fermentation while preventing oxygen and contaminants from entering.
-
Monitoring Fermentation: Place the vessel in a cool, dark place (around 65-75°F is ideal). Fermentation will begin within 24-48 hours, evidenced by bubbling in the airlock. Use the hydrometer to monitor the specific gravity daily, noting when it stabilizes, indicating that fermentation is slowing.
Section 5: Racking and Secondary Fermentation
-
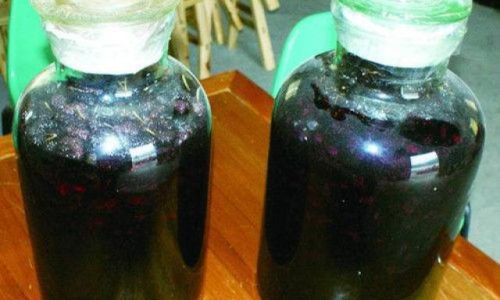
Racking: Once primary fermentation has subsided (usually after 7-10 days), siphon the wine off the sediment (called “racking”) into a clean, sanitized secondary fermentation vessel. This process removes solids and clears the wine.
-
Optional Adjustments: At this stage, you may want to adjust the wine’s sweetness, acidity, or tannin levels. Adding more sugar will make the wine sweeter, while lemon juice or tartaric acid can increase acidity. Tannin powder can add structure and complexity.
-
Secondary Fermentation: Allow the wine to continue fermenting in the secondary vessel for another 2-4 weeks, or until fermentation completely stops. Monitor with the hydrometer to ensure all sugars have been converted to alcohol.
Section 6: Aging and Clarifying
-
Aging: For best flavor development, age your mulberry wine for at least 3-6 months in a cool, dark place. During this time, the wine will mellow and its flavors will integrate.
-
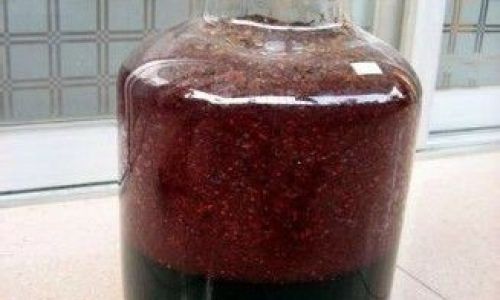
Clarifying: To remove any remaining particles and improve clarity, you can fine the wine with bentonite, gelatin, or other clarifying agents. Follow the manufacturer’s instructions for use. After fining, let the wine sit for another week or two before racking it again into a clean vessel.
Section 7: Bottling and Storing Your Mulberry Wine
-
Bottling: Once the wine is clear and to your liking, siphon it into clean, sanitized bottles. Use corks, screw caps, or other suitable closures.
-
Storing: Store the bottled wine in a cool, dark place, preferably at a consistent temperature. Mulberry wine can be enjoyed immediately but often improves with age, developing more complex flavors over time.
Conclusion
Crafting mulberry wine is a rewarding endeavor that combines the art of fermentation with the enjoyment of a unique, homemade beverage. By following this guide, you’ll be able to create a delicious, aromatic wine that reflects the essence of the mulberries used. Remember, patience is key in wine-making; allowing your mulberry wine to ferment and age properly will yield a more balanced and flavorful final product. Happy wine-making!

0 comments