Introduction: The Enchantment of Salted Plum
In the realm of culinary arts, there exists a delicate balance between sweetness and tartness, simplicity and complexity, that defines the essence of many timeless dishes. Among these, salted plum (salted plum, or plum preserved in salt) stands out as a unique and underappreciated delight, offering a burst of flavors that can elevate any meal or snack. This traditional preservation method not only preserves the plum’s natural sweetness and tartness but also introduces a new layer of flavor through the addition of salt, creating a harmonious contrast that tantalizes the taste buds.
In this culinary journey, we will explore the intricacies of making delicious salted plum, from selecting the perfect plums to the art of salting and preserving, ensuring every step contributes to the final, mouthwatering result. Whether you’re a seasoned chef or a home cook eager to experiment, this guide promises to demystify the process and inspire you to create your own batch of this delightful preserve.
The Art of Selection: Finding the Ideal Plums
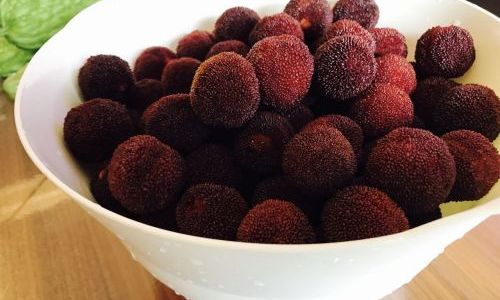
Before diving into the preparation, it’s crucial to understand the importance of selecting the right plums. The quality of your ingredients directly impacts the outcome, and this is no exception. Look for firm, ripe plums with a deep, vibrant color. The skin should be smooth and free from blemishes, indicating that the fruit is fresh and healthy.
Varietal choice also plays a role. While many types of plums can be used for salted plum, some varieties naturally lend themselves better to this preservation method. Japanese plums, for instance, are often preferred due to their balanced sweetness and tartness, making them ideal candidates for the salting process.

Once you’ve selected your plums, rinse them thoroughly under cold running water to remove any dirt or residue. Pat them dry using a clean kitchen towel or paper towels to ensure no excess moisture remains, as this could affect the salting process.
The Salting Technique: Preserving Flavor and Texture
The salting of plums is a delicate process that requires patience and attention to detail. There are several methods to achieve this, each yielding slightly different results in terms of flavor intensity and texture. Here, we’ll focus on two popular techniques: dry salting and brine salting.
Dry Salting Method:
-
Preparation: Begin by sterilizing any containers you plan to use for storing the salted plums. This can be done by washing them with hot, soapy water, rinsing thoroughly, and then drying them completely. You can also use a mild bleach solution (one tablespoon bleach per gallon of water) followed by thorough rinsing and drying.
-
Salting: Lay the dried plums in a single layer on a clean, sterile surface. Sprinkle a thin, even layer of fine sea salt over the plums, ensuring each fruit is lightly coated. The amount of salt will vary depending on personal preference, but generally, a ratio of about 1 tablespoon of salt per pound of plums is a good starting point.

-
Marinating: Place the salted plums in a sterile jar or container, pressing them down gently to ensure they are tightly packed and as much air as possible is removed. Cover the plums with a clean cloth or lid and let them sit at room temperature for 24-48 hours. During this time, the salt will draw out moisture from the plums, creating a natural brine.
-
Storing: After the initial marinating period, check the plums. They should have a slightly firmer texture and a more concentrated flavor. Transfer them to a clean jar, pouring any accumulated brine over them to cover completely. Seal the jar tightly and store in a cool, dark place for at least two weeks before enjoying. The flavor will continue to develop over time, reaching peak deliciousness after a month or more.
Brine Salting Method:
-
Making the Brine: In a pot, combine water and salt in a ratio of about 1 cup of water to 1/4 cup of salt. Heat until the salt is completely dissolved, then remove from heat and let it cool to room temperature.
-
Prepping the Plums: While the brine is cooling, prick the plums all over with a clean fork or toothpick to allow the brine to penetrate more deeply. This step is crucial for even salting and flavor development.

-
Submerging: Once the brine is cool, carefully place the pricked plums into the brine, ensuring they are fully submerged. Use a weight, such as a small, clean stone or a plate that fits inside the jar, to keep the plums down if necessary.
-
Storing: Cover the jar with a tight-fitting lid and store it in a cool, dark place for at least two weeks. Like with the dry salting method, the flavor will continue to mature over time, with optimal taste developing after a month or longer.
Enhancing Flavor: Adding Spices and Herbs
While traditional salted plum is delightful on its own, adding spices and herbs can elevate the dish to new heights of flavor. Consider infusing your brine with a few whole spices like cinnamon sticks, cloves, or star anise for a warm, aromatic twist. For a hint of freshness, incorporate a few sprigs of fresh mint or thyme into the jar before sealing.
For an even more complex flavor profile, try creating a dry spice blend to coat the plums before salting. Combine ground cinnamon, nutmeg, and a pinch of chili flakes with the salt for a spicy-sweet contrast that’s both intriguing and addictive.
Serving Suggestions: From Desserts to Appetizers
Salted plum’s versatility makes it an excellent addition to a wide range of dishes. It can be enjoyed on its own as a tangy, refreshing snack, or incorporated into various recipes to add depth and complexity.

-
Desserts: Use salted plum as a topping for ice cream, yogurt, or oatmeal. Its unique flavor pairs beautifully with creamy textures and sweet bases.
-
Appetizers: Incorporate sliced salted plums into salads or use them to garnish grilled meats or seafood. The contrast of saltiness and tartness complements rich, savory flavors.
-
Beverages: Infuse water, sparkling water, or cocktails with salted plum slices for a refreshing, flavorful drink. The natural sweetness and tanginess make it an excellent base for both non-alcoholic and alcoholic beverages.
-
Baking: Add chopped salted plums to baked goods like muffins, cakes, or cookies for a burst of flavor and moisture. Their unique taste can transform an ordinary treat into something extraordinary.
Conclusion: Preserving Tradition, Crafting Delight
Making salted plum is not merely a culinary task; it’s a journey through time-honored traditions and the art of preservation. Each step, from selecting the perfect plums to carefully salting and storing them, contributes to the final product—a preserve that is as much a testament to patience and craftsmanship as it is a delight to the senses.

Whether you choose the dry salting method or opt for the brine approach, remember that the key to delicious salted plum lies in attention to detail and a willingness to experiment. With each batch, you’ll refine your technique, discovering new flavors and textures that make this preserve uniquely yours.
So, embark on this culinary adventure, and let the enchantment of salted plum captivate your taste buds. In the end, you’ll not only have a jar of delicious, preserved plums but also a deeper understanding of the art of food preservation and the joy of crafting something truly special.


0 comments