Table of content
Introduction
Mulberry vinegar, a lesser-known yet delightful culinary delight, offers a unique blend of tangy, sweet, and slightly floral flavors. Derived from the fermented juice of mulberry fruits, this vinegar not only enhances the taste of various dishes but also boasts a range of health benefits. Mulberries, native to warm temperate regions of Asia, Europe, and North America, are rich in antioxidants, vitamins, and minerals. By transforming these nutritious fruits into vinegar, we can preserve their goodness and enjoy it throughout the year.
In this comprehensive guide, we will delve into the art of making mulberry vinegar from scratch. From selecting the perfect mulberries to the final bottling process, each step will be meticulously explained to ensure you can craft your own batch of this exquisite condiment at home. Whether you’re a seasoned home brewer or a novice in the world of fermentation, this guide promises to be both informative and enjoyable.
Chapter 1: Understanding Mulberries and Their Benefits
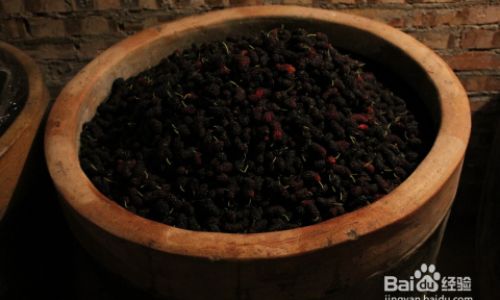
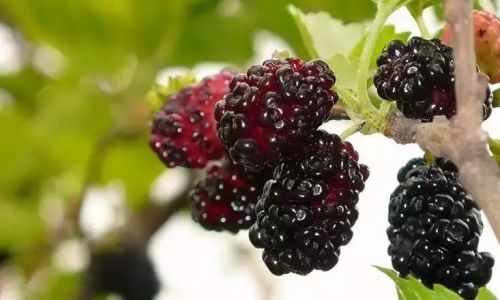
Before diving into the vinegar-making process, it’s crucial to understand the fruit that forms the foundation of our endeavor – the mulberry. Mulberries (Morus species) are small, drupaceous fruits that grow on mulberry trees. They come in various colors, including red, white, and black, each variety offering a slightly different flavor profile.
Nutritional Benefits
Mulberries are a nutritional powerhouse, packed with vitamins A, C, K, and various B vitamins. They are also rich in minerals like potassium, iron, calcium, and magnesium. One of the most notable compounds in mulberries is resveratrol, a powerful antioxidant known for its anti-inflammatory and anti-aging properties.
Culinary Uses
Fresh mulberries are delicious on their own, but they can also be used in a variety of culinary applications. They can be incorporated into jams, pies, smoothies, and even baked goods. However, making mulberry vinegar allows you to preserve the fruit’s essence and enjoy its flavors in a more versatile form.
Chapter 2: Preparing for the Vinegar-Making Process
Before starting the vinegar-making process, there are a few essential preparations you need to undertake:
Selecting the Right Mulberries
Choose ripe, firm mulberries without any signs of mold or decay. Ideally, pick them fresh from a mulberry tree or purchase them from a reputable source that ensures freshness. The quality of your mulberries will directly impact the quality of your final vinegar.
Equipment and Ingredients
Here’s a list of equipment and ingredients you’ll need:
- Fresh mulberries (about 2 kilograms for a standard batch)
- Sugar (about 500 grams, adjustable to taste)
- Distilled white vinegar or apple cider vinegar (as a starter, about 250 milliliters)
- A large, clean glass jar with a lid (at least 2-gallon capacity)
- Cheesecloth or a fine-mesh strainer
- A clean, sterile bottle for storing the finished vinegar
- A large mixing bowl
- A wooden spoon or silicone spatula
- A funnel (optional, for easier bottling)
- A thermometer (optional, but helpful for monitoring fermentation temperatures)
Sanitization
Cleanliness is paramount in any fermentation process. Ensure all equipment is thoroughly washed and sanitized using a mild bleach solution or a commercial sanitizer. Rinse well to remove any traces of sanitizer before use.
Chapter 3: Making Mulberry Juice
The first step in making mulberry vinegar is to extract the juice from the fruits.
Step-by-Step Instructions
-
Rinse the Mulberries: Gently rinse the mulberries under cold running water to remove any dirt or debris. Pat them dry using a clean kitchen towel.
-
Crushing the Fruits: In a large mixing bowl, use a potato masher or your hands to crush the mulberries. You want to break them down but not puree them completely, as some texture is beneficial for flavor extraction.
-
Extracting the Juice: Place the crushed mulberries in a cheesecloth or fine-mesh strainer set over a large bowl. Use your hands or a wooden spoon to press out as much juice as possible. You can also use a juicer if you have one.
-
Measuring the Juice: Once you’ve extracted all the juice, measure it. You should have around 1.5 to 2 liters of mulberry juice. If you have less, you can adjust the amount of sugar and vinegar accordingly.
Chapter 4: Fermenting the Mulberry Juice into Vinegar
Now that you have your mulberry juice, it’s time to start the fermentation process.
Step-by-Step Instructions
-
Combining Ingredients: Pour the mulberry juice into your clean, large glass jar. Add the sugar and stir until it’s fully dissolved. The sugar provides food for the acetic acid bacteria that will convert the alcohol into vinegar.
-
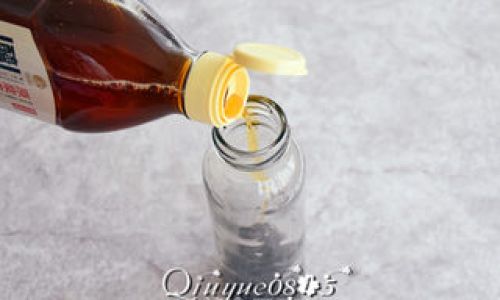
Adding the Starter Vinegar: Pour in the distilled white vinegar or apple cider vinegar. This acts as a starter culture, introducing the necessary bacteria to begin the acetic fermentation process.
-
Covering the Jar: Cover the jar with a cheesecloth or a loose-fitting lid to allow oxygen in while preventing contaminants from entering. The acetic acid bacteria need oxygen to thrive.
-
Monitoring the Fermentation: Place the jar in a warm, dark place (ideally between 70°F to 85°F or 21°C to 29°C). Check the jar daily, stirring gently with a clean, wooden spoon to distribute the bacteria evenly. You may notice a film forming on the surface; this is normal and can be skimmed off if it becomes too thick.
-
Taste Testing: After about 2 to 4 weeks, start tasting the vinegar daily. The fermentation process will continue until the desired level of acidity is achieved. This can take anywhere from 4 to 6 weeks, depending on temperature and other environmental factors.
Chapter 5: Bottling and Storing Your Mulberry Vinegar
Once your mulberry vinegar has reached the desired level of acidity and flavor, it’s ready to be bottled and stored.
Step-by-Step Instructions
-
Straining the Vinegar: Use a cheesecloth or fine-mesh strainer to strain out any remaining pulp or sediment. This will give your vinegar a clearer appearance.
-
Bottling: Pour the strained vinegar into a clean, sterile bottle using a funnel if necessary. Label the bottle with the date and any other relevant information.
-
Storing: Store your mulberry vinegar in a cool, dark place. It will continue to mature and develop flavor over time, but it’s safe to use immediately.
Chapter 6: Using and Enjoying Your Mulberry Vinegar
Mulberry vinegar is incredibly versatile and can be used in a multitude of ways. Here are a few ideas to inspire you:
- Salad Dressings: Use it as a base for a tangy, sweet salad dressing.
- Marinades: Add it to marinades for meats, vegetables, or tofu to infuse them with a unique flavor.
- Pickling: Use it to pickle vegetables for a sweet-and-sour twist.
- Beverages: Mix it with sparkling water, honey, and a splash of fruit juice for a refreshing drink.
- Baking: Incorporate it into baked goods like cakes, cookies, or muffins for a subtle fruit flavor.
Conclusion
Making mulberry vinegar is a rewarding endeavor that not only allows you to preserve the deliciousness of mulberries but also introduces a new, exciting ingredient into your culinary repertoire. By following the steps outlined in this guide, you can craft a batch of high-quality, nutritious mulberry vinegar that will enhance the flavors of your dishes and provide a range of health benefits.
Remember, the art of fermentation is as much about patience and observation as it is about following recipes. Each batch of mulberry vinegar you make will be unique, reflecting the quality of your ingredients, the conditions of your fermentation environment, and your personal preferences. Embrace this variability and enjoy the journey of discovery that comes with crafting your own vinegar at home.
Happy brewing!

0 comments