Introduction
Mulberry rice wine, a traditional beverage steeped in history and culture, offers a unique blend of flavors that can captivate the senses. This artisanal drink, often associated with rural China and other East Asian countries, combines the sweetness of mulberries with the rich, earthy tones of fermented rice. While commercial versions are readily available, crafting your own mulberry rice wine at home can be a rewarding endeavor, allowing you to tailor the taste and aroma to your preferences. This guide will walk you through the entire process, from selecting the right ingredients to bottling your final product, ensuring you create a batch of mulberry rice wine that is both delicious and memorable.
Chapter 1: Understanding the Basics
Before diving into the recipe, it’s crucial to understand the fundamentals of making mulberry rice wine. The process involves several key steps: preparing the mulberries, cooking the rice, mixing the ingredients, fermentation, and aging. Each step plays a vital role in the final quality and flavor of your wine.
1 Ingredients Overview

- Mulberries: Choose fresh, ripe mulberries with a deep purple color for the best flavor. If fresh mulberries are unavailable, frozen or dried mulberries can be used, but adjust the quantity and soaking time accordingly.
- Rice: Glutinous rice (also known as sweet rice or sticky rice) is preferred due to its high starch content, which aids in fermentation.
- Water: Clean, potable water is essential for brewing.
- Yeast: Wine yeast or a traditional starter culture (such as a piece of previously fermented mulberry rice wine) is necessary to initiate fermentation.
- Sugar: Optional, to enhance sweetness. The natural sugars in mulberries and glutinous rice are usually sufficient, but additional sugar can be added if desired.
2 Equipment
- Large pots for cooking rice and mulberries
- Strainer and cheesecloth for filtering
- Fermentation jars with tight-fitting lids
- Large mixing bowl
- Funnel and clean bottles for bottling
- Hydrometer (optional, for measuring specific gravity and monitoring fermentation progress)
- Thermometer (optional, for maintaining optimal fermentation temperatures)
Chapter 2: Preparing the Ingredients
1 Selecting and Preparing Mulberries
Start by inspecting your mulberries. Discard any that are moldy, bruised, or overly ripe. If using fresh mulberries, rinse them gently under cold running water and pat them dry with a clean cloth or paper towels. For dried mulberries, soak them in warm water for several hours or overnight to soften.
2 Cooking the Glutinous Rice
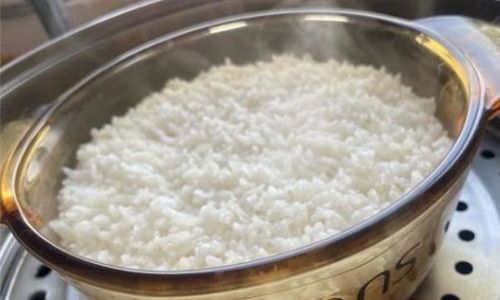
Rinse the glutinous rice thoroughly under cold water until the water runs clear. Soak the rice in clean water for about 4-6 hours, or overnight, to allow it to absorb moisture and soften. Drain the soaked rice and place it in a large pot. Add enough water to cover the rice by about an inch. Bring the water to a boil, then reduce the heat to low, cover, and simmer for about 20-30 minutes, or until the rice is tender and the water is absorbed. Let the cooked rice cool to room temperature.
Chapter 3: Mixing and Fermentation
1 Blending the Ingredients

Once the rice has cooled, transfer it to a large mixing bowl. If using fresh mulberries, mash them lightly with a fork or potato masher to release their juices. If using soaked dried mulberries, blend them into a puree or leave them whole for a chunkier texture. Add the mulberries to the rice and mix well. If desired, sprinkle in a bit of sugar and stir to combine.
2 Adding Yeast
Sprinkle the yeast evenly over the rice and mulberry mixture. If using a starter culture, crumble it into small pieces and distribute it throughout the mixture. Use a clean spoon or your hands (wearing gloves) to ensure the yeast is evenly distributed.
3 Preparing the Fermentation Jar
Transfer the mixture to a clean fermentation jar, pressing it down gently to remove any air pockets. The jar should be filled to within about an inch of the top to allow for expansion during fermentation. Cover the jar with a clean cloth or cheesecloth and secure it with a rubber band to prevent contaminants from entering while allowing gas to escape.
4 Initiating Fermentation
Place the jar in a warm, dark place with a temperature between 68-86°F (20-30°C). This optimal temperature range encourages yeast activity and promotes efficient fermentation. Depending on the ambient temperature and the activity of the yeast, fermentation can take anywhere from 3-7 days. During this time, you may notice bubbles forming and a characteristic yeasty aroma emanating from the jar.
Chapter 4: Monitoring and Adjusting

1 Checking Specific Gravity (Optional)
Using a hydrometer, you can measure the specific gravity of your mixture before and during fermentation to monitor the progress of sugar conversion into alcohol. As fermentation proceeds, the specific gravity will decrease. When it stabilizes and no longer changes significantly over a 24-hour period, fermentation is considered complete.
2 Stirring and Temperature Control
Stir the mixture gently once or twice a day during the first few days of fermentation to distribute the yeast evenly and prevent the formation of a solid mass (called a “cap”) on the surface. If the temperature rises too high, consider moving the jar to a cooler location to prevent the yeast from becoming stressed or dying.
Chapter 5: Secondary Fermentation and Aging
1 Racking and Filtering
Once primary fermentation has subsided, carefully rack (transfer) the liquid (now called “wine”) into a clean jar, leaving behind any sediment. Use a funnel lined with cheesecloth or a fine-mesh strainer to filter out any remaining rice particles, mulberry skins, and yeast. Repeat this process if necessary until the wine is clear.
2 Secondary Fermentation (Optional)

For a smoother, more refined wine, you can initiate a secondary fermentation by adding additional fruit, herbs, or spices. This step is optional and can be tailored to your taste preferences. If adding additional sugar or ingredients, be mindful of the potential increase in alcohol content and adjust accordingly.
3 Aging
Transfer the filtered wine to clean, airtight bottles. Store the bottles in a cool, dark place, such as a cellar or pantry, for at least 3-6 months to allow the flavors to meld and develop. Aging can continue for up to a year or more, depending on your desired taste profile. Older wines tend to have more complex flavors and smoother textures.
Chapter 6: Bottling and Serving
1 Preparing Bottles
Ensure your bottles are clean and sterile to prevent contamination. Rinse them thoroughly with hot water and a mild detergent, then rinse again with clean water. You can sanitize them by immersing them in a solution of one part bleach to ten parts water for a few minutes, then rinsing well with clean water. Allow the bottles to air-dry completely.
2 Bottling the Wine
Use a funnel to pour the aged wine into the prepared bottles, filling them to the neck. Wipe the rim of each bottle clean with a damp cloth to remove any drips, then secure the lid or cork tightly. Label the bottles with the date and any other relevant information.

3 Serving Your Mulberry Rice Wine
Chill your mulberry rice wine for at least an hour before serving to enhance its flavor. Pour it into glasses, preferably ones with a narrow neck to retain the aroma. Enjoy it on its own, as an aperitif, or pair it with light dishes such as sushi, seafood, or delicate desserts.
Conclusion
Crafting mulberry rice wine at home is a rewarding endeavor that combines the art of fermentation with the joy of creating something delicious from scratch. By following this guide, you’ll be able to produce a batch of mulberry rice wine that is not only a testament to your culinary skills but also a delightful addition to your dining table. Whether you enjoy it as a refreshing beverage or a special-occasion treat, your homemade mulberry rice wine is sure to impress and delight. Happy brewing!


0 comments