Table of content
Baking cookies is a delightful and rewarding culinary activity that can bring joy to both the baker and those who enjoy the sweet treats. Whether you’re a seasoned baker or a novice in the kitchen, making cookies from scratch can be a fun and satisfying experience. In this comprehensive guide, we’ll walk you through the process of baking delicious cookies in your oven, from gathering the necessary ingredients and equipment to mixing, shaping, and finally baking your cookies to perfection. By following these detailed steps, you’ll be able to create homemade cookies that are sure to impress your friends and family.
Chapter 1: Preparation and Ingredients
Before you dive into the baking process, it’s essential to ensure you have all the necessary ingredients and equipment ready. This will not only make the baking process smoother but also ensure that your cookies turn out perfectly.
Ingredients:
- Butter (or Margarine): Provides flavor and moisture.
- Granulated Sugar: Adds sweetness and a slight crunch.
- Brown Sugar: Adds moisture, chewiness, and a deeper caramel flavor.
- Eggs: Bind the ingredients together and add structure.
- Vanilla Extract: Enhances flavor.
- All-Purpose Flour: The main structural component.
- Baking Powder: Leavens the dough, making the cookies rise.
- Salt: Balances the sweetness.
- Optional Add-Ins: Chocolate chips, nuts, dried fruit, or sprinkles for added texture and flavor.
Equipment:
- Mixing Bowls: For combining ingredients.
- Electric Mixer or Whisk: For creaming the butter and sugar.
- Measuring Cups and Spoons: For accuracy in ingredient quantities.
- Spatula: For scraping the sides of the bowl and folding in ingredients.
- Baking Sheets: Lined with parchment paper or silicone baking mats to prevent sticking.
- Cooling Racks: For letting the cookies cool after baking.
- Oven: Preheated to the correct temperature.
Chapter 2: Preheating the Oven
One of the most crucial steps in baking cookies is preheating the oven to the correct temperature. This ensures that the cookies bake evenly and achieve the desired texture and color. Most cookie recipes call for an oven temperature between 325°F (165°C) and 375°F (190°C). Always check your recipe for the specific temperature and preheat your oven accordingly.

Chapter 3: Mixing the Ingredients
Now that you have all your ingredients and equipment ready, it’s time to start mixing. Follow these steps to create the perfect cookie dough:
-
Cream the Butter and Sugars: In a large mixing bowl, use an electric mixer or a whisk to cream together the butter (softened to room temperature) and both granulated and brown sugars until the mixture is light and fluffy. This should take about 2-3 minutes on medium speed.
-
Add the Eggs and Vanilla: Beat in the eggs one at a time, making sure each egg is fully incorporated before adding the next. Then, mix in the vanilla extract.
-
Combine Dry Ingredients: In a separate bowl, whisk together the flour, baking powder, and salt. Gradually add this dry mixture to the wet mixture, beating on low speed until just combined. Be careful not to overmix, as this can result in tough cookies.
-
Fold in Add-Ins: If you’re adding chocolate chips, nuts, or other mix-ins, gently fold them into the dough using a spatula.
Chapter 4: Shaping the Dough
There are several ways to shape your cookie dough, depending on the type of cookie you’re making. Here are a few common methods:
-
Scoop and Roll: Use a cookie scoop or a spoon to portion out the dough, then roll each portion into a ball. This method is perfect for classic drop cookies.
-
Flatten with a Fork: For cookies like peanut butter cookies, you may want to flatten the dough balls slightly with a fork before baking. This creates a unique pattern and helps the cookies bake evenly.
-
Chill the Dough: Some recipes recommend chilling the dough in the refrigerator for a while before baking. This can help the cookies spread less during baking and result in a thicker, chewier texture.
-
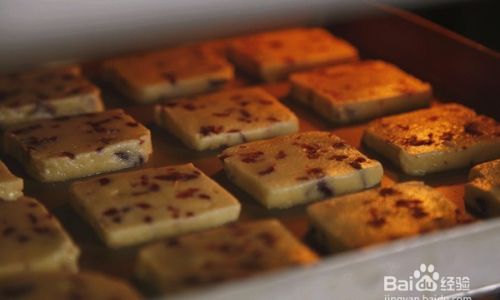
Use Cookie Cutters: For shaped cookies, roll out the dough on a lightly floured surface to about 1/4 inch thick. Use cookie cutters to cut out shapes, then transfer them to the baking sheet.
Chapter 5: Baking the Cookies
Once your dough is shaped, it’s time to bake. Here are some tips for successful baking:
-
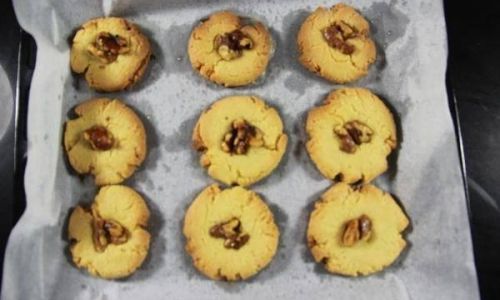
Space Evenly: Arrange the dough pieces on the baking sheet, leaving enough space between them to allow for expansion during baking. The exact amount of space will depend on the type of cookie, but generally, 1-2 inches apart is a good rule of thumb.
-
Bake Until Golden: Bake the cookies in the preheated oven for the time specified in your recipe. Keep in mind that ovens can vary, so it’s a good idea to check the cookies a few minutes before the estimated baking time. Look for golden-brown edges and a set center.
-
Rotate the Pans: If you’re baking more than one batch, halfway through the baking time, rotate the pans from top to bottom and front to back to ensure even baking.
-
Cool on Racks: Once the cookies are done, remove them from the oven and let them cool on the baking sheets for about 5 minutes before transferring them to cooling racks to cool completely. This helps them set and prevents them from becoming too soft or crumbly.

Chapter 6: Troubleshooting and Tips
Even the best bakers encounter issues sometimes. Here are some common troubleshooting tips and helpful hints to ensure your cookies turn out perfectly:
-
Cookie Dough is Too Sticky: If your dough is too sticky to handle, you may need to add a bit more flour. However, be cautious as too much flour can make the cookies dry.
-
Cookies Spread Too Much: This can happen if the dough is too warm or if there’s too much butter. Chilling the dough before baking can help. Additionally, using baking soda instead of baking powder can sometimes reduce spreading.
-
Cookies are Too Dry: If your cookies turn out dry, they may have been overbaked or there wasn’t enough fat in the dough. Make sure to follow the baking time closely and consider adding a bit more butter next time.
-
Cookies Lack Flavor: Enhance the flavor by using high-quality ingredients, such as unsalted butter, pure vanilla extract, and good-quality chocolate chips. Adding a pinch of sea salt to the dough can also boost flavor.

Chapter 7: Enjoying Your Creations
Finally, it’s time to enjoy the fruits of your labor. Whether you’re serving your homemade cookies warm from the oven with a glass of milk or packaging them up as gifts for friends and family, there’s no denying the joy that comes from baking your own cookies.
Remember, baking is an art that takes practice and patience. Don’t be discouraged if your first batch doesn’t turn out perfectly. With each attempt, you’ll learn more about your oven, your ingredients, and the baking process, and your cookies will continue to improve.
In conclusion, baking cookies in your oven is a rewarding and enjoyable activity that can bring a sense of accomplishment and delight to your kitchen. By following the steps outlined in this guide, you’ll be able to create delicious, homemade cookies that are sure to become a cherished part of your baking repertoire. Happy baking!




0 comments