Introduction
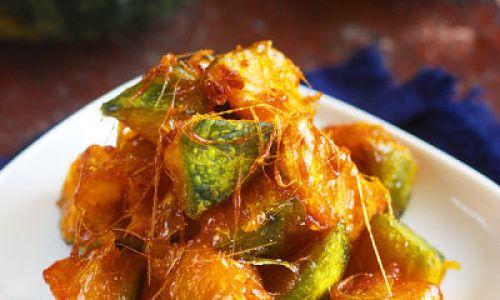
Candied pumpkin, known in Chinese cuisine as bá sī nán guā (拔丝南瓜), is a delectable dessert that combines the natural sweetness of pumpkin with a crispy, sugar-coated exterior. This dish is a staple in Chinese banquets and family gatherings, prized for its striking appearance—golden, glistening threads of caramelized sugar that stretch like silk when lifted with chopsticks. While the recipe may seem intimidating at first glance, mastering the technique of creating the signature “silken threads” (bá sī) is achievable with patience and precision. This article will guide you through the process of crafting this visually stunning and irresistibly sweet treat, from selecting the perfect pumpkin to executing the delicate sugar-pulling technique.
The Science Behind Candied Pumpkin
Before diving into the recipe, it’s essential to understand the culinary principles at play. Candied pumpkin relies on two key processes: frying and caramelization. The pumpkin slices are first coated in a light batter and deep-fried until golden and crispy. Simultaneously, sugar is melted to a precise temperature to form a golden caramel, which is then used to coat the fried pumpkin. The “silken threads” emerge when the hot caramel is stretched and cooled rapidly, creating delicate strands that encase the pumpkin. Achieving the perfect balance between crispy texture and sticky sweetness requires careful attention to temperature, timing, and technique.
Ingredients
To create candied pumpkin, gather the following ingredients:
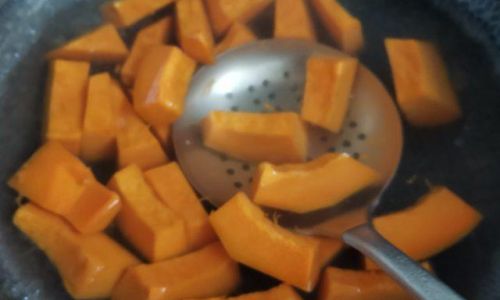
- 500g pumpkin (preferably kabocha or butternut squash for its dense, sweet flesh)
- 100g granulated sugar
- 50ml water
- 1/4 teaspoon white vinegar (to prevent sugar crystallization)
- 50g cornstarch (or potato starch) for dredging
- 1/2 teaspoon salt
- Vegetable oil for frying
- Optional: 1/4 teaspoon cinnamon powder or vanilla extract for added flavor
Equipment Checklist
- A deep, heavy-bottomed pot or wok for frying
- A candy thermometer (optional but highly recommended)
- Tongs or a slotted spoon for handling fried pumpkin
- A baking sheet lined with parchment paper
- A large, heatproof plate for serving
- A pastry brush (to clean sugar strands from the pot)
Step-by-Step Guide
Preparing the Pumpkin
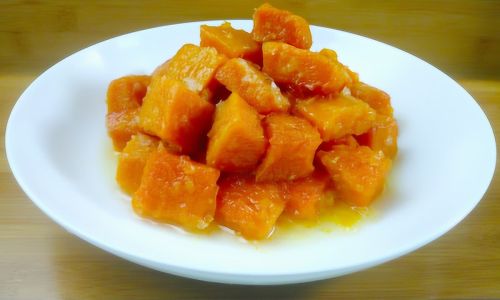
- Peel and Slice: Begin by peeling the pumpkin and removing the seeds and fibrous interior. Slice the flesh into uniform pieces—approximately 3cm x 3cm x 1cm thick. Consistency in size ensures even cooking.
- Salt Soak: Soak the pumpkin slices in a bowl of cold water mixed with 1/2 teaspoon of salt for 10 minutes. This step removes excess moisture and firms up the flesh, preventing sogginess during frying.
- Dry Thoroughly: Pat the pumpkin slices dry with paper towels. Any residual moisture will cause the batter to become greasy and prevent proper crisping.
Coating the Pumpkin
- Dredge in Starch: Place the cornstarch in a shallow dish. Coat each pumpkin slice evenly, shaking off excess starch. The starch creates a barrier, ensuring the pumpkin remains crispy and adheres to the caramel.
- Resting Period: Allow the coated pumpkin to rest for 5 minutes. This hydrates the starch slightly, creating a lighter, more delicate crust.
Deep-Frying the Pumpkin
- Heat the Oil: Pour vegetable oil into a deep pot or wok, ensuring it reaches at least 5cm in depth. Heat the oil to 170–180°C (340–355°F). Use a thermometer for accuracy, as overheating will burn the pumpkin, while insufficient heat will result in greasy, limp pieces.
- Fry in Batches: Gently lower the pumpkin slices into the hot oil, working in batches to avoid overcrowding. Fry for 3–4 minutes until golden and crisp. The pumpkin should be tender inside—test by piercing a piece with a skewer; it should meet no resistance.
- Drain Excess Oil: Transfer the fried pumpkin to a baking sheet lined with parchment paper. This absorbs excess oil and keeps the pieces crisp.
Crafting the Caramelized Sugar Coating
This is the most critical step, as the sugar must be heated to the precise temperature to achieve the signature silken threads.

- Combine Sugar and Water: In a clean, dry saucepan, combine the granulated sugar and water. Stir gently to moisten the sugar, ensuring no granules cling to the sides.
- Heat the Syrup: Place the saucepan over medium heat. Do not stir the mixture once it begins to boil, as this can cause crystallization. Instead, occasionally swirl the pan gently to distribute heat evenly.
- Monitor Temperature: Insert a candy thermometer. The syrup will progress through stages:
- Thread Stage (106–113°C/223–236°F): Syrup forms thin threads when dripped from a spoon.
- Soft Ball Stage (113–118°C/236–244°F): Syrup forms a soft, pliable ball in cold water.
- Hard Crack Stage (149–154°C/300–310°F): Syrup forms brittle threads.
- For candied pumpkin, aim for 150–155°C (302–311°F), just below the hard crack stage. At this temperature, the sugar is molten but not yet brittle, allowing it to stretch into delicate threads.
- Add Vinegar: Just before the syrup reaches temperature, stir in the white vinegar. The acidity inhibits crystallization, ensuring a smooth, glossy coating.
Coating the Pumpkin and Creating Silken Threads
- Toss Quickly: Once the sugar reaches 150°C, remove it from heat immediately. Add the fried pumpkin slices to the saucepan and toss gently with a heatproof spatula, ensuring each piece is coated. The residual heat will adhere the caramel to the pumpkin.
- Stretch the Sugar: Using chopsticks or a fork, lift a piece of pumpkin from the saucepan. Quickly swing it back and forth, allowing the caramel to stretch into thin threads. Continue this motion while transferring the coated pumpkin to the serving plate. The rapid cooling of the sugar creates the iconic silken strands.
- Work Swiftly: The caramel hardens quickly, so coat and thread each piece immediately. If the sugar becomes too stiff, reheat it gently over low heat, but avoid overcooking.
Serving and Presentation
- Plate Artfully: Arrange the candied pumpkin on a heatproof plate. The residual heat may cause the sugar to continue stretching, so work efficiently.
- Clean the Pot: While the sugar is still pliable, use a damp pastry brush to clean any stray threads from the saucepan. Once cooled, hardened sugar is challenging to remove.
- Optional Garnishes: For added flair, sprinkle the dish with toasted sesame seeds, chopped nuts, or a dusting of cinnamon.
Troubleshooting Common Issues

- Sugar Crystallizes: If the syrup crystallizes, it means stray sugar crystals were not dissolved during cooking. To fix, add a few drops of water and reheat gently, stirring until smooth.
- No Silken Threads: If the sugar is too cool, it won’t stretch. Reheat briefly. If it’s overcooked, it will become brittle—discard and start fresh.
- Greasy Coating: Ensure the pumpkin is thoroughly dried before frying, and maintain oil temperature to prevent absorption.
Variations and Creative Twists
- Spiced Caramel: Infuse the sugar syrup with star anise, cloves, or a cinnamon stick for a warm, aromatic twist.
- Nutty Crunch: Toss the fried pumpkin in toasted sesame seeds or crushed peanuts before coating with caramel.
- Healthier Adaptations: For a lighter version, omit the deep-frying and bake the pumpkin slices at 200°C (390°F) until golden. Coat with a thin layer of caramel instead of full threading.
Cultural Significance of Candied Pumpkin
Candied pumpkin holds a cherished place in Chinese culinary traditions, often served during festivals and celebrations. The dish symbolizes prosperity and sweetness, with the golden threads representing good fortune. It is a testament to the artistry of Chinese cooking, where simplicity meets precision to create edible poetry.
Conclusion
Crafting candied pumpkin is a labor of love that rewards the cook with a dish that is as visually stunning as it is delicious. While the process demands attention to detail, the result—a harmonious blend of crispy pumpkin and shimmering caramel—is well worth the effort. Whether served as a standalone dessert or paired with a scoop of vanilla ice cream, this dish is guaranteed to impress. Embrace the challenge, savor the process, and delight in the sweet satisfaction of mastering the art of bá sī nán guā.
0 comments