Introduction
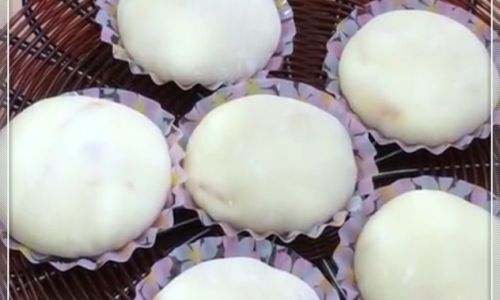
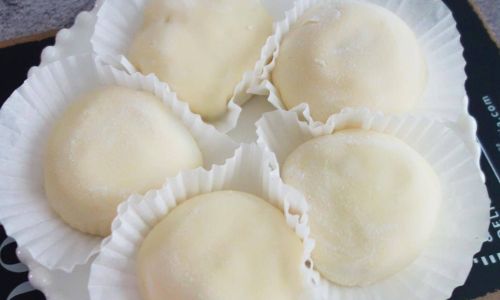
Snow skin mochi, also known as yukinejo in Japanese, is a delightful and refreshing dessert that combines the softness of mochi with a variety of sweet fillings. Unlike traditional mochi, which is made with glutinous rice flour and can be quite sticky and dense, snow skin mochi uses a mixture of cornstarch, sugar, and water to create a lighter, more delicate dough. This makes it perfect for wrapping around creamy fillings like ice cream, fresh fruit, or sweet bean paste.
The beauty of snow skin mochi lies in its simplicity and versatility. With just a few ingredients and a bit of patience, you can create beautiful, customizable treats that are perfect for any occasion. In this article, we’ll walk you through a simple recipe for making snow skin mochi at home, complete with step-by-step instructions and tips for success.

Ingredients
Before we dive into the recipe, let’s list out the ingredients you’ll need:
- 1 cup cornstarch (also known as cornflour)
- 1/2 cup sugar (you can adjust the sweetness to your preference)
- 1 1/2 cups boiling water
- Food coloring (optional, for adding color to your mochi dough)
- Fillings (such as ice cream, sweet bean paste, fresh fruit, or whipped cream)
- Cornstarch or powdered sugar (for dusting, to prevent sticking)
Equipment
- Mixing bowls
- Spatula or wooden spoon
- Plastic wrap or a damp cloth (to cover the dough while it cools)
- Rolling pin (optional, but helpful for flattening the dough)
- Knife or scissors (for cutting the dough into smaller pieces)
- Mochi molds (optional, but can make shaping easier and more uniform)
Step-by-Step Recipe
Step 1: Prepare the Dough
-
Combine Dry Ingredients: In a large mixing bowl, whisk together the cornstarch and sugar until well combined. This ensures that the sugar is evenly distributed throughout the dough.
-
Add Boiling Water: Gradually pour the boiling water into the cornstarch and sugar mixture, stirring constantly with a spatula or wooden spoon. Be careful, as the mixture will be very hot. The dough will start to thicken and come together as you stir.
-
Knead the Dough: Once the mixture has cooled slightly and has formed a dough-like consistency, transfer it to a clean surface dusted with a little cornstarch or powdered sugar. Knead the dough for a few minutes until it becomes smooth and elastic. If the dough is too sticky, add a bit more cornstarch. If it’s too dry, you can add a tiny bit of water, but be cautious as too much water can make the dough too soft.
-
Add Food Coloring (Optional): If you want to add color to your mochi dough, divide the dough into smaller portions and knead in a few drops of food coloring until the desired color is achieved. Remember that the color will intensify as the dough sits, so start with less coloring than you think you need.
Step 2: Let the Dough Rest

- Cover the Dough: Wrap the dough tightly in plastic wrap or cover it with a damp cloth to prevent it from drying out. Let the dough rest for at least 15-20 minutes. This resting period allows the gluten in the cornstarch to relax, making the dough easier to roll out and work with.
Step 3: Prepare the Fillings
While the dough is resting, prepare your fillings. If you’re using ice cream, make sure it’s slightly softened so it’s easier to handle. If you’re using sweet bean paste or another thick filling, you may need to divide it into smaller portions for easier wrapping. Fresh fruit can be sliced or diced as desired.
Step 4: Roll Out the Dough
-
Dust the Surface: Lightly dust your work surface with cornstarch or powdered sugar to prevent sticking.
-
Roll Out the Dough: Place a portion of the dough on the dusted surface and roll it out into a thin, even layer using a rolling pin. The thickness of the dough is up to your preference, but aiming for about 1/4 inch (6mm) is a good starting point.
Step 5: Cut and Shape the Dough
-
Cut the Dough: Use a knife or scissors to cut the rolled-out dough into circles or squares, depending on the shape you prefer. If you have mochi molds, you can use them to cut out uniform shapes.
-
Prepare for Wrapping: Place a small ball or spoonful of your chosen filling in the center of each dough piece. Be careful not to overfill, as this can make it difficult to seal the mochi.
Step 6: Wrap the Mochi
-
Seal the Dough: Gently lift the edges of the dough around the filling and pinch them together to seal. If the dough is sticky, you can lightly dust your fingers with cornstarch or powdered sugar to help.

-
Shape the Mochi: Once sealed, you can gently roll the mochi between your palms to smooth out any seams and give it a round shape. If you’re using molds, press the sealed dough into the mold and gently release it to give it a uniform shape.
Step 7: Dust with Powdered Sugar
To prevent the mochi from sticking together, lightly dust each piece with powdered sugar. You can also place them on a tray lined with parchment paper and separate them with a thin layer of powdered sugar.
Step 8: Serve and Enjoy
Snow skin mochi is best enjoyed immediately, as the dough tends to soften and become stickier over time. If you’re not serving it right away, you can store it in an airtight container in the refrigerator for a few hours. Just be sure to let it sit at room temperature for a few minutes before serving to soften the dough slightly.
Tips for Success
- Work Quickly: Snow skin mochi dough can become sticky and difficult to handle if it sits out for too long. Work in small batches and keep the dough covered when not in use.
- Use Quality Fillings: The quality of your fillings will greatly impact the overall taste of your mochi. Choose high-quality ingredients that you enjoy eating on their own.
- Experiment with Flavors and Colors: Snow skin mochi is a great canvas for creativity. Experiment with different fillings, colors, and shapes to make unique and delicious treats.
- Store Properly: If you’re not serving your mochi immediately, store it in an airtight container in the refrigerator. It can also be frozen for longer storage, but be sure to thaw it in the refrigerator before serving.
Conclusion
Making snow skin mochi at home is a fun and rewarding experience. With just a few ingredients and a bit of patience, you can create beautiful, customizable treats that are perfect for any occasion. Whether you’re looking for a sweet snack, a dessert for a party, or a unique gift for a friend, snow skin mochi is sure to impress. So why wait? Gather your ingredients, roll up your sleeves, and start making your own snow skin mochi today!


0 comments