Introduction
When the sun blazes overhead and temperatures climb, few things rival the joy of indulging in a cooling, naturally sweet treat. Enter the chilled pear—a dessert that marries simplicity with elegance, offering a burst of hydration and flavor while requiring minimal effort. Often overlooked in favor of more elaborate sweets, this humble fruit transforms into a luxurious delight when prepared thoughtfully. Whether served as a palate-cleansing finale to a meal or enjoyed as a standalone afternoon pick-me-up, chilled pears are a testament to the beauty of uncomplicated cuisine. This article will guide you through the process of creating this refreshing dish, from selecting the perfect fruit to elevating it with creative twists. By the end, you’ll master a recipe that celebrates the pear’s delicate sweetness and versatile texture, all while staying effortlessly cool.
The Allure of Chilled Pears
Pears, with their grained flesh and floral aroma, are a culinary chameleon. When raw, they offer a crisp, juicy crunch; when cooked, they soften into a silken tenderness that melts on the tongue. Chilling amplifies their natural sugars, creating a balance between refreshing and indulgent. Unlike sugary ice creams or heavy cakes, chilled pears provide a light, nutrient-rich alternative. Rich in dietary fiber, vitamin C, and antioxidants, they cater to health-conscious eaters without sacrificing taste. Moreover, their mild flavor profile acts as a canvas for endless customization—a splash of citrus, a hint of spice, or a drizzle of honey can elevate this dessert to gourmet status.
Selecting the Ideal Pear
The foundation of any great chilled pear dish begins with fruit selection. While varieties like Bartlett, Anjou, and Bosc are common in grocery stores, each behaves differently when cooked. Bartlett pears, known for their buttery texture, are excellent for poaching but may become too soft if overcooked. Anjou pears retain their shape better, making them ideal for slicing or halving. Bosc pears, with their honeyed sweetness and firm flesh, are a favorite for baking and chilling. Regardless of variety, prioritize ripe yet firm fruit. Gently press the neck of the pear—if it yields slightly, it’s ready. Avoid overly soft or bruised specimens, as they will disintegrate during cooking.
Essential Ingredients and Tools
To craft chilled pears, gather the following:
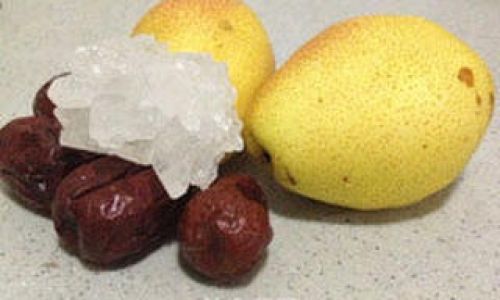
- 4 ripe pears (peeled, cored, and halved or quartered)
- 4 cups water (or a mix of water and white wine for depth)
- 1 cup granulated sugar (adjust to taste; substitute with honey or maple syrup for a vegan option)
- 1 lemon (juiced, to prevent browning and add brightness)
- 1 cinnamon stick (optional, for warmth)
- 1 vanilla bean (split lengthwise, or 1 tsp vanilla extract)
- A pinch of salt (to balance sweetness)
Tools required:
- A medium saucepan (for poaching)
- A sharp paring knife (for peeling and coring)
- A slotted spoon (for gentle handling)
- A baking sheet (for chilling)
- An airtight container (for storage)
Step-by-Step Preparation
-
Peel and Prepare the Pears
Using a paring knife, carefully peel the pears, leaving the stem intact for visual appeal. Halve each pear lengthwise and use a melon baller or small spoon to remove the core and seeds. If desired, slice the halves into quarters for smaller portions. Rub the cut sides with lemon juice to prevent oxidation (browning).
-
Create the Poaching Liquid
In the saucepan, combine water, sugar, lemon juice, cinnamon stick, vanilla bean, and salt. Bring the mixture to a simmer over medium heat, stirring occasionally until the sugar dissolves. The liquid should taste subtly sweet but not cloying—adjust with extra water or sugar as needed. -
Poach the Pears
Gently lower the pear halves into the simmering liquid. Ensure they are submerged; use a plate or parchment paper cutout to weigh them down if necessary. Reduce the heat to low and poach for 15–20 minutes, or until the pears are tender when pierced with a knife. Avoid boiling vigorously, as this may cause the fruit to break apart. -
Cool and Chill
Once cooked, transfer the pears to a baking sheet using a slotted spoon. Let them cool to room temperature, then refrigerate for at least 2 hours (or overnight) to chill thoroughly. Meanwhile, reduce the poaching liquid by half over high heat to create a syrupy glaze. Strain and set aside. -
Serve and Garnish
To plate, drizzle the chilled pears with the reduced syrup. Enhance with a dollop of whipped cream, a sprinkle of toasted almonds, or a mint leaf. For a boozy twist, splash with a teaspoon of pear brandy or Champagne.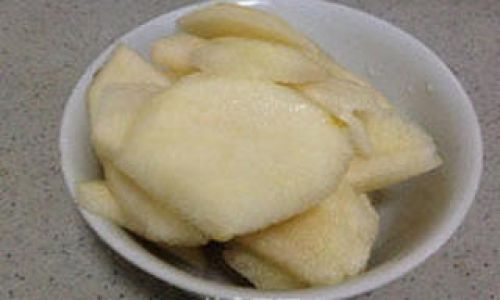
Creative Variations
- Spiced Infusion: Add star anise, cardamom pods, or fresh ginger to the poaching liquid for exotic warmth.
- Herb-Infused: Toss in a handful of thyme, rosemary, or basil during poaching for a fragrant twist.
- Citrus Zing: Replace water with fresh orange juice and add a strip of orange zest.
- Vegan-Friendly: Swap sugar with coconut sugar or agave syrup, and serve with coconut yogurt.
- Savory Edge: Pair with blue cheese crumbles and a balsamic reduction for a sophisticated appetizer.
The Science Behind Poaching
Poaching is a gentle cooking method that preserves the pear’s texture while infusing it with flavor. The low, steady heat ensures even cooking without caramelization, allowing the fruit to absorb the aromatic notes of the liquid. The lemon juice not only prevents browning but also brightens the overall taste, balancing the syrup’s richness. Chilling afterward firms the flesh slightly, creating a pleasing contrast between the tender interior and crisp exterior.
Health Benefits and Dietary Adaptations
Chilled pears align with various dietary needs. For diabetics or those monitoring sugar intake, reduce the syrup’s sweetness or use a zero-calorie sweetener like erythritol. Gluten-free eaters can enjoy the dessert as-is, while vegans can opt for coconut-based toppings. Pears themselves are low in calories and high in fiber, aiding digestion and promoting satiety.
Storing and Preserving
Chilled pears can be stored in their poaching liquid for up to 5 days in the refrigerator. For longer preservation, freeze the poached fruit on a baking sheet before transferring to a freezer-safe bag. Thaw in the refrigerator overnight and reheat gently in the syrup before serving.
Troubleshooting Common Issues
- Mushy Pears: Overcooking is the culprit. Test doneness early and remove from heat once tender.
- Bland Flavor: Increase the poaching liquid’s seasoning or add a splash of vinegar for acidity.
- Cloudy Syrup: Strain the liquid through a fine-mesh sieve to remove impurities before reducing.
Serving Suggestions Beyond Dessert
- Breakfast Bowl: Layer chilled pears with Greek yogurt, granola, and honey.
- Cocktail Garnish: Muddle a pear slice into a gin and tonic or Prosecco spritz.
- Salad Topper: Dice and toss with arugula, walnuts, and goat cheese.
Conclusion
The chilled pear is a testament to the magic of simplicity. By harnessing the fruit’s natural qualities and enhancing it with thoughtful preparation, you create a dessert that feels both timeless and innovative. Whether you adhere strictly to tradition or experiment with bold flavor combinations, this recipe offers a canvas for culinary creativity. So the next time temperatures rise, resist the urge to reach for store-bought treats. Instead, embrace the cool, delicate embrace of a perfectly poached pear—a dessert that proves sometimes, less truly is more.
0 comments