Introduction
Coconut jelly, or coconut pudding as it’s sometimes known, is a delightful dessert that combines the creamy richness of coconut milk with the smooth, jelly-like texture that’s both refreshing and indulgent. Whether you’re looking for a tropical twist on your usual dessert routine or simply want to impress your guests with a homemade treat, coconut jelly is an excellent choice. In this comprehensive guide, we’ll walk you through the process of making coconut jelly from scratch, ensuring you have all the tips, tricks, and ingredients you need to create a perfect batch.
Understanding the Basics
Before diving into the recipe, it’s essential to understand the fundamental components of coconut jelly. The base of this dessert is coconut milk, which provides the rich, creamy flavor. To achieve the jelly-like consistency, you’ll need a gelatinizing agent. Traditionally, this could be gelatin powder, but for a vegan option, agar-agar or tapioca starch can be used. Sweeteners like sugar or honey add a touch of sweetness, while flavorings such as vanilla extract or pandan leaves can elevate the taste.

Ingredients Overview
Here’s a list of the ingredients you’ll need to make coconut jelly:
- Full-fat coconut milk: 400 milliliters (about 1.5 cups)
- Water: 200 milliliters (about 0.8 cups)
- Sugar or honey: 100 grams (about 0.5 cups), adjust to taste
- Gelatin powder, agar-agar, or tapioca starch: Depending on the type, you’ll need between 10 to 20 grams (about 0.35 to 0.7 ounces)
- Vanilla extract or pandan leaves (optional): For added flavor
- Salt: A pinch, to enhance the sweetness
Equipment Needed
To make coconut jelly, you’ll need the following kitchen tools and equipment:
- Measuring cups and spoons
- Mixing bowls
- Whisk or electric mixer
- Saucepan
- Sieve or strainer
- Spoon for stirring
- Molds or containers for setting the jelly
- Refrigerator
Step-by-Step Recipe
Now, let’s dive into the step-by-step recipe for making coconut jelly.
Step 1: Prepare Your Ingredients
Begin by measuring out all your ingredients accurately. This ensures consistency in your final product. Pour the coconut milk into a measuring cup, and set it aside. Measure the water, sugar (or honey), and gelatinizing agent separately. If using pandan leaves, wash them thoroughly and tie them into a knot for easy removal later.
Step 2: Combine Coconut Milk and Water
In a mixing bowl, combine the coconut milk and water. Whisk them together until well blended. This mixture will form the base of your jelly.
Step 3: Heat the Mixture

Transfer the coconut milk mixture to a saucepan. Place the saucepan over medium heat. As the mixture begins to warm, add the sugar (or honey) and a pinch of salt. Stir continuously until the sugar is fully dissolved and the mixture is warm, but not boiling. Be careful not to let it boil, as this could curdle the coconut milk.
Step 4: Add the Gelatinizing Agent
If you’re using gelatin powder, sprinkle it over the surface of the warm coconut milk mixture. Let it sit for a minute to bloom (absorb the liquid). Then, whisk it in gently until fully incorporated. If using agar-agar or tapioca starch, you may need to prepare a slurry first. To do this, mix the agar-agar or tapioca starch with a small amount of cold water to form a smooth paste. Then, slowly whisk this paste into the warm coconut milk mixture.
Step 5: Infuse with Flavor (Optional)
If you’re adding vanilla extract, stir it in now. For pandan leaves, add them to the saucepan and let the mixture simmer gently for a few minutes to infuse the flavor. If using pandan essence, add it at this stage as well.
Step 6: Strain the Mixture
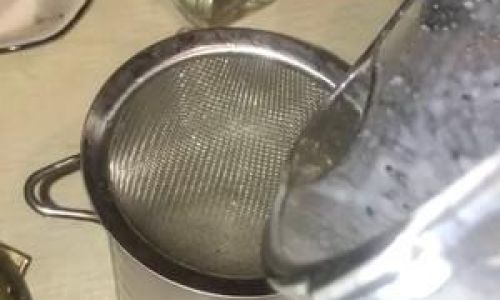
Once the gelatinizing agent is fully dissolved and the mixture is well combined, remove it from the heat. If you’ve used pandan leaves, strain out the leaves at this point using a sieve or strainer. This ensures a smooth jelly without any leaf particles.
Step 7: Pour into Molds
Prepare your molds or containers by lightly greasing them with a bit of oil or lining them with parchment paper to prevent sticking. Pour the coconut jelly mixture into the molds, filling them to your desired level. If you want to create layered jelly, pour a thin layer into the molds first, let it set, and then pour in another layer of a different color or flavor.
Step 8: Set the Jelly
Allow the jelly to cool to room temperature. Once it’s cool, cover the molds with plastic wrap or transfer them to a container with a lid to prevent any surface from drying out. Place the molds in the refrigerator and let the jelly set for at least 4 hours, or overnight for firmer jelly.

Step 9: Serve Your Coconut Jelly
Once the jelly is fully set, you can unmold it by running a knife around the edges and inverting the mold onto a serving plate. If using parchment paper, simply lift the paper out and place the jelly on a plate. If you’ve poured the jelly into individual serving dishes, you can serve them directly from the dish.
Serving Suggestions
Coconut jelly is versatile and can be enjoyed in various ways. Here are some serving suggestions to inspire you:
- Toppings and Garnishes: Add fresh fruit, toasted coconut flakes, or a drizzle of honey or caramel sauce.
- Dessert Combinations: Serve coconut jelly with mango puree, passion fruit sauce, or a scoop of vanilla ice cream for a tropical twist.
- Drinks: Blend coconut jelly with ice and a splash of coconut water or milk for a refreshing smoothie.
- Dessert Platter: Arrange coconut jelly alongside other desserts like macaroons, mango slices, and sticky rice for a visually appealing and delicious dessert platter.
Troubleshooting Tips
Even with the best intentions, things can sometimes go awry in the kitchen. Here are some troubleshooting tips to help you avoid common pitfalls:
- Lumpy Jelly: If your jelly turns lumpy, it’s likely due to the gelatinizing agent not being fully dissolved. Ensure you whisk it in thoroughly and avoid overheating the mixture.
- Weak Jelly: If your jelly is too soft, it may be because you used too little gelatinizing agent or didn’t let it set long enough. Increase the amount of agent slightly next time and ensure it sets for the recommended time.
- Curdled Coconut Milk: If your coconut milk curdles, it’s usually because the mixture was too hot. Always heat gently and stir constantly to prevent curdling.
Storage Instructions
Store any leftover coconut jelly in an airtight container in the refrigerator. It will keep for up to 5 days. To reheat, place the jelly in a microwave-safe dish and warm it on low power until just softened. Alternatively, you can let it sit at room temperature for a few minutes to soften slightly before serving.
Conclusion
Making coconut jelly at home is a rewarding experience that allows you to customize the flavors and textures to your liking. With this comprehensive guide, you’ll have all the knowledge and skills necessary to create delicious, creamy coconut jelly that’s sure to impress. Whether you’re serving it at a summer gathering or enjoying it as a personal treat, coconut jelly is a delightful addition to your dessert repertoire. Happy cooking!


0 comments