Table of content
Rosehip wine, a delightful beverage with a unique blend of tartness and sweetness, has been cherished for centuries for its flavor and potential health benefits. Derived from the vibrant, rose-colored fruits of the wild rose plant (Rosa canina), this wine offers a refreshing alternative to traditional grape-based varieties. Crafting rosehip wine at home is a rewarding process that combines the simplicity of foraging with the artistry of winemaking. This guide will walk you through every step, from selecting the finest rosehips to bottling your finished creation, ensuring a result that delights the palate and impresses guests.
Understanding Rosehips: Nature’s Hidden Gem
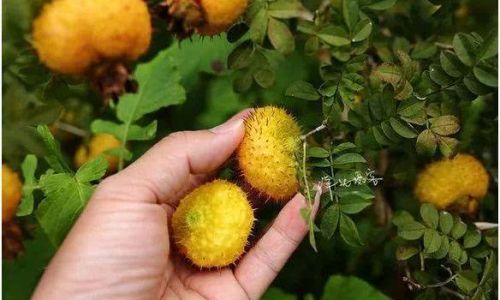
Before diving into the winemaking process, it’s essential to appreciate the star ingredient: rosehips. These small, red-to-orange fruits are the seed pods of wild roses, left behind after the petals fall. Rich in vitamin C, antioxidants, and natural sugars, rosehips have been used in teas, jams, and medicinal remedies for generations. Their bright, citrusy flavor profile makes them an ideal candidate for fermentation, yielding a wine that is both aromatic and complex.
Gathering Your Ingredients and Equipment
To embark on your rosehip wine journey, you’ll need the following:
Ingredients
- Rosehips (4–5 pounds): Freshly harvested or dried. Ensure they are ripe, firm, and free from mold.
- Sugar (2–3 pounds): Granulated white sugar works best for consistent fermentation.
- Water (1 gallon): Use filtered or spring water to avoid chlorine, which can hinder yeast activity.
- Wine Yeast (1 packet): Choose a strain suited for fruit wines, such as Lalvin EC-1118 or Red Star Premier Cuvée.
- Yeast Nutrient (1 tsp): Enhances yeast health and fermentation efficiency.
- Citric Acid (1 tsp): Balances acidity and preserves color.
- Pectic Enzyme (1/4 tsp): Breaks down pectin, preventing haziness in the final wine.
Equipment
- Primary Fermenter (1-gallon bucket): Food-grade plastic with a lid.
- Secondary Fermenter (1-gallon glass carboy): For aging.
- Airlock and Bung: To allow CO₂ escape while blocking contaminants.
- Hydrometer: Measures sugar content and alcohol potential.
- Siphon Hose: For transferring wine without disturbing sediment.
- Bottles and Corks: Use clean, sterilized wine bottles and corks.
Step 1: Harvesting and Preparing Rosehips
The quality of your wine begins with the rosehips. Harvest them in late summer or early autumn when they are plump and fully colored. Avoid stems and leaves, as they can impart bitterness.
- Cleaning: Rinse rosehips under cool water to remove dirt and debris.
- De-seeding: Cut each rosehip in half and scrape out the tiny, hair-like seeds using a spoon. While time-consuming, this step is crucial—the seeds contain irritating hairs that can cause throat discomfort if left intact.
- Crushing: Lightly crush the rosehips using a mortar and pestle or a food processor. This releases juices and flavors.
Step 2: Creating the Must (Unfermented Wine Base)
The must is the mixture of rosehips, water, and sugar that will ferment into wine.
-
Boiling the Rosehips:
- In a large pot, combine crushed rosehips with 1 gallon of water.
- Bring to a gentle boil, then reduce heat and simmer for 30 minutes. This extracts color, flavor, and natural sugars.
- Strain the liquid through a fine-mesh sieve or cheesecloth, pressing gently to extract as much juice as possible. Discard the solids.
-
Adding Sugar and Acid:
- Return the strained liquid to the pot.
- Stir in sugar until fully dissolved. The sugar provides food for the yeast and determines alcohol content.
- Add citric acid and pectic enzyme, stirring thoroughly.
-
Cooling the Must:
Allow the mixture to cool to room temperature (around 70°F/21°C). Yeast is sensitive to heat, and adding it to warm liquid can kill it.
Step 3: Pitching the Yeast and Primary Fermentation
Primary fermentation is where the magic happens—yeast converts sugar into alcohol and CO₂.
-
Activating the Yeast:
- In a small bowl, sprinkle the yeast packet over 1/4 cup of warm water (100–110°F/38–43°C). Let it sit for 10–15 minutes until frothy.
- Add the activated yeast to the cooled must, along with yeast nutrient. Stir gently.
-
Fermentation Setup:
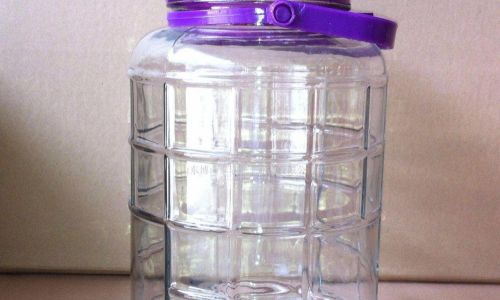
- Pour the must into your primary fermenter, leaving 1–2 inches of headspace to prevent overflow.
- Seal the bucket with the lid and airlock. Fill the airlock halfway with water or vodka to create a sterile seal.
-
Monitoring Fermentation:
- Store the fermenter in a dark, cool place (65–75°F/18–24°C) for 7–10 days.
- Bubbles will rise through the airlock, and a frothy layer (krausen) may form on the surface. This is normal.
- Use a hydrometer to track progress. When the specific gravity drops below 1.010, primary fermentation is complete.
Step 4: Racking and Secondary Fermentation
Racking transfers the wine off the sediment (lees) to clarify it and halt aggressive fermentation.
-
Siphoning the Wine:
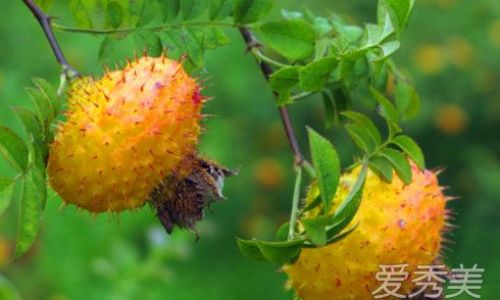
- Carefully siphon the wine into a sterilized glass carboy, avoiding the sediment at the bottom.
- Attach a fresh airlock and bung.
-
Aging:
- Store the carboy in a cool, dark place for 3–6 months. This mellows flavors and enhances complexity.
- Rack the wine every 4–6 weeks to remove additional sediment.
Step 5: Clarifying and Stabilizing
Before bottling, ensure your wine is clear and stable.
-
Finings (Optional):
- Add bentonite or sparkalloid according to package instructions to help settle remaining particles.
- Stir gently and let sit for 1–2 weeks before racking again.
-
Stabilizing:
- If sweetening the wine, add potassium sorbate (1/2 tsp per gallon) to prevent re-fermentation.
- Adjust sweetness to taste, but remember residual sugar will increase alcohol content.
Step 6: Bottling and Aging
The final step transforms your creation into a polished product.
-
Preparing Bottles:
- Sterilize bottles and corks using a sulfite solution or a dishwasher’s sanitizing cycle.
- Fill bottles using a siphon, leaving 1/2 inch of headspace.
-
Corking:
Insert corks firmly using a corker. For long-term aging, consider waxing the corks or using shrink capsules.
-
Final Aging:
- Store bottles upright for 3–5 days to allow corks to seal, then lay them horizontally.
- Age for 6–12 months for optimal flavor development. Rosehip wine improves with time, so resist the urge to drink it too young!
Troubleshooting Common Issues
- Stuck Fermentation: If fermentation halts prematurely, gently warm the must and add more yeast nutrient.
- Off-Flavors: Musty aromas may indicate contamination—sanitize equipment thoroughly.
- Hazy Wine: Prolonged aging or additional finings can clarify cloudiness.
Creative Variations
Experiment with flavors to customize your rosehip wine:
- Spiced Rosehip Wine: Add cinnamon sticks, cloves, or vanilla beans during secondary fermentation.
- Rosehip-Berry Blend: Combine with blackberries or raspberries for a fruitier profile.
- Dry vs. Sweet: Adjust sugar levels to create a crisp, dry wine or a lush dessert wine.
Conclusion
Crafting rosehip wine is a labor of love that rewards patience and attention to detail. From foraging wild rosehips to savoring the finished product, each step connects you to a timeless tradition of artisanal winemaking. Whether enjoyed chilled on a summer evening or paired with hearty stews in winter, your homemade rosehip wine will be a testament to the beauty of nature’s bounty. So raise a glass to creativity, experimentation, and the joy of sharing a drink made by your own hands. Cheers!


0 comments