Introduction
Brazilian cherry wine, also known as pitanga wine, is a unique and flavorful beverage that captures the essence of the tropics. Made from the vibrant, tart fruits of the Eugenia uniflora tree, this wine offers a balance of sweetness and acidity, with hints of resin and spice. Crafting Brazilian cherry wine at home is a rewarding process that combines the art of fermentation with the bounty of nature. Whether you’re a seasoned winemaker or a curious beginner, this guide will walk you through every step, from selecting the freshest cherries to bottling your finished creation. Let’s dive into the world of Brazilian cherry wine-making and unlock the secrets to a truly exceptional homemade libation.
Understanding Brazilian Cherries
Before embarking on your wine-making journey, it’s essential to familiarize yourself with the star ingredient: the Brazilian cherry (pitanga). Native to South America, this small, round fruit grows on evergreen shrubs or trees and boasts a bright red to deep purple hue when ripe. The flavor profile is distinct—tangy, slightly astringent, and reminiscent of cherries with a hint of pine. When selecting cherries for wine, prioritize ripe, unblemished fruits. Overripe cherries may impart a fermented or mushy taste, while underripe ones could result in excessively tart wine.
Ingredients and Equipment
To craft Brazilian cherry wine, you’ll need the following ingredients and tools:
Ingredients
- 3–4 pounds of fresh Brazilian cherries (ripe, firm, and free of mold)
- 2–3 pounds of granulated sugar (adjust to taste)
- 1 gallon of filtered water (chlorine-free)
- 1 packet of wine yeast (e.g., Lalvin EC-1118 or Red Star Premier Cuvée)
- 1 teaspoon of yeast nutrient (optional, but recommended for robust fermentation)
- 1/2 teaspoon of pectic enzyme (to clarify the wine)
- 1–2 campden tablets (to sterilize the must, if desired)
Equipment
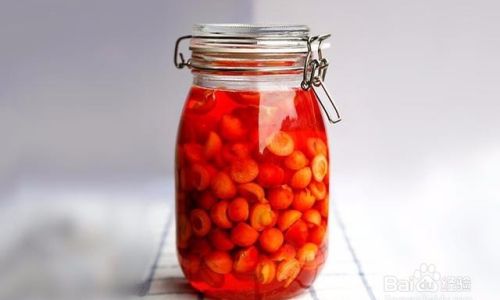
- Large stainless steel or food-grade plastic bucket (primary fermenter)
- Glass carboy or secondary fermentation vessel (1–5 gallons, depending on batch size)
- Airlock and bung
- Siphon hose
- Hydrometer (to measure sugar content and alcohol potential)
- Cheesecloth or fine-mesh strainer
- Funnel
- Bottles with corks or screw caps (dark glass recommended to protect from light)
- Sanitizing solution (e.g., Star San or iodophor)
Step 1: Harvesting and Preparing the Cherries
The foundation of great wine lies in the quality of the fruit. If you’re foraging wild Brazilian cherries, aim to harvest them during the peak of their season (typically late spring to early summer in tropical regions). For store-bought or cultivated cherries, ensure they’re organic and free of pesticides.
- Wash the cherries: Rinse them gently under cool water to remove dirt, debris, and insects. Avoid scrubbing too vigorously, as this may bruise the skin.
- Remove stems and leaves: Pinch off any green stems or leaves attached to the fruit.
- Crush the cherries: Using a clean potato masher or your hands, gently crush the cherries in the primary fermenter. This releases the juice and exposes the flesh to yeast. Note: Some winemakers prefer to freeze cherries before crushing to break down cell walls and enhance juice extraction.
Step 2: Preparing the Must
The term “must” refers to the mixture of fruit, sugar, water, and additives before fermentation begins.
- Add water and sugar: Combine the crushed cherries with 1 gallon of filtered water in the primary fermenter. Stir in 2 pounds of sugar, adjusting to taste. A hydrometer reading between 1.090–1.100 specific gravity (SG) is ideal for a dry wine; higher SG (e.g., 1.120) will yield a sweeter result.
- Adjust acidity: Brazilian cherries are naturally tart, but if desired, test the pH with strips (aim for 3.2–3.5) and add citric acid or tartaric acid to balance.
- Add pectic enzyme: Mix 1/2 teaspoon into the must to break down pectins, which improves clarity and reduces haze.
- Optional: Campden tablets: If you’re concerned about wild bacteria or yeast, crush one campden tablet per gallon and stir into the must. Wait 24 hours before adding yeast to allow sulfites to dissipate.
Step 3: Initiating Fermentation
Fermentation is the magical process where yeast converts sugar into alcohol and carbon dioxide.
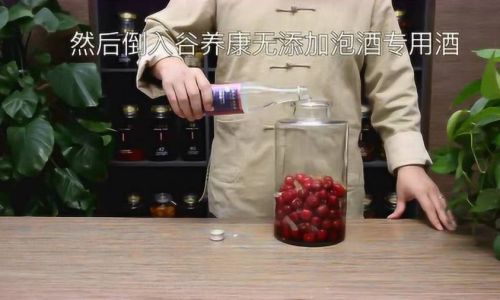
- Rehydrate the yeast: In a small bowl, sprinkle the yeast packet over 1/2 cup of warm water (104°F/40°C). Let it sit for 10–15 minutes until frothy.
- Pitch the yeast: Pour the activated yeast into the must, along with yeast nutrient if using. Stir vigorously to aerate the mixture and distribute the yeast.
- Cover the fermenter: Secure a clean cloth or lid over the bucket to keep pests out while allowing gas to escape.
Step 4: Primary Fermentation
During primary fermentation, which lasts 7–14 days, the yeast will consume sugars and produce alcohol.
- Monitor activity: Bubbles in the airlock and a frothy layer (krausen) on the surface indicate active fermentation. Stir the must daily with a sanitized spoon to prevent mold and integrate the cap (pulp layer).
- Check gravity: Use a hydrometer daily. When the SG stabilizes (e.g., drops below 1.010), primary fermentation is complete.
Step 5: Racking and Secondary Fermentation
Racking (siphoning) the wine into a secondary vessel clarifies it and allows flavors to mellow.
- Siphon the wine: Gently transfer the liquid into a sanitized carboy, leaving sediment (lees) behind. Avoid splashing to minimize oxidation.
- Attach the airlock: Insert the bung and airlock filled with sanitizer solution to prevent oxygen exposure.
- Aging: Store the carboy in a cool, dark place (60–70°F/15–21°C) for 3–6 months. Longer aging deepens complexity.
Step 6: Clarifying and Stabilizing
After aging, the wine may still appear cloudy. Clarifying agents help achieve brilliance.
- Add finings: Mix 1 teaspoon of bentonite (clay-based) or gelatin per gallon, stir gently, and wait 1–2 weeks for particles to settle.
- Rack again: Siphon the wine into a fresh carboy, leaving sediment behind.
- Stabilize: If sweetening the wine, add potassium sorbate (1/2 teaspoon per gallon) to prevent re-fermentation.
Step 7: Bottling
Bottling is the final step before enjoying your creation.
- Prepare bottles: Sanitize dark glass bottles (to protect from light) and corks or screw caps.
- Siphon the wine: Fill each bottle, leaving 1/2 inch of headspace. Cork or cap immediately.
- Label and age: Store bottles upright for 2–3 days to allow corks to seal, then lay them horizontally. Age for 6–12 months for optimal flavor.
Serving Suggestions
Brazilian cherry wine pairs beautifully with spicy dishes, aged cheeses, or dark chocolate. Serve chilled (55–60°F/13–16°C) to highlight its vibrant acidity and fruitiness.
Tips for Success
- Sanitize everything: Even microscopic contaminants can ruin a batch.
- Control temperature: Fluctuations can stall fermentation or create off-flavors.
- Taste regularly: Adjust sweetness or acidity during racking if needed.
- Be patient: Aging is key to mellowing harsh edges.
Troubleshooting Common Issues
- Stuck fermentation: If yeast activity halts, check temperature, nutrients, and sugar levels.
- Off-odors: Rotten egg smells indicate hydrogen sulfide; aerate gently or add copper sulfate (carefully).
- Cloudiness: Ensure proper racking and clarify with finings.
Conclusion
Crafting Brazilian cherry wine is a labor of love that rewards patience and attention to detail. From the first crush of cherries to the final sip of aged wine, each step contributes to a beverage that’s as unique as its origin. Whether you’re preserving the taste of summer or experimenting with tropical flavors, this guide equips you with the knowledge to create a wine that’s both refreshing and profound. So raise a glass to tradition, innovation, and the simple joy of turning fruit into gold. Cheers!
0 comments