Table of content
Introduction
Mulberries, scientifically known as Morus species, are a delightful and nutritious fruit that grows on mulberry trees. These fruits are rich in antioxidants, vitamins, and minerals, making them a favorite among health-conscious individuals. However, mulberries are highly perishable and can spoil quickly if not stored properly. This article delves into the various methods of preserving mulberries, ensuring that you can enjoy their sweet and tangy flavor throughout the year.
Understanding Mulberry Characteristics
Before diving into preservation techniques, it’s crucial to understand the unique characteristics of mulberries. These fruits are typically soft, juicy, and prone to bruising. Their short shelf life, often just a few days under ambient conditions, necessitates prompt and careful handling to prevent spoilage.
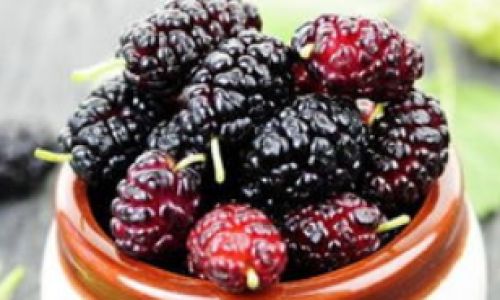
Mulberries come in various colors, including white, red, and black, with each variety offering a slightly different taste profile. Black mulberries, often considered the sweetest, are particularly popular for preservation due to their rich flavor and high nutritional content.
Importance of Proper Preservation
Proper preservation of mulberries not only extends their shelf life but also retains their nutritional value and flavor. By employing effective preservation methods, you can enjoy mulberries in various forms, such as jams, jellies, dried fruits, and even mulberry wine.
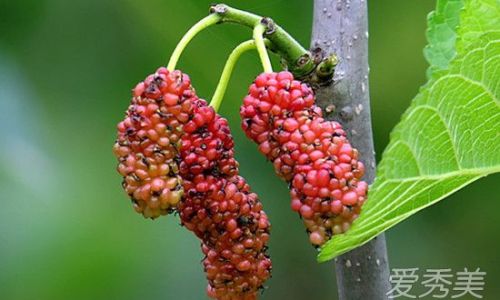
Moreover, preserving mulberries can help reduce food waste, a significant issue globally. By transforming these perishable fruits into long-lasting products, you contribute to environmental sustainability and resource conservation.
Basic Preservation Principles
Before exploring specific preservation methods, it’s essential to understand some basic principles that apply to all techniques:
-
Cleanliness: Ensure all surfaces, utensils, and containers are thoroughly cleaned and sanitized to prevent contamination.
-
Timeliness: Handle mulberries as soon as possible after harvesting to minimize exposure to air and bacteria.
-
Temperature Control: Store mulberries at appropriate temperatures to slow down spoilage. For example, refrigerate fresh mulberries or freeze them for longer storage.
-
Packaging: Use airtight containers or vacuum-sealed bags to prevent oxygen exposure, which accelerates spoilage.
Now, let’s delve into the various methods of preserving mulberries.
Freezing Mulberries
Freezing is one of the simplest and most effective ways to preserve mulberries. This method retains the fruit’s natural flavor and texture, allowing you to enjoy them almost as if they were freshly picked.
Steps for Freezing Mulberries
-
Selection and Preparation: Choose ripe, firm mulberries without bruises or mold. Rinse them gently under cold running water and pat them dry using a clean kitchen towel or paper towels.
-
Flash Freezing: Spread the mulberries in a single layer on a baking sheet lined with parchment paper. Place the sheet in the freezer for about 2-4 hours until the mulberries are frozen solid. This step prevents the fruits from clumping together when stored in a freezer bag.
-
Storage: Once frozen, transfer the mulberries to an airtight freezer bag or container, removing as much excess air as possible. Label the bag with the date and return it to the freezer. Properly frozen mulberries can last up to a year.
Tips for Freezing Mulberries
- Avoid washing mulberries until you’re ready to freeze them, as excess moisture can cause ice crystals to form, affecting texture.
- For easier handling, you can freeze mulberries in small portions or single-serve bags.
Drying Mulberries
Dried mulberries are a convenient and nutritious snack that can be enjoyed year-round. Drying concentrates the fruit’s natural sugars, making them sweeter and more flavorful.
Steps for Drying Mulberries
-
Preparation: Select ripe, firm mulberries and rinse them thoroughly under cold water. Pat them dry and remove any stems or leaves.
-
Blanching (Optional): Blanching mulberries in boiling water for a brief period (30-60 seconds) and then plunging them into ice water can help preserve color and texture. However, this step is optional and may not be necessary for all varieties.
-
Drying: You can dry mulberries using a food dehydrator, oven, or sun-drying method.
- Food Dehydrator: Spread the mulberries in a single layer on the dehydrator trays and set the temperature to around 135°F (57°C). Dry for about 12-24 hours, depending on the humidity and mulberry size.
- Oven: Preheat your oven to its lowest setting, typically around 150°F (65°C). Spread mulberries on baking sheets lined with parchment paper and dry for 8-12 hours, stirring occasionally.
- Sun-Drying: Lay mulberries on clean, mesh trays or screens in a sunny, well-ventilated area. Cover them with cheesecloth or a fine net to protect from insects. Sun-drying can take several days, depending on weather conditions.
-
Storage: Once fully dried, store mulberries in an airtight container in a cool, dark place. They can last for several months. For longer storage, consider vacuum sealing or placing them in a container with a desiccant packet.
Tips for Drying Mulberries
- Ensure mulberries are thoroughly dried to prevent mold and bacteria growth.
- Experiment with different drying methods to find the one that best suits your needs and preferences.
Making Mulberry Jam or Jelly
Transforming mulberries into jam or jelly is a fantastic way to preserve their flavor and enjoy them on toast, yogurt, or pancakes.
Steps for Making Mulberry Jam or Jelly
-
Preparation: Rinse and pat dry ripe mulberries. Remove any stems or leaves.
-
Cooking: In a large pot, combine mulberries with an equal amount of sugar (or a sugar substitute like honey or agave syrup). Add a small amount of lemon juice to enhance flavor and act as a natural preservative. Cook over medium heat, stirring frequently, until the mixture reaches a gel-like consistency. For jelly, you may need to strain out the pulp and seeds using a jelly bag or cheesecloth.
-
Setting Point: To check if the jam or jelly has reached the setting point, spoon a small amount onto a cold plate. Allow it to cool for a minute, then run your finger through the mixture. If it wrinkles and forms a skin, it’s ready.
-
Jarring: Pour the hot jam or jelly into clean, sterile jars, leaving a half-inch headspace. Wipe the jar rims clean, apply lids, and process in a hot water canner for about 10 minutes to ensure sterility. Alternatively, you can store them in the refrigerator for immediate use.
Tips for Making Mulberry Jam or Jelly
- Experiment with different sugar levels to find the sweetness that suits your taste.
- Adding pectin, a natural thickening agent, can help achieve the desired consistency.
- Properly canned jam or jelly can last for up to a year in a cool, dark pantry.
Mulberry Wine Making
For those who enjoy a glass of wine, making mulberry wine is a rewarding preservation method. This process not only preserves the fruit but also transforms it into a delightful and unique beverage.
Steps for Making Mulberry Wine
-
Preparation: Rinse and pat dry mulberries. Remove stems and any imperfect fruits.
-
Crushing: Crush the mulberries using a potato masher or food mill to release their juices.
-
Fermentation: Transfer the crushed mulberries to a fermentation vessel, such as a glass carboy. Add sugar to taste (typically around 1-2 pounds per gallon of mulberry juice). Dissolve a campden tablet in water and add it to kill any wild yeast or bacteria. Let it sit for 24 hours.
-
Pitching Yeast: After 24 hours, add wine yeast to the mixture, following the manufacturer’s instructions. Stir well to distribute the yeast evenly.
-
Primary Fermentation: Cover the vessel with a loose-fitting lid to allow carbon dioxide to escape. Fermentation can last from a few days to a week, depending on temperature and yeast activity. Stir daily to prevent the formation of a cap on the surface.
-
Racking and Secondary Fermentation: Once primary fermentation slows, rack (siphon) the wine into a clean carboy, leaving behind any sediment. Allow it to undergo secondary fermentation for another few weeks to months, depending on desired taste and clarity.
-
Bottling: When fermentation is complete, rack the wine again, this time into clean, sterile bottles. Cork or cap the bottles tightly and store them in a cool, dark place.
Tips for Making Mulberry Wine
- Monitoring fermentation temperature is crucial for optimal yeast activity and flavor development.
- Regular racking helps remove sediment, improving clarity and taste.
- Aging mulberry wine can enhance its complexity and flavor, so consider storing it for several months or even years before enjoying.
Conclusion
Preserving mulberries is a rewarding endeavor that allows you to enjoy their sweet and tangy flavor throughout the year


0 comments