Introduction
Pickling fresh tender garlic is a culinary art that transforms a simple, everyday ingredient into a versatile and flavorful delicacy. Garlic, known for its pungent aroma and sharp taste, undergoes a remarkable transformation when submerged in a brine of vinegar, salt, and spices. The result is a tangy, slightly sweet, and deeply flavorful preserved garlic that can elevate dishes from mundane to extraordinary. Whether you’re a seasoned chef or an enthusiastic home cook, learning how to pickle fresh tender garlic can add a new dimension to your culinary repertoire.
In this comprehensive guide, we’ll explore the intricacies of pickling fresh tender garlic, from selecting the perfect garlic bulbs to crafting a balanced brine and ensuring the pickling process is successful. By the end, you’ll be equipped with the knowledge and skills to create your own jar of delicious, pickled garlic that can be enjoyed throughout the year.
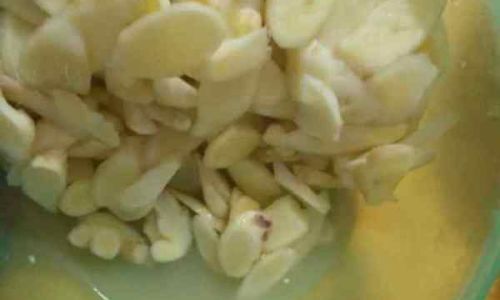
Chapter 1: Selecting the Perfect Fresh Tender Garlic
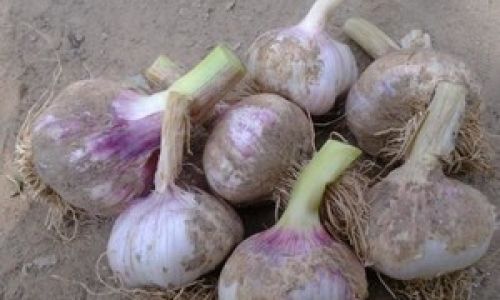
The first step in pickling fresh tender garlic is selecting the right garlic bulbs. The quality of your garlic will directly impact the final taste and texture of your pickled product. Here are some key factors to consider when choosing garlic for pickling:
-
Freshness: Opt for garlic bulbs that are firm, plump, and free of wrinkles or soft spots. Fresh garlic has a stronger, more vibrant flavor and a better texture for pickling.
-
Variety: Different garlic varieties have distinct flavors. For pickling, choose a variety that balances pungency with a hint of sweetness. Common varieties suitable for pickling include hardneck and softneck garlic.
-
Size: While size isn’t a critical factor, larger bulbs tend to have larger cloves, which can be easier to handle and peel. However, smaller bulbs are often more tender and can pickle more quickly.
-
Origin: Garlic grown in regions with cooler climates tends to have a stronger flavor, while garlic from warmer climates may be sweeter. Choose garlic that suits your preferred flavor profile.
Once you’ve selected your garlic bulbs, it’s essential to prepare them properly before pickling. This involves peeling the cloves and ensuring they are free of any dirt or debris.
Chapter 2: Preparing the Garlic for Pickling
Peeling garlic can be a tedious task, but it’s crucial for ensuring that your pickled garlic has an even texture and flavor. Here are a few techniques to make the peeling process more efficient:
-
Smashing and Peeling: Place a garlic clove on a flat surface and press down firmly with the side of a knife blade. This will loosen the skin, making it easier to peel.
-
Microwave Method: Place whole garlic bulbs in a microwave-safe bowl and microwave for about 15-20 seconds. The heat will loosen the skin, allowing you to peel the cloves more easily.
-
Soaking Method: Soak garlic cloves in cold water for about 15 minutes. The skin will become more pliable and easier to remove.
Once the cloves are peeled, inspect them carefully for any imperfections. Remove any damaged or discolored parts to ensure your pickled garlic is of the highest quality.
Chapter 3: Crafting the Perfect Pickling Brine
The brine is the lifeblood of pickled garlic. It not only preserves the garlic but also adds flavor and texture. Here’s a basic recipe for a balanced pickling brine, along with some variations to suit different tastes:
Basic Pickling Brine Recipe
-
Ingredients:
- 1 cup apple cider vinegar or white vinegar
- 1/2 cup water
- 2 tablespoons sugar or honey (optional for sweetness)
- 1 tablespoon salt
- 1 teaspoon whole black peppercorns
- 1 teaspoon whole coriander seeds
- 1 bay leaf
- 1-2 cloves of garlic (for extra garlic flavor, optional)
-
Instructions:
- In a medium saucepan, combine the vinegar, water, sugar (or honey), and salt. Heat until the sugar and salt are fully dissolved.
- Add the peppercorns, coriander seeds, bay leaf, and optional garlic cloves. Allow the mixture to simmer for about 5 minutes to infuse the flavors.
- Remove the saucepan from heat and let the brine cool to room temperature.
Brine Variations
- Herbed Brine: Add a handful of fresh herbs like thyme, rosemary, or dill to the brine for an aromatic twist.
- Spicy Brine: Incorporate red pepper flakes, sliced jalapenos, or a few whole chili peppers for a spicy kick.
- Sweet and Sour Brine: Increase the amount of sugar or honey and add a splash of lemon juice for a balanced sweet-and-sour flavor.
Chapter 4: The Pickling Process
Now that you have your prepared garlic cloves and brine, it’s time to start the pickling process. Here’s a step-by-step guide to ensure success:
-
Sterilize Jars: Start by sterilizing your pickling jars. This can be done by boiling them in water for about 10 minutes or running them through the dishwasher on the sanitize setting.
-
Pack the Garlic: Pack the peeled garlic cloves tightly into the sterilized jars. Make sure there are no air pockets, as this can cause mold or spoilage.
-
Pour in the Brine: Carefully pour the cooled brine over the garlic cloves, ensuring they are fully submerged. If necessary, use a weight like a small glass or a pickling weight to keep the garlic cloves from floating.
-
Seal and Store: Secure the jar lids tightly and store the jars in a cool, dark place. The ideal temperature for pickling is between 65-70°F (18-21°C).
-
Waiting Period: Allow the garlic to pickle for at least 2 weeks before tasting. The longer it sits, the more flavor it will develop. For best results, let it pickle for 3-4 weeks.
Chapter 5: Troubleshooting and Tips for Success
Pickling fresh tender garlic can sometimes present challenges, but with a few tips and troubleshooting techniques, you can ensure a successful outcome:
-
Mold Prevention: If you notice mold forming on the surface of your brine, it’s likely due to air exposure or improper sterilization. Remove any mold with a clean spoon and replace the brine if necessary. Ensure all garlic cloves are fully submerged.
-
Texture Control: If your pickled garlic is too soft or mushy, it may have been overcooked or stored at too high a temperature. Adjust your pickling time and storage conditions accordingly.
-
Flavor Adjustment: If your pickled garlic lacks flavor, consider adding more spices or herbs to the brine or letting it pickle for a longer period.
-
Storage: Once opened, store pickled garlic in the refrigerator to slow down the fermentation process and extend its shelf life.
Chapter 6: Enjoying Your Pickled Garlic
The versatility of pickled garlic makes it a valuable addition to a wide range of dishes. Here are a few ideas for incorporating your homemade pickled garlic into meals:
- Salads: Add a few slices to your favorite salad for a tangy, garlicky kick.
- Sandwiches: Use pickled garlic as a spread on bread or as a topping for sandwiches.
- Marinades and Sauces: Incorporate pickled garlic into marinades for meats or as an ingredient in homemade dressings and dipping sauces.
- Soups and Stews: Add a few cloves to soups and stews for an extra layer of flavor.
- Appetizers: Serve pickled garlic as a side dish or appetizer with crusty bread.
Conclusion
Pickling fresh tender garlic is a rewarding culinary endeavor that yields a delicious, versatile, and long-lasting treat. By following the steps outlined in this guide, you can create your own jar of pickled garlic that will enhance the flavor of countless dishes. Whether you’re a garlic enthusiast or simply looking to add a new dimension to your cooking, pickling fresh tender garlic is a skill worth mastering. Happy pickling!
0 comments