Introduction

Mulberry wine, a delightful and aromatic beverage derived from the fruits of the mulberry tree (Morus alba, Morus nigra, or Morus rubra), offers a unique flavor profile that combines sweetness, tartness, and a subtle hint of earthiness. This ancient drink, which has been enjoyed for centuries across various cultures, not only tantalizes the taste buds but also boasts potential health benefits attributed to the antioxidants and nutrients present in mulberries. In this comprehensive guide, we will delve into the art and science of crafting mulberry wine, from selecting the perfect mulberries to bottling your final product. By following these steps, you can create a batch of mulberry wine that is as visually appealing as it is palate-pleasing.
Chapter 1: Understanding Mulberries and Their Wine-Making Potential
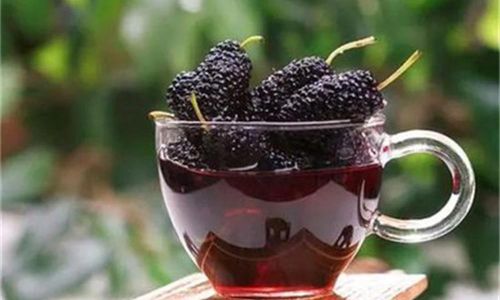
Mulberries are small, drupaceous fruits that grow in clusters on mulberry trees. Depending on the species, they can range in color from white to red to dark purple-black, each variety contributing its unique flavor and color to the wine. Mulberries are rich in vitamins, minerals, antioxidants, and polyphenols, which not only enhance the nutritional profile of the wine but also contribute to its complex taste and aroma.
When choosing mulberries for wine-making, look for firm, fully ripe fruits with a deep, vibrant color. Avoid overripe or moldy berries, as they can spoil the batch. Ideally, pick mulberries fresh from the tree or source them from a reputable supplier known for their quality.
Chapter 2: Equipment and Ingredients
Before embarking on your mulberry wine-making journey, ensure you have the necessary equipment and ingredients. Here’s a comprehensive list:
-
Primary Fermentation Equipment:
- Large, food-grade plastic or stainless steel bucket or fermentation vessel
- Stirring spoon or paddle
- Fine-mesh strainer or cheesecloth
- Hydrometer (to measure specific gravity and monitor fermentation)
- Thermometer (to monitor temperature)
-
Secondary Fermentation and Aging Equipment:
- Carboy or glass jug (for secondary fermentation and aging)
- Airlock and stopper
- Racking cane and tubing (for transferring wine)
-
Bottling Equipment:
- Bottles (preferably dark glass to protect from light)
- Corks, stoppers, or screw caps
- Bottling wand or funnel
- Wine labels and corking tool
-
Ingredients:
- Fresh mulberries (about 4-5 pounds for a standard 1-gallon batch)
- Sugar (about 2-3 pounds, depending on desired sweetness)
- Water (distilled or spring water, non-chlorinated)
- Wine yeast (specifically formulated for fruit wines, such as Montrachet or Lalvin EC-1118)
- Yeast nutrient (optional, but recommended for healthier fermentation)
- Pectic enzyme (to break down pectin and improve juice clarity)
- Campden tablets (to sterilize equipment and kill wild yeasts and bacteria)
- Acid blend (optional, to adjust acidity if needed)
Chapter 3: Preparing the Mulberries and Equipment
-
Sanitization: Begin by sanitizing all equipment using a solution of water and Campden tablets. Rinse thoroughly with clean water to remove any traces of the sanitizer.
-
Sorting and Crushing the Mulberries: Sort through the mulberries, removing any stems, leaves, or imperfect fruits. Crush the mulberries using a potato masher, food processor, or your hands. Crushing helps release the juices and start the fermentation process.
-
Measuring Sugar and Water: In a separate container, mix the sugar with enough water to dissolve it completely. The amount of sugar will depend on your personal preference for sweetness and the natural sugar content of the mulberries.
Chapter 4: Primary Fermentation
-
Mixing Ingredients: Combine the crushed mulberries, sugar-water mixture, and any additional water needed to reach your desired batch size (typically 1 gallon) in your primary fermentation vessel. Stir well to ensure even distribution of sugars and mulberry pulp.
-
Taking Initial Measurements: Use the hydrometer to measure the initial specific gravity of the mixture. This will help you determine the potential alcohol content of your wine.
-
Adding Yeast and Nutrients: Sprinkle the pectic enzyme and yeast nutrient over the surface of the must (the mixture of fruit, sugar, and water). Allow a few minutes for the enzymes and nutrients to dissolve before adding the yeast. Activate the yeast according to the manufacturer’s instructions, then gently stir it into the must.
-
Covering and Fermenting: Cover the fermentation vessel with a fine-mesh strainer or cheesecloth secured with a rubber band. This allows gases to escape while preventing contaminants from entering. Place the vessel in a cool, dark place where temperatures remain between 65°F and 75°F (18°C to 24°C).
-
Monitoring Fermentation: Daily stirring and monitoring with the hydrometer are crucial during primary fermentation. Stirring helps distribute nutrients and oxygen, which are essential for yeast health. The specific gravity should drop over time, indicating that fermentation is progressing.
Chapter 5: Racking and Secondary Fermentation
-
Racking Off: Once primary fermentation has slowed significantly (usually after about a week), it’s time to rack the wine. Use the racking cane and tubing to transfer the clearer liquid (the wine) from the primary vessel into a clean carboy, leaving behind the sediment (lees).
-
Adding Sulfur: To prevent oxidation and the growth of unwanted microorganisms, add a small amount of sulfur dioxide (using Campden tablets) to the wine before sealing the carboy with an airlock and stopper.
-
Secondary Fermentation: Allow the wine to continue fermenting in the carboy for another 2-4 weeks, monitoring occasionally to ensure no unusual activity occurs. The airlock should bubble intermittently, indicating ongoing fermentation.
Chapter 6: Aging and Clarification
-
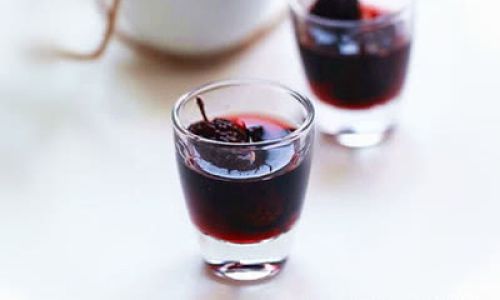
Bulk Aging: After secondary fermentation, transfer the wine back to a clean carboy (if necessary) for bulk aging. This period, which can last from 3 to 12 months, allows the wine to develop complexity and mellow flavors. Store the carboy in a cool, dark place.
-
Clarification: During aging, the wine may become clearer naturally. However, you can also use clarifying agents such as bentonite or gelatin to speed up the process. Follow the manufacturer’s instructions for adding these agents.
-
Racking Again: Once the wine has cleared, rack it off into another clean carboy, leaving behind any remaining sediment.
Chapter 7: Bottling and Final Touches
-
Final Adjustments: Taste the wine and make any final adjustments to sweetness, acidity, or tannin levels. Adding a small amount of sugar or acid blend can balance the wine’s profile.
-
Stabilizing and Sterilizing: To prevent further fermentation in the bottles, add potassium sorbate as a stabilizer. Also, add another dose of sulfur dioxide to sterilize the wine.
-
Bottling: Use the bottling wand or funnel to transfer the wine into clean, dark glass bottles. Fill each bottle to the neck, then insert a cork, stopper, or screw cap.
-
Labeling and Storing: Label the bottles with your chosen design and store them upright in a cool, dark place. Allow the wine to age further in the bottle if desired, though it is usually ready to drink within a few months.
Conclusion
Crafting mulberry wine is a rewarding endeavor that combines the artistry of wine-making with the joy of working with natural ingredients. By following the steps outlined in this guide, you can create a batch of mulberry wine that is not only delicious but also a testament to your patience and creativity. Enjoy the process, savor the results, and share your homemade mulberry wine with friends and family who appreciate the finer points of fine wine. Happy wine-making!

0 comments