Introduction
Mulberries, often overlooked in the shadow of their more popular fruit counterparts like grapes and strawberries, hold a unique charm and flavor that is perfectly suited for creating delightful homemade wines. Among the various ways to enjoy mulberries, crafting sweet mulberry wine stands out as a rewarding endeavor for both hobbyists and seasoned winemakers alike. This guide will walk you through the entire process of making sweet mulberry wine, from selecting the right mulberries to bottling your final product. By following these steps, you’ll be able to enjoy a rich, fruity, and sweet mulberry wine that captures the essence of the fruit.
Section 1: Understanding Mulberries and Wine Making Basics
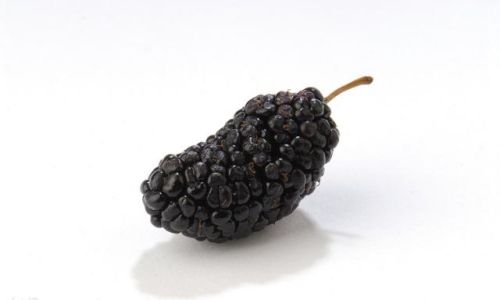
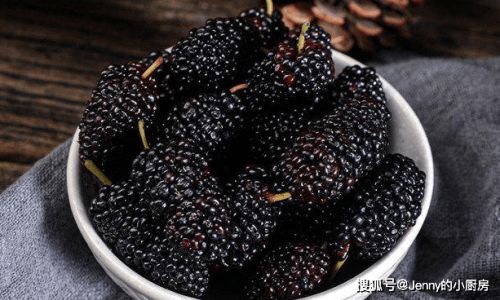
Before diving into the specifics of making mulberry wine, it’s essential to have a basic understanding of mulberries and the wine-making process. Mulberries (Morus nigra, Morus alba, or Morus rubra) are the edible fruits of mulberry trees, native to warm temperate regions of Asia, Africa, and Europe. They vary in color from dark purple to red, with a slightly tart yet sweet flavor that makes them ideal for wine production.

Wine making, in its simplest form, involves fermenting fruit juice with yeast to convert sugars into alcohol and carbon dioxide. The sweetness of the wine can be controlled by adjusting the amount of sugar added before fermentation, the type of yeast used, and the duration of fermentation. For sweet mulberry wine, careful management of these factors is crucial.
Section 2: Gathering and Preparing the Mulberries
Step 1: Selecting the Mulberries
Choose mulberries that are fully ripe, firm, and free from blemishes or mold. The ripest mulberries will have the deepest color and the sweetest flavor, contributing to a better-tasting wine. If possible, pick mulberries from a tree that has not been sprayed with pesticides, or source organic mulberries from a trusted supplier.
Step 2: Cleaning the Mulberries
Gently rinse the mulberries under cold running water to remove any dirt or debris. Avoid soaking them, as this can lead to the absorption of unwanted water and potential loss of flavor. Pat the mulberries dry using a clean kitchen towel or let them air-dry on a paper towel-lined tray.
Step 3: Removing Stems and Imperfections
Carefully remove the stems and any leaves or imperfect fruit parts. This ensures a smoother texture and cleaner flavor in the final wine.
Section 3: Preparing the Must (Fruit Juice)
Step 4: Crushing the Mulberries
Crush the mulberries using a potato masher, food processor, or blender until they form a pulpy mixture. Crushing helps to release the juices and natural sugars within the fruit, which are essential for fermentation.
Step 5: Measuring Sugar Content
Use a hydrometer to measure the specific gravity (SG) of the mulberry pulp, which indicates its sugar content. The initial SG will determine how much sugar, if any, needs to be added to achieve the desired sweetness level in the final wine. For sweet mulberry wine, aim for an initial SG between 1.080 and 1.100.
Step 6: Adjusting Sugar Levels

If the initial SG is lower than desired, calculate the amount of sugar needed to reach the target SG. Use granulated sugar, dissolving it in a small amount of boiling water before adding it to the mulberry pulp to avoid localized crystallization. Stir well to ensure even distribution.
Section 4: Adding Yeast and Nutrients
Step 7: Selecting and Preparing Yeast
Choose a wine yeast strain that is suitable for sweet wines, such as those that produce low to moderate alcohol levels and have good fruit aroma retention. Activate the yeast by sprinkling it over a small amount of lukewarm water (around 100°F or 38°C) containing a pinch of sugar. Let it sit for about 15 minutes until it becomes frothy.
Step 8: Adding Yeast and Nutrients
Pour the activated yeast into the mulberry must, stirring gently to distribute it evenly. Add yeast nutrients, such as diammonium phosphate (DAP) and yeast hulls, to provide essential vitamins and minerals that support healthy yeast growth and fermentation.
Section 5: Fermentation
Step 9: Transferring to a Fermentation Vessel
Pour the mulberry must into a clean, sanitized fermentation vessel, such as a glass carboy or food-grade plastic bucket. Leave some headspace to allow for the formation of foam (krausen) during fermentation.
Step 10: Monitoring Fermentation
Cover the vessel with a loose-fitting lid or fermentation lock to allow carbon dioxide to escape while preventing contaminants from entering. Monitor the fermentation daily by checking the specific gravity with a hydrometer. Record these readings to track the progress of sugar conversion to alcohol.
Step 11: Racking and Secondary Fermentation
Once the fermentation slows down (indicated by a stable specific gravity reading for a few days), rack (siphon) the wine off the sediment into a clean secondary fermentation vessel. This process, known as racking, helps to clarify the wine by separating it from yeast cells and other solids. Allow the wine to continue fermenting, if necessary, until it reaches the desired dryness or sweetness level.
Section 6: Aging and Bottling

Step 12: Aging
Transfer the wine to clean, sanitized oak barrels, carboys, or bottles for aging. Oak aging can add complexity and depth to the wine through the extraction of tannins and vanilla flavors. Alternatively, use neutral containers for a cleaner, fruitier profile. Age the wine for at least 6 months to a year, allowing it to develop its full flavor potential.
Step 13: Bottling
When the wine has aged sufficiently and reached the desired taste profile, prepare for bottling. Rack the wine again to remove any remaining sediment. Use a bottling wand and clean, sanitized bottles to fill them, leaving a small headspace to allow for expansion. Secure the bottles with corks, screw caps, or other suitable closures.
Section 7: Serving and Enjoying Your Sweet Mulberry Wine
Step 14: Allowing the Wine to Mature
Store the bottled wine in a cool, dark place for at least a few weeks to allow any remaining yeast and sediments to settle. For best results, age the wine for several months or even years before serving.
Step 15: Serving Your Sweet Mulberry Wine
Chill the wine slightly before serving to enhance its flavors. Pour into clean wine glasses and enjoy its deep purple hue, fruity aroma, and sweet, balanced taste. Pair it with light desserts, cheeses, or enjoy it on its own as a refreshing beverage.
Conclusion
Making sweet mulberry wine is a rewarding endeavor that combines the joy of working with fresh fruit, the art of fermentation, and the patience of aging. By following this guide, you’ll be able to create a unique and delightful wine that captures the essence of mulberries, offering a sweet, fruity, and aromatic experience. Whether you’re a seasoned winemaker or a beginner, the process of crafting your own mulberry wine is sure to be both fulfilling and enjoyable. Happy wine making!


0 comments