Introduction
Mulberries, known scientifically as Morus species, are a delightful fruit that grows on mulberry trees. Their sweet, juicy flavor and vibrant purple hue make them a favorite among fruit enthusiasts. However, mulberries are highly perishable and can spoil quickly if not stored properly. This guide delves into the various methods of preserving mulberries to help you enjoy their taste and nutritional benefits for longer periods. From freezing and drying to canning and pickling, we’ll explore each technique in detail, ensuring you can make the most of your mulberry harvest.
Understanding Mulberry Storage Basics
Before diving into preservation methods, it’s crucial to understand the basics of mulberry storage. Mulberries are highly sensitive to temperature and moisture changes, which can accelerate their spoilage. Here are some general guidelines to keep in mind:
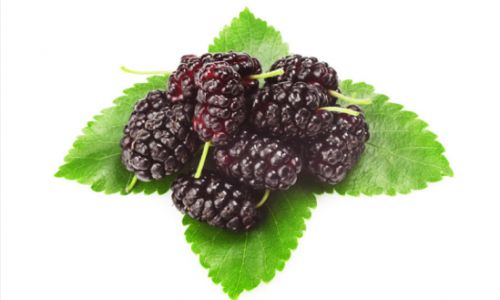
- Harvesting Timing: Pick mulberries when they are fully ripe but still firm. Overripe fruits are more susceptible to bruising and decay.
- Handling with Care: Handle mulberries gently to avoid crushing them. Use soft baskets or containers lined with paper towels to cushion the fruit.
- Immediate Cooling: After harvesting, refrigerate mulberries as soon as possible to slow down ripening and bacterial growth.
- Inspect Regularly: Check stored mulberries regularly for signs of mold or spoilage. Remove any affected fruit immediately to prevent the spread of contamination.
Freezing Mulberries
Freezing is one of the simplest and most effective ways to preserve mulberries. This method retains the fruit’s natural flavor and texture, allowing you to enjoy them throughout the year. Here’s how to freeze mulberries:
- Preparation: Rinse mulberries under cold running water and pat them dry using a clean kitchen towel or paper towels. Ensure they are completely dry to prevent freezer burn.
- Flash Freezing: Spread the mulberries in a single layer on a baking sheet lined with parchment paper. Place the sheet in the freezer for about 2-3 hours until the mulberries are frozen solid. This step prevents the fruit from clumping together when stored in containers.
- Storage: Once frozen, transfer the mulberries to airtight freezer bags or containers. Label the bags with the date and quantity for easy identification.
- Usage: When ready to use, thaw the mulberries in the refrigerator overnight or place them in a bowl of cold water for about 30 minutes. They can also be used directly from frozen in smoothies, baked goods, or yogurt.
Drying Mulberries
Dried mulberries offer a concentrated sweetness and chewy texture, making them an excellent snack or cooking ingredient. Drying mulberries can be done using a food dehydrator, oven, or even the sun. Here’s a step-by-step guide:
- Preparation: Wash and pat the mulberries dry. Remove any stems or leaves.
- Dehydrator Method: Preheat your food dehydrator to its lowest setting, typically around 135°F (57°C). Spread the mulberries in a single layer on the dehydrator trays. Dehydrate for about 12-24 hours, depending on the humidity and the size of the mulberries. Check every few hours to ensure they are not over-dried.
- Oven Method: Preheat your oven to its lowest setting, usually around 150°F (65°C). Spread the mulberries on baking sheets lined with parchment paper. Prop the oven door open slightly with a wooden spoon to allow moisture to escape. Dry for about 6-12 hours, stirring occasionally.
- Sun-Drying Method: Spread the mulberries on clean, mesh screens or trays. Place them in a sunny, well-ventilated area. Turn the mulberries every few hours to ensure even drying. Sun-drying can take several days, depending on the weather conditions.
- Storage: Once fully dried, store the mulberries in airtight containers or glass jars. Place them in a cool, dark place or refrigerate for longer storage. Dried mulberries can last for several months if stored properly.
Canning Mulberries
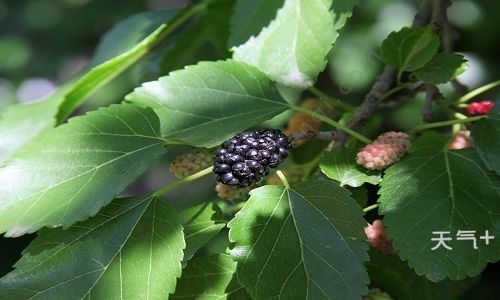
Canning mulberries preserves them in a syrupy, sweetened liquid, making them ideal for use in desserts, jams, or as a topping. Here’s how to can mulberries:
- Preparation: Wash and drain the mulberries. Remove any stems or leaves.
- Syrup Preparation: In a large pot, combine water and sugar in a ratio of 2 parts water to 1 part sugar. Heat the mixture until the sugar dissolves and the syrup comes to a boil.
- Blanching: Add the mulberries to the boiling syrup and cook for about 3-5 minutes, stirring gently to avoid breaking the fruit. This step helps to soften the mulberries and infuse them with flavor.
- Jar Preparation: Sterilize your canning jars and lids by boiling them in water for at least 10 minutes.
- Packing: Ladle the mulberries and syrup into the hot jars, leaving about 1/2 inch of headspace. Wipe the jar rims clean with a damp cloth to remove any syrup residue.
- Sealing: Secure the lids on the jars and place them in a large pot of boiling water, ensuring the jars are fully submerged. Process the jars in the boiling water bath for about 15-20 minutes, depending on your altitude.
- Cooling: Remove the jars from the water bath and let them cool on a wire rack. Check for proper sealing by pressing the center of each lid. If it does not pop up, the jar is sealed.
- Storage: Store the canned mulberries in a cool, dark place. Properly canned mulberries can last for up to a year.
Pickling Mulberries
Pickling mulberries adds a tangy, preserved twist to the fruit, making them a unique addition to salads, sandwiches, or as a standalone snack. Here’s how to pickle mulberries:
- Preparation: Wash and dry the mulberries. Remove any stems or leaves.
- Pickling Solution: In a large pot, combine vinegar, water, sugar, and pickling spices such as mustard seeds, garlic cloves, and red pepper flakes. Adjust the sweetness and tanginess to your preference. Heat the mixture until the sugar dissolves and it comes to a boil.
- Blanching: Add the mulberries to the boiling pickling solution and cook for about 2-3 minutes. Stir gently to avoid breaking the fruit.
- Jar Preparation: Sterilize your canning jars and lids as described in the canning section.
- Packing: Ladle the mulberries and pickling solution into the hot jars, leaving about 1/2 inch of headspace. Wipe the jar rims clean.
- Sealing: Secure the lids on the jars and process them in a boiling water bath for about 15 minutes, depending on your altitude.
- Cooling: Remove the jars from the water bath and let them cool on a wire rack. Check for proper sealing.
- Storage: Store the pickled mulberries in a cool, dark place. Properly pickled mulberries can last for several months.
Fermenting Mulberries
Fermenting mulberries transforms them into a probiotic-rich, tangy treat that can be enjoyed on its own or used as a base for other fermented foods like sauerkraut or kimchi. Here’s how to ferment mulberries:

- Preparation: Wash and dry the mulberries thoroughly. Remove any stems or leaves.
- Fermentation Jar: Use a wide-mouth glass jar with a tight-fitting lid. Add a fermentation weight or a smaller jar filled with water to keep the mulberries submerged during fermentation.
- Salt Solution: Dissolve a small amount of sea salt (about 1-2 teaspoons per quart of water) in filtered water. Pour enough of this salt solution into the jar to cover the mulberries by about 1 inch.
- Active Fermentation: Cover the jar with a loose-fitting lid or a cloth to allow gas to escape. Place the jar in a cool, dark place. Stir the mulberries daily for the first few days to distribute the salt and promote even fermentation.
- Taste Testing: After about 3-7 days, start tasting the mulberries daily. Fermentation can take anywhere from a few days to a couple of weeks, depending on your taste preferences and the ambient temperature.
- Storage: Once you reach the desired level of tanginess, remove the mulberries from the fermentation jar and store them in a clean, airtight container in the refrigerator. They can last for several weeks.
Conclusion
Preserving mulberries allows you to enjoy their sweet, juicy flavor beyond the short window of their seasonal availability. Whether you choose to freeze, dry, can, pickle, or ferment your mulberries, each method offers unique benefits and flavors. By following the detailed steps outlined in this guide, you can ensure that your mulberries stay fresh, delicious, and nutritious for months or even years. Happy preserving!



0 comments