Introduction
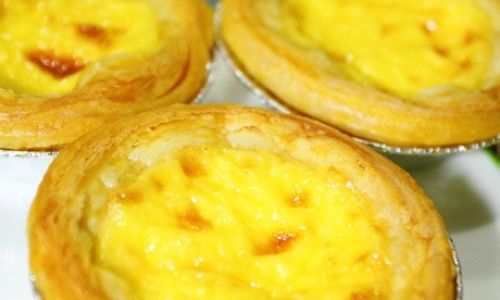
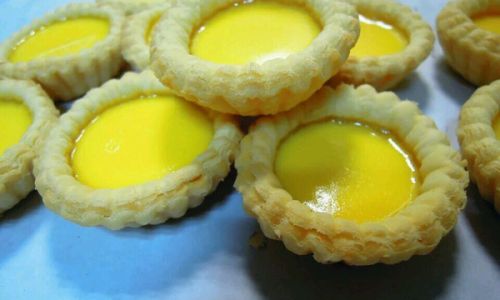
Egg tarts, with their golden, flaky crusts and creamy, custard-like fillings, are a timeless delight enjoyed by people worldwide. Whether you’re hosting a gathering, indulging in a sweet treat, or simply satisfying a midnight craving, mastering the art of making homemade egg tarts can be an incredibly rewarding experience. This guide will take you through the entire process, from understanding the basics to perfecting your technique, ensuring that every bite is as mouthwatering as the last.
Section 1: Understanding the Ingredients
Before diving into the recipe, it’s crucial to familiarize yourself with the key ingredients that make up a classic egg tart. Each component plays a vital role in achieving the desired texture and flavor.
1 Crust Ingredients

- Butter: Provides richness and flavor. Use unsalted butter for better control over seasoning.
- Shortening or Lard: Adds flakiness to the crust. Shortening tends to be more versatile and stable at various temperatures.
- Flour: Forms the structure of the crust. All-purpose flour works well for a balance between gluten development and tenderness.
- Salt: Enhances the overall flavor.
- Ice Water: Helps to keep the dough cool, preventing over-mixing and gluten formation, which can lead to a tough crust.
- Sugar: Adds sweetness and helps with browning.
2 Custard Filling Ingredients
- Eggs: The foundation of the custard, providing structure and richness.
- Milk: Adds creaminess and a subtle dairy flavor. Whole milk is preferable for its fullness.
- Heavy Cream: Further enhances creaminess and richness.
- Sugar: Balances the savory notes of the eggs and dairy with sweetness.
- Vanilla Extract: Adds depth of flavor. Pure vanilla extract is recommended for the best taste.
- Salt: A pinch helps to highlight the other flavors.
Section 2: Preparing the Crust
The crust is the backbone of any egg tart. A well-made crust should be flaky, buttery, and just slightly sweet. Here’s how to achieve it:
1 Combining Dry Ingredients
In a large mixing bowl, whisk together the flour and a pinch of salt. This ensures an even distribution of the salt, which enhances the flavor of the butter and shortening.
2 Incorporating the Fat
Cut the cold, cubed butter and shortening into the flour mixture using a pastry cutter or two forks. The goal is to create a coarse meal texture, with small lumps of fat evenly distributed throughout the flour. This process is crucial for achieving a flaky crust, as the fat melts during baking, creating pockets of steam that separate the flour layers.
3 Adding Ice Water
Gradually add ice water, one tablespoon at a time, mixing gently with a fork or your hands until the dough starts to come together. Be careful not to overwork the dough, as this can lead to gluten development, making the crust tough. Once the dough forms a shaggy mass, gather it into a ball and flatten it into a disk. Wrap it tightly in plastic wrap and refrigerate for at least 30 minutes. This resting period allows the gluten to relax and the fats to firm up again, ensuring a tender, flaky crust.
4 Rolling Out the Dough
Once chilled, place the dough on a lightly floured surface and roll it out into a thin, even layer. Aim for a thickness of about ⅛ inch. If the dough becomes too warm or sticky, refrigerate it for a few minutes before continuing. Use a tart pan or muffin tin to cut out circles slightly larger than the diameter of each cup. Gently press the dough into the cups, allowing the excess to hang over the edges. Prick the bottom of the dough with a fork to prevent bubbling during baking.
5 Docking and Chilling Again
Trim the excess dough from the edges using a knife or your fingers. Dock the bottom of the dough again with a fork to ensure even baking. Place the tart shells back in the refrigerator for another 15-20 minutes. This final chilling step helps the dough maintain its shape during baking and prevents the edges from over-browning.
Section 3: Preparing the Custard Filling
The custard filling is what sets egg tarts apart from other pastries. It should be smooth, creamy, and just slightly set when baked. Here’s how to make it:
1 Whisking Together the Wet Ingredients

In a large mixing bowl, whisk together the eggs, milk, heavy cream, sugar, and a pinch of salt until well combined. Be sure to whisk vigorously to break up any egg yolks and ensure an even mixture.
2 Adding Vanilla Extract
Stir in the vanilla extract. This step not only adds flavor but also helps to enhance the overall aroma of the baked egg tarts.
3 Straining the Mixture
Pass the custard mixture through a fine-mesh sieve to remove any lumps or bubbles. This ensures a smooth, silky filling that bakes evenly without any imperfections.
Section 4: Assembling and Baking
Now that both the crust and filling are prepared, it’s time to assemble and bake your egg tarts.
1 Pouring the Custard
Carefully pour the strained custard filling into each chilled tart shell, filling them almost to the top. Be gentle to avoid disturbing the dough and creating air bubbles.
2 Preheating the Oven
Preheat your oven to 350°F (175°C). Place a rack in the middle of the oven to ensure even baking.
3 Baking the Egg Tarts
Place the tart pan on a baking sheet to catch any drips and transfer it to the preheated oven. Bake for about 20-25 minutes, or until the crust is golden brown and the custard is set but still slightly jiggly in the center. The exact baking time may vary depending on your oven, so keep a close eye on them.
4 Checking for Doneness
To check if the egg tarts are done, gently shake the pan. The custard should have a slight wobble but should not slosh around. If the edges of the crust start to brown too quickly, you can cover them loosely with aluminum foil or parchment paper to prevent over-browning.
Section 5: Cooling and Serving

Once baked, allow the egg tarts to cool slightly in the pan before transferring them to a wire rack to cool completely. This helps them set properly and prevents the custard from becoming too runny.
1 Cooling
Cooling is an essential step as it allows the custard to firm up and the flavors to meld together. Let the egg tarts cool for at least 15-20 minutes before serving.
2 Optional Garnishes
While classic egg tarts are delicious on their own, you can elevate them with a few optional garnishes. A dusting of powdered sugar adds a touch of elegance, while a drizzle of caramel or a sprinkle of cinnamon can transform them into festive treats.
Section 6: Troubleshooting and Tips
Even the most seasoned bakers can encounter issues when making egg tarts. Here are some common problems and solutions to help you troubleshoot:
1 Soggy Bottom Crust
- Solution: Ensure the crust is fully chilled before adding the filling and baking. This helps prevent the bottom crust from absorbing too much moisture from the custard.
2 Over-Browned Edges
- Solution: Cover the edges loosely with aluminum foil or parchment paper during the final few minutes of baking if they start to brown too quickly.
3 Runny Custard
- Solution: Make sure the custard is baked until it’s just set but still slightly jiggly in the center. Over-baking can cause the custard to curdle and become dry.
4 Crust Falling Apart
- Solution: Handle the dough gently to avoid stretching it too much, which can weaken the gluten structure. Also, ensure the dough is well-rested before rolling it out.
Conclusion
Making delicious egg tarts at home is a rewarding culinary endeavor that combines precision, patience, and a love for baking. By following this guide, you’ll be able to create flaky, buttery crusts filled with creamy, custard-like goodness that will delight your family and friends. Remember, baking is an art that requires practice and experimentation, so don’t be afraid to make adjustments to the recipe to suit your taste preferences. Happy baking!
This comprehensive guide covers every aspect of making delicious egg tarts, from understanding the ingredients and preparing the crust to making the custard filling, assembling, baking, and troubleshooting common issues. With this information, you’ll be well-equipped to embark on your own culinary journey and create egg tarts that are sure to


0 comments