Introduction
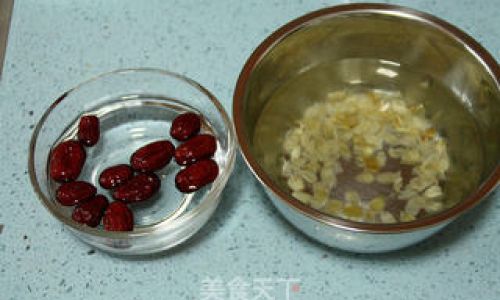
Snow dates, a delightful and unique confectionery, have captivated the taste buds of many across various cultures. Their name evokes images of winter’s wonderland, with their white, fluffy exterior resembling freshly fallen snow. However, these treats are far from being mere seasonal symbols; they are a testament to the artistry and skill of traditional sweet-makers. This guide delves into the intricate world of snow date production, offering a comprehensive look at their history, the science behind their creation, and most importantly, detailed recipes and production methods.
Historical Background
The origins of snow dates are shrouded in mystery, with various cultures claiming their own versions of this sweet delicacy. Some attribute their inception to ancient China, where they were once a royal delicacy, reserved only for the emperor and his court. Others trace their lineage to the Middle East, where similar sweetmeats were enjoyed during festive occasions. Regardless of their exact origins, snow dates have evolved over time, incorporating diverse ingredients and techniques, reflecting the culinary richness of different regions.
In modern times, snow dates have become a popular snack worldwide, enjoyed by people of all ages. Their appeal lies not only in their aesthetic beauty but also in their delicate texture and sweet, yet subtly complex flavor. This guide aims to preserve and share the art of crafting snow dates, ensuring that this timeless treat continues to delight future generations.
Understanding the Ingredients
Before diving into the production methods, it’s crucial to understand the key ingredients that make snow dates unique. The primary components include:
-
Starch-based Flour: Typically, rice flour, potato starch, or a combination of both is used. These starches provide the necessary structure for the snow dates, ensuring they hold their shape during cooking.
-
Sugar: Granulated sugar, powdered sugar, or a mixture of both is essential for sweetness and texture. Sugar also plays a role in the caramelization process, contributing to the snow dates’ golden-brown exterior.
-
Water: Acts as a binding agent, helping to create a smooth dough. The amount of water used can affect the final texture, so precision is key.
-
Oil: Vegetable oil or a neutral-flavored oil like canola oil is used to prevent sticking and to give the snow dates a slight crispiness.
-
Emulsifiers and Stabilizers: These optional ingredients, such as lecithin or xanthan gum, can improve the dough’s workability and stability, ensuring a smoother production process.
-
Flavorings and Extracts: Vanilla extract, almond essence, or other flavorings can be added to enhance the snow dates’ taste.
Production Methods: Traditional vs. Modern Approaches
Snow dates can be produced using both traditional and modern methods. Each approach has its own set of advantages and challenges.
Traditional Methods
Traditional snow date production often involves handcrafting, ensuring each treat is meticulously crafted. Here’s a step-by-step breakdown:
-
Mixing the Dough: Begin by combining the starch-based flour, sugar, and a small amount of water in a large bowl. Gradually add more water until a smooth, pliable dough forms. The dough should be neither too sticky nor too dry.
-
Shaping the Dough: Divide the dough into small portions and roll them into balls or logs, depending on the desired shape. This step requires patience and precision to ensure uniformity.
-
Coating with Sugar: Roll each dough piece in powdered sugar to create a light, snowy coating. This not only adds to the aesthetic appeal but also helps to create a crisp exterior when cooked.
-
Deep-Frying: Heat vegetable oil in a deep fryer or large, heavy-bottomed pot to a temperature of around 350°F (175°C). Carefully drop a few dough pieces into the hot oil and fry until golden brown. Use a slotted spoon to remove them and let them drain on paper towels.
-
Cooling and Serving: Allow the snow dates to cool completely. They will become crispier as they cool. Serve them as a standalone snack or pair them with tea or coffee.
Modern Methods
Modern production methods often incorporate machinery to streamline the process, allowing for larger-scale production. Here’s an overview:
-
Dough Preparation: In a commercial setting, the dough is typically prepared using a mixer or food processor. This ensures a consistent texture and reduces the physical effort required.
-
Shaping and Coating: Automated machines can shape the dough into uniform pieces and coat them with powdered sugar. This eliminates the need for manual labor and speeds up production.
-
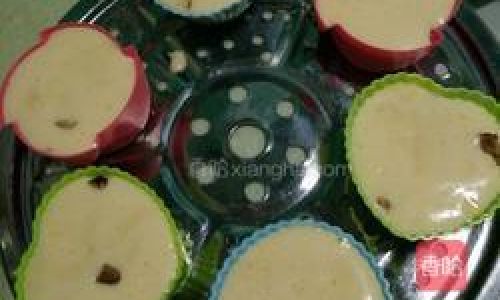
Deep-Frying: Commercial deep fryers are used to cook the snow dates. These fryers maintain a consistent temperature, ensuring even cooking and reducing the risk of overcooking or burning.
-
Packaging: Once cooled, the snow dates are often packaged in airtight containers or sealed bags to preserve their freshness. This allows for distribution and sale beyond the immediate production area.
Recipes for Snow Dates
Below are two recipes, one for traditional snow dates and another for a modern twist.
Recipe 1: Classic Snow Dates
Ingredients:
- 200g rice flour
- 100g granulated sugar
- 150ml water
- 500ml vegetable oil for frying
- 200g powdered sugar for coating
Instructions:
-
Prepare the Dough: In a large bowl, combine the rice flour and granulated sugar. Gradually add the water, mixing until a smooth dough forms. If the dough is too sticky, add a little more flour. If it’s too dry, add a few drops of water.
-
Shape the Dough: Divide the dough into small portions and roll them into balls. You can also roll them into logs or other shapes if preferred.
-
Coat with Powdered Sugar: Place the powdered sugar in a shallow dish. Roll each dough ball in the powdered sugar, ensuring it’s evenly coated.
-
Heat the Oil: Pour the vegetable oil into a deep fryer or large pot and heat it to 350°F (175°C).
-
Fry the Snow Dates: Carefully drop a few dough balls into the hot oil. Fry them for about 3-4 minutes, or until they turn golden brown. Use a slotted spoon to remove them and let them drain on paper towels.
-
Cool and Serve: Allow the snow dates to cool completely before serving. Enjoy them as a snack or pair them with your favorite beverage.
Recipe 2: Almond Snow Dates with Vanilla
Ingredients:
- 250g potato starch
- 150g powdered sugar
- 125ml water
- 1 tsp vanilla extract
- 500ml vegetable oil for frying
- 50g sliced almonds
- Additional powdered sugar for coating
Instructions:
-
Prepare the Dough: In a mixing bowl, combine the potato starch and powdered sugar. Add the water and vanilla extract, mixing until a smooth dough forms. If necessary, adjust the consistency by adding a little more water or starch.
-
Incorporate the Almonds: Fold the sliced almonds into the dough, distributing them evenly.
-
Shape the Dough: Divide the dough into small portions and roll them into balls. You can press a few almond slices into the surface of each ball for added texture and flavor.
-
Coat with Powdered Sugar: Place additional powdered sugar in a shallow dish. Roll each dough ball in the powdered sugar to coat.
-
Heat the Oil: Pour the vegetable oil into a deep fryer or large pot and heat it to 350°F (175°C).
-
Fry the Snow Dates: Carefully drop a few dough balls into the hot oil. Fry them for about 3-4 minutes, or until they turn golden brown and the almonds are lightly toasted. Use a slotted spoon to remove them and let them drain on paper towels.
-
Cool and Serve: Allow the almond snow dates to cool completely. They will become crispier as they cool. Serve them as a sophisticated snack or gift them to friends and family.
Troubleshooting and Tips
- Sticky Dough: If the dough is too sticky, add a little more starch-based flour. Conversely, if it’s too dry, add a few drops of water.
- Uneven Cooking: Ensure the oil temperature remains consistent throughout the frying process. Overcrowding the pot can lower the temperature, leading to uneven cooking.
- Storage: Snow dates are best enjoyed immediately after cooling. However, they can be stored in an airtight container for up to a week. Avoid exposing them to moisture, which can soften their texture.
- Flavor Variations: Experiment with different flavorings and extracts, such as lemon, mint, or cinnamon, to create unique variations.
Conclusion
Crafting snow dates is an art that combines precision, patience, and a love for sweet treats. Whether you choose to follow a traditional method or incorporate modern techniques, the result is a delightful snack that brings joy





0 comments