Cooking porridge, a warm and nutritious meal that can be enjoyed at any time of the day, has never been easier with the help of a pressure cooker. This versatile kitchen appliance not only speeds up the cooking process but also ensures that your porridge is cooked to perfection, retaining all its flavors and nutrients. Whether you prefer a creamy oatmeal, a hearty rice porridge, or a more exotic quinoa-based variety, a pressure cooker can handle it all with minimal effort on your part. In this comprehensive guide, we’ll walk you through the process of making porridge in a pressure cooker, from selecting your ingredients to setting the perfect cooking time.
Understanding Your Pressure Cooker
Before diving into the recipe, it’s crucial to familiarize yourself with the basics of your pressure cooker. Modern pressure cookers come with various features such as digital displays, programmable settings, and safety mechanisms. While some models might require a bit of a learning curve, the fundamental principle remains the same: they create a sealed environment that traps steam, thereby increasing the cooking temperature and speeding up the process.
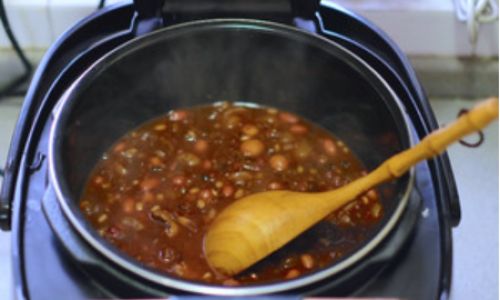
Ingredients for a Basic Porridge
To keep things simple, let’s start with a basic oatmeal porridge. Here’s what you’ll need:
- 1 cup rolled oats
- 4 cups water or milk (dairy or non-dairy)
- A pinch of salt (optional)
- Sweeteners and toppings (honey, maple syrup, fresh fruits, nuts, seeds, etc.)
Feel free to adjust the quantities based on your preference for thickness and serving size. For a richer flavor, you can also add a splash of vanilla extract or a cinnamon stick.
Preparing Your Pressure Cooker
-
Cleaning and Assembly: Begin by ensuring that your pressure cooker’s inner pot is clean and free of any residue from previous meals. Assemble the pressure cooker according to the manufacturer’s instructions, ensuring that all parts, including the lid and sealing ring, are properly in place.
-
Adding Ingredients: Pour the water or milk into the inner pot. Add the rolled oats and a pinch of salt if using. Stir gently to combine, ensuring there are no clumps of oats stuck together.
Setting Up the Pressure Cooker
-
Locking the Lid: Secure the lid of the pressure cooker and ensure it is properly locked in place. Depending on your model, you may need to turn a locking knob or press a button to seal the lid.
-
Selecting the Cooking Mode: Most modern pressure cookers offer multiple cooking modes. For porridge, you’ll typically use the ‘Pressure Cook’ or ‘Manual’ setting. Adjust the cooking time according to your preference. For rolled oats, a cooking time of around 5-7 minutes under high pressure usually yields a creamy and fluffy result.
-
Starting the Cooking Process: Once the settings are in place, press the ‘Start’ button or equivalent to begin the pressure-cooking process. The cooker will take a few minutes to build up pressure before the actual cooking time begins.
During Cooking and Natural Release
-
Monitoring the Cooking: While the porridge is cooking, you can attend to other tasks in the kitchen or simply relax. Modern pressure cookers are designed to be safe and require minimal supervision during the cooking process.
-
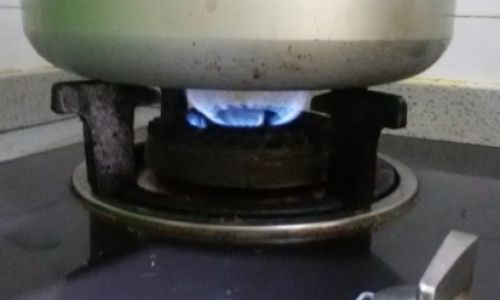
Natural Pressure Release: After the cooking time has elapsed, allow the pressure to release naturally. This means letting the cooker sit undisturbed until the pressure indicator drops and the lid can be safely opened. Natural release helps to ensure that the porridge is creamy and well-cooked, preventing it from becoming too thin or overcooked.
Finishing Touches and Serving
-
Opening the Lid: Once the pressure has fully released, carefully open the lid of the pressure cooker, avoiding any steam that may escape. Stir the porridge gently to ensure it’s well mixed.
-
Adjusting Consistency: If the porridge is thicker than you prefer, you can add a bit more milk or water and stir to combine. Conversely, if it’s too thin, you can let it simmer on the ‘Sauté’ or ‘Keep Warm’ setting for a few minutes to thicken slightly.
-
Adding Sweeteners and Toppings: Taste the porridge and add sweeteners like honey or maple syrup according to your taste. Now is also the time to add any toppings such as fresh fruits, nuts, seeds, or a sprinkle of cinnamon.
Storage and Reheating
-
Storing Leftovers: If you have leftover porridge, store it in an airtight container in the refrigerator for up to 3 days. To reheat, you can use the microwave, stovetop, or even your pressure cooker’s ‘Reheat’ function.
-
Freezing: For longer storage, portion the porridge into freezer-safe containers and freeze for up to 3 months. Thaw overnight in the refrigerator before reheating.
Tips for Perfect Porridge
- Experiment with Ingredients: Don’t be afraid to experiment with different grains, milks, and toppings to find your perfect porridge recipe.
- Soak Grains (Optional): For a more digestible and nutritious porridge, soak the grains overnight in water before cooking.
- Use a Trivet: If you’re adding any ingredients that cook faster than the porridge itself, like fruits or quick-cooking grains, use a trivet to keep them separate during the pressure-cooking process.
Conclusion
Cooking porridge in a pressure cooker is a quick, easy, and nutritious way to enjoy this comforting meal. With minimal prep and hands-on time, you can have a delicious and satisfying bowl of porridge ready in no time. Whether you’re making it for breakfast, lunch, or dinner, a pressure cooker ensures that your porridge is always perfectly cooked, retaining all its natural goodness and flavors. So, why wait? Grab your pressure cooker and start experimenting with different porridge recipes today!

0 comments