Introduction
Pickled ginger, a staple in sushi bars and an essential condiment in various Asian cuisines, offers a refreshing and tangy contrast to rich, savory dishes. Its crisp texture and bright flavor can elevate even the simplest meals, making it a versatile ingredient to have on hand. While pickling ginger might seem like a straightforward process, achieving the perfect balance of sweetness, tanginess, and crunch can be a bit of an art. In this comprehensive guide, we’ll explore the best practices for making the most delicious pickled ginger, from selecting the right ginger to mastering the pickling process.
Chapter 1: Understanding the Ingredients
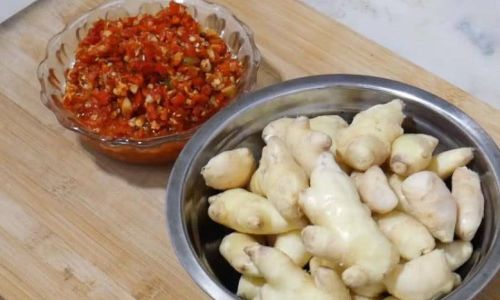
1 Types of Ginger
Before diving into the pickling process, it’s crucial to understand the different types of ginger available and how they impact the final dish. The most common types are:
-
Young Ginger (Shoga): This variety has a tender texture and a mild, slightly sweet flavor. It’s ideal for pickling because it retains its crispness well and doesn’t overpower other flavors.
-
Mature Ginger: Known for its strong, spicy aroma and flavor, mature ginger is often used in cooking rather than pickling. Its fibrous texture can make it less suitable for pickling unless it’s peeled and thinly sliced.
-
Dried Ginger: While dried ginger adds a unique depth of flavor to dishes, it’s not suitable for pickling due to its concentrated, intense taste and lack of moisture.
For pickled ginger, young ginger is the gold standard. Look for firm, smooth roots with tight skin and a fresh aroma.
2 Pickling Ingredients
The key to delicious pickled ginger lies in the pickling liquid, which typically includes:
-
Rice Vinegar: This acidic liquid provides the tanginess that balances the ginger’s natural sweetness. Look for unseasoned rice vinegar to avoid unwanted flavors.
-
Sugar: Sugar rounds out the vinegar’s acidity, creating a harmonious balance of sweet and tangy notes. You can use granulated sugar, honey, or even maple syrup for a unique twist.
-
Salt: A pinch of salt enhances the flavors and helps to draw out excess moisture from the ginger, making it crisper.
-
Optional Flavorings: For added complexity, consider incorporating ingredients like garlic, chili flakes, or even a splash of sesame oil. These additions can elevate your pickled ginger from good to great.
Chapter 2: Preparing the Ginger
1 Cleaning and Peeling
Start by thoroughly washing the ginger roots under cold running water to remove any dirt or debris. Use a vegetable peeler to remove the tough outer skin. Be careful not to remove too much flesh, as some of the ginger’s flavor lies just beneath the skin.
2 Slicing Techniques
The thickness of your ginger slices will affect both the texture and the pickling time. For traditional pickled ginger, aim for thin, uniform slices. You can use a sharp knife or a mandoline for precision.
-
Thin Slices: These will pickle quickly and maintain a crisp texture. They’re perfect for sushi and salads.
-
Matchsticks: For a different texture and presentation, cut the ginger into matchsticks. This shape can add visual interest and a different mouthfeel to dishes.
-
Julienne: Similar to matchsticks but slightly thicker, julienne-cut ginger offers a heartier bite.
3 Blanching (Optional)
Blanching the ginger before pickling can help to remove excess starch and firm up the slices, making them even crispier. To blanch, bring a pot of water to a boil, add the sliced ginger, and cook for about 30 seconds to 1 minute. Immediately transfer the ginger to an ice water bath to stop the cooking process. Drain well before pickling.
Chapter 3: Making the Pickling Liquid
1 Basic Pickling Liquid Ratio
A classic pickling liquid ratio is 1 part sugar to 2 parts rice vinegar. Adjust this ratio to suit your taste preferences. For example:
-
Sweet and Tangy: Use 1/2 cup sugar and 1 cup rice vinegar.
-
More Tangy: Reduce the sugar to 1/4 cup while keeping the vinegar at 1 cup.
-
Less Tangy: Increase the sugar to 3/4 cup or 1 cup while maintaining 1 cup of vinegar.
2 Heating the Pickling Liquid
Combine the sugar and vinegar in a saucepan over medium heat. Stir until the sugar is completely dissolved. You can add a pinch of salt at this stage to enhance the flavors. Once the mixture is clear and slightly warm, remove it from the heat and let it cool slightly before using.
3 Infusing Flavors
If you’re adding additional flavors like garlic or chili flakes, you can infuse them directly into the pickling liquid. Simply add the desired ingredients to the vinegar-sugar mixture while it’s still warm and let it sit for a few minutes before cooling. This allows the flavors to meld together.
Chapter 4: Pickling the Ginger
1 Packing the Jar
Choose a clean, glass jar with a tight-fitting lid for pickling. Pack the sliced ginger tightly into the jar, ensuring there are no large gaps that could cause the pickling liquid to not cover all the ginger evenly.
2 Pouring the Liquid
Carefully pour the cooled pickling liquid over the ginger, ensuring all slices are fully submerged. If necessary, use a small weight like a clean stone or a smaller jar filled with water to keep the ginger submerged. This prevents air exposure, which can cause spoilage.
3 Sealing and Storing
Seal the jar tightly and label it with the date. Store the pickled ginger in the refrigerator. The pickling process will continue slowly in the fridge, allowing the flavors to meld and develop over time.
Chapter 5: Timing and Flavor Development
1 Initial Pickling Period
The initial pickling period can range from a few hours to overnight, depending on your preferred level of tanginess and sweetness. For a milder, sweeter pickled ginger, let it sit for just a few hours. For a more tangy, intense flavor, leave it for a day or two.
2 Long-Term Storage
Properly stored, pickled ginger can last for several weeks in the refrigerator. The flavors will continue to develop and intensify over time, so feel free to experiment with different storage durations to find your preferred taste.
Chapter 6: Serving and Using Pickled Ginger
1 Traditional Uses
Pickled ginger is a natural partner to sushi and sashimi, providing a refreshing contrast to rich, fatty fish. It’s also excellent served alongside grilled meats, stir-fries, or as a garnish for salads and soups.
2 Creative Applications
Don’t be afraid to think outside the box with your pickled ginger. Use it to flavor marinades, dressings, or even as a topping for tacos and burgers. Its unique blend of sweet, tangy, and spicy notes can add a surprising twist to many dishes.
3 Preserving the Crunch
To maintain the crisp texture of your pickled ginger, avoid over-soaking it. If you notice it becoming too soft, you can transfer the ginger to a fresh jar with fresh pickling liquid to rejuvenate it.
Conclusion
Making delicious pickled ginger is a rewarding culinary endeavor that can elevate your meals and introduce you to a world of flavor possibilities. By following the steps outlined in this guide—from selecting the right ginger to mastering the pickling process—you’ll be able to create a tangy, sweet, and crisp condiment that’s sure to impress. Whether you’re serving it as a traditional sushi accompaniment or incorporating it into innovative dishes, pickled ginger is a versatile and delicious addition to your culinary repertoire. Happy pickling!

0 comments