Introduction:
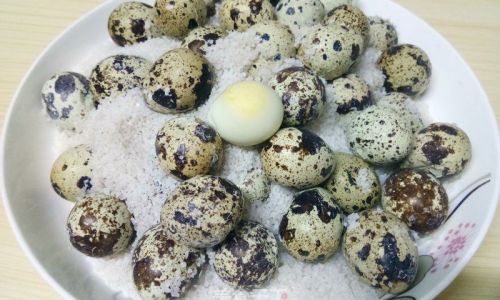
Salt-baked quail eggs are a delightful and unique snack that combines the delicate flavor of quail eggs with the rich, savory taste of salt-baked dishes. This traditional cooking method originated in China and has since gained popularity worldwide for its simplicity and the mouthwatering results it produces. Unlike boiling or frying, salt-baking preserves the natural juices and flavors of the eggs, giving them a slightly crispy exterior and a creamy, moist interior. In this comprehensive guide, we’ll walk you through the entire process of making salt-baked quail eggs from start to finish, ensuring you achieve perfect results every time.
Section 1: Understanding the Ingredients
Before diving into the recipe, it’s crucial to understand the role each ingredient plays in the final dish. Here’s a breakdown:
-
Quail Eggs: These tiny eggs are known for their rich, nutty flavor and creamy texture. They are often preferred over chicken eggs for salt-baking due to their smaller size, which makes them easier to handle and cook evenly.
-
Coarse Salt: The foundation of salt-baking, coarse salt creates a protective layer around the eggs, preventing them from drying out while infusing them with a subtle salty flavor.
-
Baking Soda (Optional): Adding a pinch of baking soda to the salt mixture can help neutralize any unwanted odors and enhance the crispiness of the outer layer.
-
Water: Used to create a damp environment within the salt crust, which facilitates even heat distribution and ensures the eggs cook gently and uniformly.
-
Seasonings (Optional): You can enhance the flavor profile by incorporating additional seasonings such as five-spice powder, garlic powder, or even a hint of black pepper into the salt mixture.
Section 2: Preparation and Tools
To make salt-baked quail eggs, you’ll need a few essential tools and pieces of equipment:
-
Oven: Preheated to an appropriate temperature, usually around 350°F (175°C), to ensure even cooking.
-
Baking Dish: A shallow, oven-safe dish that can accommodate the salt-covered eggs without overcrowding.
-
Aluminum Foil: Used to line the baking dish, preventing the salt from sticking and making cleanup easier.
-
Small Bowl and Spoon: For mixing the salt and any optional seasonings.
-
Tongs or Gloves: To handle the hot salt mixture safely.
-
Sharp Knife: For making a small hole in each egg (optional but recommended to prevent cracking during cooking).
Section 3: Step-by-Step Recipe
Now, let’s dive into the recipe for salt-baked quail eggs:
Step 1: Prepare the Quail Eggs
-
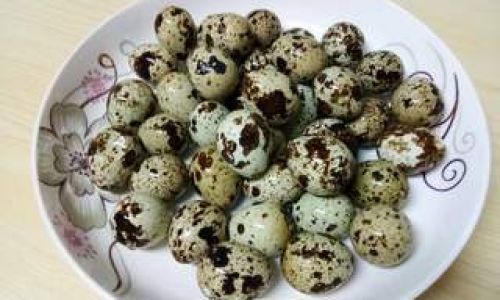
Rinse and Dry: Start by rinsing the quail eggs under cold running water to remove any dirt or debris. Pat them dry using a paper towel.
-
Optional Piercing: If desired, use a sharp knife to make a tiny hole at the bottom or top of each egg. This helps prevent the eggs from cracking under pressure during cooking.
Step 2: Prepare the Salt Mixture
-
Measure the Salt: Place a generous amount of coarse salt in a small bowl. The exact amount will depend on the number of eggs you’re cooking, but aim for at least 1 cup of salt per dozen eggs.
-
Add Seasonings: If using, sprinkle in your chosen seasonings and mix well to distribute evenly.
-
Add Water: Gradually add water, a tablespoon at a time, until the salt mixture reaches a damp, sand-like consistency. It should be moist enough to stick together but not wet enough to form a liquid.
Step 3: Assemble the Salt Crust
-
Line the Dish: Line your baking dish with aluminum foil, ensuring it overlaps the edges for easy removal later.
-
Create a Base: Spread a layer of the salt mixture in the bottom of the dish, about half an inch thick.
-
Nestle the Eggs: Carefully place the quail eggs on top of the salt base, spacing them out evenly.
-
Cover with Salt: Pack the remaining salt mixture around and over the eggs, forming a thick, even crust. Use your fingers or the back of a spoon to press down gently, ensuring there are no gaps.
Step 4: Bake the Eggs
-
Preheat the Oven: Preheat your oven to 350°F (175°C).
-
Bake: Place the baking dish in the preheated oven and bake for about 15-20 minutes, or until the salt crust has turned a golden brown and the eggs are fully cooked. The exact timing may vary depending on your oven and the size of the eggs.
Step 5: Cool and Serve
-
Remove from Oven: Carefully remove the baking dish from the oven using oven mitts. Allow it to cool slightly.
-
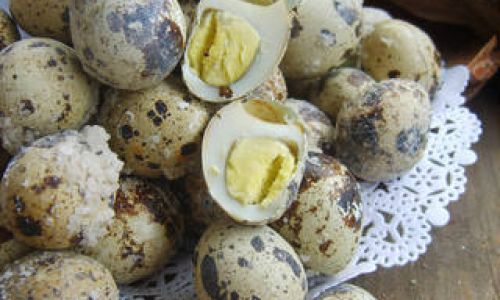
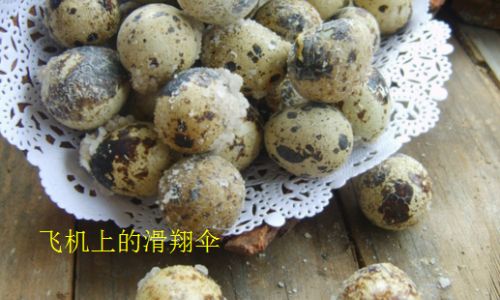
Crack and Peel: Once cool enough to handle, use a spoon or your hands to crack open the salt crust. Carefully peel away the salt to reveal the cooked quail eggs.
-
Serve: Serve the salt-baked quail eggs immediately while they are still warm. They can be enjoyed on their own, as part of a charcuterie board, or paired with a dipping sauce like soy sauce or spicy mustard.
Section 4: Tips and Variations
Here are some tips and variations to help you perfect your salt-baked quail eggs:
-
Egg Freshness: Use fresh quail eggs for the best results. Older eggs may have a stronger sulfur smell when cooked.
-
Cooking Time: Keep in mind that smaller eggs will cook faster than larger ones. Start with the recommended cooking time and adjust as needed based on your specific eggs and oven.
-
Flavor Infusions: Experiment with different seasonings and herbs to create unique flavor profiles. For instance, adding a pinch of rosemary or thyme to the salt mixture can add an aromatic twist.
-
Storage: Leftover salt-baked quail eggs can be stored in an airtight container in the refrigerator for up to a week. Reheat them gently before serving to maintain their texture.
Conclusion:
Salt-baked quail eggs are a delightful treat that combines simplicity with sophistication. By following this step-by-step guide, you’ll be able to create a crispy, flavorful dish that’s sure to impress your friends and family. Whether you’re looking for a unique appetizer or a fun snack to enjoy on your own, salt-baked quail eggs offer a delightful twist on traditional egg preparations. So, gather your ingredients, preheat your oven, and get ready to enjoy the delicious, savory taste of salt-baked quail eggs!

0 comments