Table of content
Making black bean milk at home is a rewarding culinary endeavor that not only provides a delicious and nutritious beverage but also allows you to control the ingredients and sweetness levels to suit your personal preferences. Black beans, known for their rich color, earthy flavor, and numerous health benefits, are a staple in many cuisines worldwide. This article will guide you through the step-by-step process of crafting your own homemade black bean milk, ensuring it’s smooth, creamy, and bursting with flavor.
Understanding the Benefits of Black Beans
Before diving into the recipe, let’s briefly discuss the nutritional benefits of black beans. These legumes are packed with protein, fiber, vitamins, and minerals such as iron, calcium, magnesium, and potassium. They are low in fat and contain no cholesterol, making them an excellent choice for a heart-healthy diet. Additionally, black beans are rich in antioxidants, which help protect cells from damage and may reduce the risk of chronic diseases. Incorporating black beans into your diet through beverages like black bean milk can be a delicious and nutritious way to boost your overall well-being.

Ingredients You’ll Need
To make black bean milk, you’ll need the following ingredients:
- 1 cup dried black beans
- 6 cups water (for soaking and blending)
- 2-3 cups fresh water (for blending after soaking)
- 1-2 tablespoons sweetener (optional, such as honey, maple syrup, or agave nectar)
- A pinch of salt (optional)
- 1 teaspoon vanilla extract (optional, for added flavor)
- A blender (high-speed blender recommended for smoother texture)
- A strainer or cheesecloth for filtering
- A pot or saucepan for heating (if needed)
Step-by-Step Guide to Making Black Bean Milk
Step 1: Preparation and Soaking
-
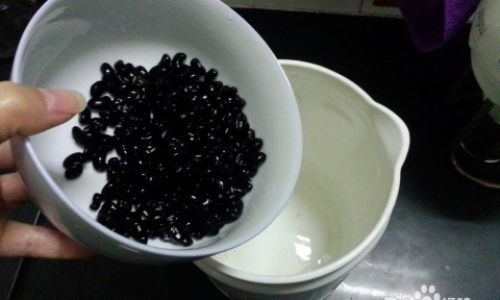
Rinse the Beans: Begin by rinsing the dried black beans under cold running water to remove any dirt or debris. This step is crucial for ensuring a clean and smooth final product.
-
Soak the Beans: Place the rinsed beans in a large bowl or pot and cover them with at least 4-6 cups of water. Soak the beans overnight or for at least 8 hours. Soaking helps to soften the beans, making them easier to blend and digest. If you’re in a rush, you can use the quick soak method: bring the beans and water to a boil for 2-3 minutes, then remove from heat, cover, and let them sit for 1-2 hours.
Step 2: Cooking the Beans
-
Drain and Rinse: After soaking, drain the beans and rinse them again under cold water.
-
Cook the Beans: Place the soaked beans in a pot and cover them with fresh water. The water level should be about 2 inches above the beans. Bring the water to a boil, then reduce the heat to low and simmer, uncovered, for about 1-1.5 hours or until the beans are tender. You may need to add more water during cooking to keep the beans submerged.

-
Cool Down: Once cooked, remove the pot from heat and let the beans cool slightly.
Step 3: Blending the Beans
-
Transfer to Blender: Transfer the cooked beans (and a bit of their cooking liquid if you prefer a thinner consistency) to a high-speed blender. You can also add fresh water at this stage to achieve your desired consistency. Start with 1-2 cups of water and adjust as needed.
-
Blend: Blend on high speed until the beans are completely pureed and the mixture is smooth. This may take a few minutes depending on your blender’s power.
-
Taste and Adjust: Taste the black bean milk and add sweetener, salt, and vanilla extract if desired. Blend again to incorporate the additions.
Step 4: Filtering the Milk
-
Prepare Strainer or Cheesecloth: Set up a strainer over a large bowl or pot. Line the strainer with cheesecloth or a fine-mesh nut milk bag to filter out any remaining bean particles.

-
Pour and Strain: Carefully pour the blended black bean mixture into the strainer. Use a spatula or the back of a spoon to press down on the solids, gently extracting as much liquid as possible. You can also let the mixture sit for a while, allowing the liquid to drip through naturally.
-
Discard the Solids: Once all the liquid has been strained, discard the bean pulp or save it for another use (e.g., adding to baked goods or smoothies).
Step 5: Heating and Serving (Optional)
-
Heat the Milk (Optional): If you prefer your black bean milk warm, pour it back into the pot and heat it over low to medium heat, stirring occasionally, until it reaches your desired temperature. Be careful not to let it boil as this could curdle the milk.
-
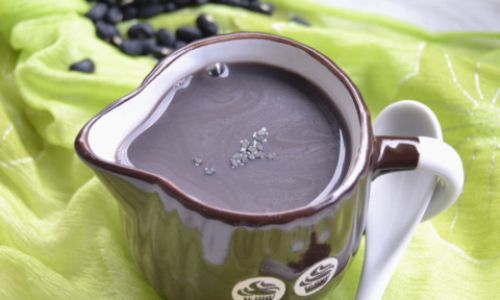
Serve: Pour the black bean milk into glasses or mugs and enjoy immediately. You can garnish with a sprinkle of cinnamon, a few slices of fresh fruit, or a drizzle of honey for added flavor and presentation.
Storage and Tips
-
Storage: Leftover black bean milk can be stored in an airtight container in the refrigerator for up to 3 days. Shake well before serving as it may separate.

-
Flavor Variations: Experiment with different sweeteners and flavors such as chocolate, cinnamon, or cardamom to suit your taste preferences.
-
Texture Adjustments: For a creamier texture, you can add a small amount of plant-based milk (like almond milk or oat milk) or a non-dairy creamer during blending.
-
Nutritional Boost: Incorporate additional nutrients by blending in spinach, kale, or other greens for a vitamin-packed twist.
Conclusion
Making black bean milk at home is a simple yet rewarding process that allows you to enjoy a nutritious and delicious beverage tailored to your liking. With its rich, creamy texture and earthy flavor, black bean milk is perfect for breakfast, a mid-afternoon pick-me-up, or as a base for smoothies and coffee drinks. By following the steps outlined in this guide, you’ll be able to craft your own batch of black bean milk in no time, enjoying the health benefits and culinary versatility of these incredible legumes. Happy blending!


0 comments