Introduction

Adzuki bean paste, also known as red bean paste, is a sweet and versatile ingredient widely used in Asian cuisines, particularly in desserts and baked goods. Its rich, earthy flavor and smooth texture make it a favorite among food enthusiasts. From traditional Japanese anpan to Chinese mooncakes and Korean patbingsu, adzuki bean paste adds a delightful sweetness and depth of flavor to various dishes. Making your own adzuki bean paste filling at home not only allows you to control the sweetness and texture but also ensures the freshness and quality of the ingredient. In this comprehensive guide, we will walk you through the step-by-step process of how to make adzuki bean paste filling, from soaking the beans to achieving the perfect consistency.
Section 1: Understanding Adzuki Beans
Before diving into the recipe, it’s essential to understand the basics of adzuki beans. Adzuki beans (Vigna angularis), also known as azuki beans or small red beans, are a species of legume native to East Asia. These beans are small, reddish-brown in color, and have a nutty, slightly sweet flavor. They are highly nutritious, rich in fiber, protein, and various vitamins and minerals.
When selecting adzuki beans for your paste, look for beans that are uniform in size and color, with a smooth texture and no signs of discoloration or mold. Store them in an airtight container in a cool, dry place, and they will keep for several months.
Section 2: Preparation and Soaking
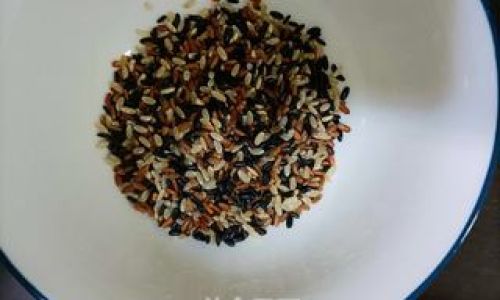
The first step in making adzuki bean paste is to prepare the beans for cooking. This involves soaking them to soften them and make them easier to cook.
Materials Needed:

- 1 cup of adzuki beans
- Water for soaking
Instructions:
- Rinse the Beans: Start by rinsing the adzuki beans under cold running water to remove any dirt or debris.
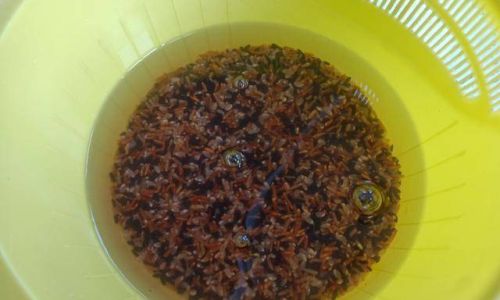
- Soak the Beans: Place the rinsed beans in a large bowl or pot and cover them with at least 2 inches of water. Soak them overnight or for at least 8 hours. Soaking helps to soften the beans and reduce the cooking time.
- Drain and Rinse: After soaking, drain the beans in a colander and rinse them under cold water again. This removes any excess starch and helps to prevent the beans from becoming too mushy during cooking.
Section 3: Cooking the Beans
Once the beans are soaked, it’s time to cook them. Cooking adzuki beans can be done on the stovetop or in a pressure cooker, each method having its own benefits.
Stovetop Method:
Materials Needed:
- Soaked and rinsed adzuki beans
- Fresh water (enough to cover the beans by about 1 inch)
- A large pot with a lid
Instructions:
- Add Water: Place the soaked and rinsed beans in a large pot and add enough fresh water to cover them by about 1 inch.
- Bring to a Boil: Place the pot on the stove over medium-high heat and bring the water to a boil.
- Reduce Heat: Once boiling, reduce the heat to low or medium-low and let the beans simmer gently, uncovered, for about 30-45 minutes, or until they are tender and have absorbed most of the water. Stir occasionally to prevent sticking.
- Check for Doneness: Test the beans for doneness by tasting one. They should be tender but not mushy. If they are still too firm, add a little more water and continue simmering until they reach the desired texture.
- Drain Excess Water: If there is any excess water left in the pot after the beans are cooked, drain it off using a colander.
Pressure Cooker Method:

Materials Needed:
- Soaked and rinsed adzuki beans
- Fresh water (enough to cover the beans by about 1 inch)
- A pressure cooker
Instructions:
- Add Water and Beans: Place the soaked and rinsed beans in the pressure cooker and add enough fresh water to cover them by about 1 inch.
- Seal and Cook: Secure the lid of the pressure cooker and set it to cook on high pressure for about 20-25 minutes. Follow the manufacturer’s instructions for sealing and setting the pressure cooker.
- Natural Release: Allow the pressure to release naturally, which usually takes about 15-20 minutes. This helps to ensure that the beans are tender and not overcooked.
- Check and Stir: Once the pressure has released, open the lid and check the beans for doneness. Stir them gently to ensure they are not sticking to the bottom of the pressure cooker.
Section 4: Mashing the Beans
Once the beans are cooked, the next step is to mash them to create the paste. You can use a potato masher, a fork, or a blender for this step, depending on your preferred texture.
Materials Needed:
- Cooked adzuki beans
- A potato masher, fork, or blender
- A large mixing bowl
Instructions:
- Transfer to Bowl: Transfer the cooked beans to a large mixing bowl.
- Mash the Beans: Use a potato masher or fork to mash the beans until they reach your desired consistency. For a smoother paste, you can use a blender or food processor. Blend in short pulses until you achieve the desired texture, being careful not to over-blend, which can make the paste too runny.
Section 5: Adding Sweeteners and Flavorings

The next step is to sweeten and flavor your adzuki bean paste. This can be done to taste, with options such as sugar, honey, maple syrup, or even a combination of these. You can also add a touch of salt to enhance the sweetness and some vanilla extract or a splash of rice vinegar for added flavor.
Materials Needed:
- Mashed adzuki beans
- Sugar, honey, or maple syrup (to taste)
- A pinch of salt (optional)
- Vanilla extract or rice vinegar (optional)
Instructions:
- Add Sweeteners: Gradually add sugar, honey, or maple syrup to the mashed beans, tasting as you go to ensure you don’t add too much. Start with about 1/2 cup of sweetener and adjust as needed.
- Mix Well: Stir the sweeteners into the beans until they are evenly distributed.
- Add Salt and Flavorings: If using, add a pinch of salt and a few drops of vanilla extract or a splash of rice vinegar. Mix well to combine.
- Taste and Adjust: Taste the paste and adjust the sweetness, saltiness, and flavorings as needed.
Section 6: Cooking the Paste (Optional)
While some recipes call for cooking the mashed beans further to evaporate excess moisture and concentrate the flavors, this step is optional. Cooking the paste can also help to achieve a firmer texture, which is useful for certain applications like filling mooncakes or making Japanese anpan.
Materials Needed:
- Sweetened and flavored mashed beans
- A non-stick skillet or saucepan
- A spatula or wooden spoon
Instructions:

- Transfer to Skillet: Transfer the sweetened and flavored mashed beans to a non-stick skillet or saucepan.
- Cook Over Low Heat: Place the skillet over low heat and cook the paste, stirring constantly with a spatula or wooden spoon to prevent sticking and burning.
- Evaporate Moisture: Cook the paste until it reaches your desired consistency. It should be thick and slightly sticky, with no excess moisture. This can take anywhere from 10-20 minutes, depending on the initial moisture content of the beans and the heat level.
- Cool and Store: Once the paste has reached the desired consistency, remove it from the heat and let it cool slightly. Transfer it to an airtight container and store it in the refrigerator for up to a week or in the freezer for longer storage.
Section 7: Using Your Adzuki Bean Paste
Now that you’ve made your own adzuki bean paste, it’s time to enjoy it in various dishes. Here are a few ideas to get you started:
- Fillings for Desserts: Use the paste as a filling for mooncakes, anpan, or other Asian desserts.
- Ice Cream and Sorbet: Mix it into ice cream or sorbet for a unique and delicious flavor.
- Spread on Toast: Spread it on toast or bagels for a sweet and nutritious breakfast.
- Toppings for Desserts: Use it as a topping for pancakes, waffles, or yogurt.
- Patbingsu: Make Korean patbingsu by topping a bed of shaved ice with the paste and other toppings like red bean syrup, fruit, and whipped cream.
Conclusion
Making your own adzuki bean paste filling is a rewarding experience that allows you to control the ingredients and the final texture and flavor. With a few simple


0 comments