Introduction: The Charm of Oat Bread
In the vast culinary landscape, bread stands as a timeless staple, transcending cultural boundaries and satisfying palates worldwide. Among its myriad variations, oat bread holds a special place, celebrated for its nutritious profile, distinctive texture, and earthy flavor. Unlike traditional wheat bread, oat bread incorporates oats—either rolled, steel-cut, or quick-cooking oats—into the dough, enriching it with dietary fiber, essential vitamins, and minerals. But how does one transform these humble oats into a loaf of mouthwatering, delicious oat bread? This comprehensive guide delves into the intricacies of oat bread making, offering tips, tricks, and recipes to help you master this culinary art.
Understanding the Ingredients: The Foundation of Flavor
Before diving into the recipe, let’s explore the key ingredients that form the backbone of delicious oat bread:
-
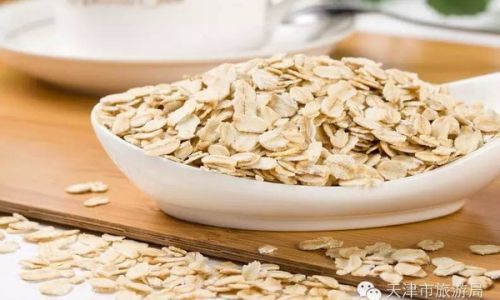
Oats: The star ingredient, oats contribute a unique chewy texture and nutty aroma. Choose high-quality oats without excessive sugar or additives for the best results. Rolled oats are the most common, but steel-cut oats can add an even more rustic texture if soaked overnight.
-
Flour: While whole wheat flour complements the nutritious profile of oats, a blend with all-purpose flour can yield a softer, more tender crumb. Bread flour, with its higher protein content, is ideal for those seeking a chewier, more structured loaf.
-
Water and Yeast: Water activates the yeast, causing it to ferment and leaven the dough. Active dry yeast or instant yeast can be used; the latter requires no proofing and can be mixed directly into the dry ingredients.

-
Salt: Enhances flavor and controls yeast activity, ensuring a balanced fermentation process.
-
Honey or Sugar: A small amount of sweetener feeds the yeast and adds a hint of sweetness to the bread. Honey can add a subtle floral note.
-
Butter or Olive Oil: Adds moisture and richness to the dough, enhancing its overall taste and texture.
-
Milk or Buttermilk: Optional but recommended for added depth of flavor and tenderness. Buttermilk, in particular, reacts with the baking soda or baking powder (if used) to create a light, airy texture.
-
Seeds and Spices: Optional additions like chia seeds, flaxseeds, sunflower seeds, or a pinch of cinnamon and nutmeg can elevate the nutritional profile and flavor complexity of your oat bread.
The Art of Mixing and Kneading
Mixing and kneading are crucial steps in bread-making, transforming a collection of ingredients into a cohesive, elastic dough. Here’s how to do it right:
-
Activation of Yeast: In a small bowl, combine warm water (around 110°F or 45°C), a pinch of sugar, and the yeast. Let it sit for about 5-10 minutes until frothy and bubbly, indicating that the yeast is active.
-
Combining Ingredients: In a large mixing bowl, whisk together the flours, salt, and any spices or seeds you’re using. Create a well in the center and pour in the activated yeast mixture, honey, melted butter (or olive oil), and milk (if using). Gradually incorporate the dry ingredients into the wet, mixing until a shaggy dough forms.
-
Kneading: Transfer the dough to a lightly floured surface and knead for about 8-10 minutes. Kneading involves folding the dough over itself, pressing down with the heels of your hands, and pushing it away from you. The dough should become smooth, elastic, and slightly tacky but not sticky. If it’s too sticky, add a bit more flour; if too dry, add a splash of water.
-
Incorporating Oats: After the dough has reached the desired consistency, fold in the oats gently. If using steel-cut oats, ensure they are well soaked to avoid tearing the dough structure.

First Rise: The Magic of Fermentation
Fermentation is where the magic happens, transforming the dough through yeast activity. Here’s how to ensure a successful first rise:
-
Shaping the Dough: Form the dough into a ball and place it in a lightly oiled bowl, turning it once to coat it with oil. This prevents the dough from drying out and helps it rise evenly.
-
Covering and Rising: Cover the bowl with a clean kitchen towel or plastic wrap and let it rise in a warm, draft-free place. Ideal temperatures range between 75-85°F (24-29°C). Allow the dough to rise until it has doubled in size, which can take anywhere from 1 to 2 hours depending on the ambient temperature.
-
Checking for Doneness: Gently press the dough with a finger. If it springs back slowly and leaves a slight indentation, it’s ready. If it collapses or springs back immediately, it needs more or less time, respectively.
Shaping and Second Rise: Crafting the Perfect Loaf
After the first rise, shaping the dough and allowing it to rise again ensures a well-structured, airy loaf:
-
Deflating the Dough: Gently punch down the risen dough to release any trapped gases.
-
Shaping: Divide the dough into desired portions (for single or multiple loaves) and shape each portion into a log or round, tucking the edges under to create a smooth surface. For a rustic look, you can skip the tight shaping and simply form the dough into a rough ball or loaf.
-
Proofing: Place the shaped dough on a lightly floured parchment paper-lined baking sheet. Cover with a lightly dampened cloth and let it proof for another 30-60 minutes, or until it has risen again to about 1.5 times its original size.
Baking: The Final Transformation
Baking is the culmination of all your efforts, transforming the proofed dough into a golden, fragrant loaf. Here’s how to bake perfect oat bread:
-
Preheating the Oven: Preheat your oven to 375°F (190°C) at least 30 minutes before baking to ensure an even baking environment.

-
Scoring the Dough: Just before baking, use a sharp knife or lame to make a few shallow slashes on the top of the dough. This allows the dough to expand evenly during baking and adds a professional touch to your loaf.
-
Baking Time: Place the dough in the preheated oven and bake for about 30-40 minutes, or until the loaf is golden brown and sounds hollow when tapped on the bottom. An instant-read thermometer inserted into the center should read between 190-200°F (88-93°C).
-
Cooling: Remove the loaf from the oven and let it cool on a wire rack for at least an hour. This step is crucial as it allows the bread to set its structure, making it easier to slice without compressing the crumb.
Tips for Perfect Oat Bread
-
Quality Ingredients: Always use fresh, high-quality ingredients. Old yeast or stale flour can ruin even the best recipes.
-
Temperature Control: Maintain the correct dough temperature throughout the process. Too hot can kill the yeast, while too cold will slow down fermentation.
-
Hydration: Adjust the hydration level based on the type of oats and flour used. Oats absorb more liquid, so you may need to add a bit more water or milk than usual.
-
Experimentation: Don’t be afraid to experiment with different oat types, flavors, and add-ins. The possibilities are endless!
-
Storage: Store cooled, sliced bread in an airtight container at room temperature for up to 3 days. For longer storage, wrap tightly and freeze for up to 3 months. Thaw slices at room temperature or toast directly from frozen.
Conclusion: A Labor of Love
Making delicious oat bread is a labor of love that rewards patience, attention to detail, and a bit of experimentation. By understanding the ingredients, mastering the mixing, kneading, and fermentation processes, and paying attention to baking techniques, you can create a loaf that is not only nutritious but also a delight for the senses. Whether enjoyed plain, toasted with a spread of butter, or used as the foundation for a hearty sandwich, oat bread offers a taste of simplicity and wholeness that is truly satisfying. Happy baking!


0 comments