Table of content
Introduction
Breadmaking is an art that combines precision, patience, and creativity. Among the myriad of bread varieties, soft European bread, often referred to as “soft euro,” stands out for its tender crumb, slightly crisp crust, and versatile flavor profile. By incorporating ingredients like oats and purple rice, we can elevate this classic bread to new heights, infusing it with additional nutrition and a unique, earthy taste. In this comprehensive guide, we’ll walk through the step-by-step process of making an oat and purple rice soft European bread, from preparing the ingredients to baking the final loaf. Whether you’re a seasoned baker or a novice in the kitchen, this recipe promises to deliver a delightful and satisfying culinary experience.
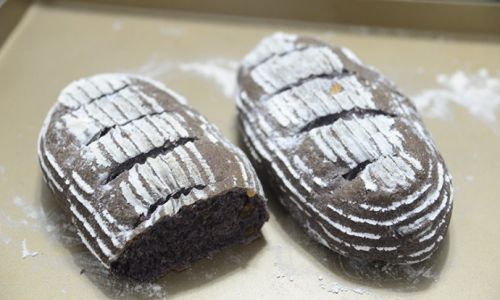
Ingredients
Before diving into the recipe, let’s gather all the necessary ingredients. This recipe yields one large loaf or two smaller ones.
- Bread Flour: 500 grams (about 3 3/4 cups)
- Instant Dry Yeast: 7 grams (about 1 1/4 teaspoons)
- Fine Sea Salt: 10 grams (about 2 teaspoons)
- Granulated Sugar: 30 grams (about 2 tablespoons)
- Milk: 240 milliliters (about 1 cup), lukewarm
- Unsalted Butter: 60 grams (about 4 1/2 tablespoons), softened
- Rolled Oats: 100 grams (about 1 cup)
- Cooked Purple Rice: 150 grams (about 3/4 cup), cooled to room temperature
- Water: As needed for adjusting dough consistency
- Egg Wash (Optional): 1 large egg beaten with 1 tablespoon of water for a glossy finish
- Sesame Seeds, Poppy Seeds, or Coarse Salt (Optional): For topping
Equipment
- Stand Mixer with dough hook attachment (or a large mixing bowl and wooden spoon)
- Measuring Cups and Spoons
- Scale for accurate ingredient measurement
- Mixing Bowls
- Plastic Dough Scraper
- Clean Kitchen Towel or Plastic Wrap for dough resting
- Proofing Basket or Bowl lined with a clean kitchen towel (optional but recommended for shaping)
- Sharp Knife or Lame for scoring the dough
- Baking Sheet lined with parchment paper
- Oven preheated to the correct temperature
- Instant-Read Thermometer for checking internal dough temperature (optional but helpful)
Step-by-Step Instructions
Step 1: Prepare the Ingredients
-
Measure and Prepare Dry Ingredients:
In a large mixing bowl or the bowl of your stand mixer, whisk together the bread flour, instant dry yeast, fine sea salt, and granulated sugar until well combined. Make sure the yeast and salt do not come into direct contact, as salt can kill the yeast.
-
Prepare Wet Ingredients:
- In a separate bowl or measuring cup, pour in the lukewarm milk. Ensure it’s not too hot (no more than 110°F or 45°C), as this can kill the yeast.
- Add the softened unsalted butter to the milk and stir until fully incorporated.
-
Prepare the Oats and Purple Rice:
- Measure out the rolled oats and set them aside.
- Cook the purple rice according to package instructions or your preferred method. Once cooked, let it cool to room temperature to avoid scorching the dough during mixing.
Step 2: Mix the Dough
-
Combine Ingredients:
With the mixer fitted with the dough hook attachment (or using a wooden spoon in a large mixing bowl), start by adding the milk and butter mixture to the dry ingredients. Mix on low speed until the ingredients come together into a shaggy dough.
-
Incorporate Oats and Purple Rice:
Once the dough forms, add the rolled oats and cooked purple rice. Continue mixing on medium-low speed until the dough is well combined and starts to come together smoothly. If the dough seems too dry, add a little water, a tablespoon at a time, until you reach the desired consistency. Remember, the dough should be tacky but not sticky.
-
Knead the Dough:
Knead the dough for about 8-10 minutes on medium speed, or until it becomes smooth, elastic, and passes the windowpane test (stretch a small piece of dough thinly; it should be translucent without tearing).
Step 3: First Fermentation
-
Shape the Dough into a Ball:
Transfer the dough to a lightly floured surface and shape it into a round ball. This helps with even fermentation.
-
Rest the Dough:
Place the dough ball in a lightly greased mixing bowl, cover it with a clean kitchen towel or plastic wrap, and let it rise in a warm, draft-free place for about 1-1.5 hours, or until it has doubled in size. The ideal temperature for fermentation is around 75-80°F (24-27°C).
Step 4: Shape the Dough
-
Deflate the Dough:
Once the dough has risen, gently punch it down to release any air bubbles.
-
Shape into a Loaf:
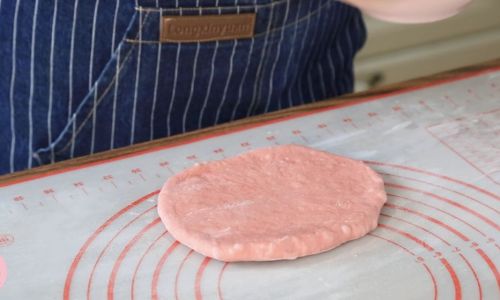
Transfer the dough to a lightly floured surface. Shape it into a log or loaf shape by stretching and folding the dough from the sides towards the center. Tuck the ends under to create a smooth, taut surface.
-
Prepare for Second Fermentation:
Place the shaped dough in a proofing basket lined with a clean kitchen towel, or simply on a parchment-lined baking sheet. Cover it loosely with a towel or plastic wrap and let it proof for another 30-45 minutes, or until it has risen slightly and feels light and airy when gently pressed.
Step 5: Prepare for Baking
-
Preheat the Oven:
While the dough is proofing, preheat your oven to 375°F (190°C). If you have a stone baking surface, place it in the oven to preheat as well.
-
Score the Dough:
Once the dough has finished proofing, carefully transfer it to the parchment-lined baking sheet (if not already there). Using a sharp knife or lame, make a few diagonal slashes across the top of the dough to allow for expansion during baking.
-
Optional Egg Wash and Toppings:
If desired, brush the top of the dough with the egg wash for a glossy finish. Sprinkle with sesame seeds, poppy seeds, or coarse salt for added texture and flavor.
Step 6: Bake the Bread
-
Bake in the Oven:
Place the baking sheet in the preheated oven. If using a stone, slide the parchment paper with the dough onto the stone. Bake for about 30-35 minutes, or until the bread is golden brown and sounds hollow when tapped on the bottom.
-
Check for Doneness:
An instant-read thermometer inserted into the center of the loaf should read between 190-200°F (88-93°C).
Step 7: Cool and Enjoy
-
Cool the Bread:
Remove the bread from the oven and let it cool on a wire rack for at least 30 minutes to an hour. This allows the crumb to set and the flavors to develop fully.
-
Slice and Serve:
Once cooled, use a sharp knife to slice the bread. Serve it fresh with your favorite toppings, such as butter, jam, or avocado. It also pairs wonderfully with soups, salads, or as part of a hearty breakfast.
Tips and Variations
- Hydration Adjustment: The hydration of the dough may vary depending on the humidity and type of flour used. Feel free to add a little more water if the dough seems too dry or a bit of flour if it’s too sticky.
- Proofing Environment: Creating an optimal proofing environment is crucial. A warm, draft-free area is ideal. You can use a proofing box, a microwave with a bowl of hot water, or simply a warm oven (turned off) with the light on.
- Storage: Store leftover bread in an airtight container at room temperature for up to 3 days. For longer storage, wrap it tightly and freeze for up to 3 months. To reheat, thaw at room temperature or warm in a preheated oven at a low temperature.
- Flavor Variations: Experiment with different seeds, nuts, or dried fruits to customize the flavor of your bread. Adding a handful of chopped nuts or a tablespoon of chia seeds can provide additional texture and nutrition.
Conclusion
Making oat and purple rice soft European bread is a rewarding culinary endeavor that combines the simplicity of classic breadmaking with the richness of whole grains. By following this detailed recipe, you’ll be able to create a



0 comments