Introduction
Preserved pork, commonly known as bacon in many parts of the world, is a culinary delight that has been enjoyed for centuries across various cultures. Its rich, savory flavor and versatility in recipes make it a staple in many kitchens. While traditional methods of preserving pork can be quite intricate and time-consuming, modern home cooks can still enjoy delicious homemade bacon with simpler, more accessible techniques. This article will guide you through the process of making preserved pork that is not only tasty but also easy to prepare. By following these steps, you’ll be able to create a dish that brings a touch of authenticity to your meals while saving time and effort.
Section 1: Understanding the Basics
Before diving into the recipe, it’s essential to understand the fundamentals of making preserved pork. The primary goal is to preserve the meat while enhancing its flavor through the addition of salt, spices, and sometimes sugar. Salt acts as a natural preservative by drawing out moisture and inhibiting the growth of bacteria. Spices and herbs add complexity to the taste, making each bite a delightful experience.
Section 2: Choosing the Right Cut
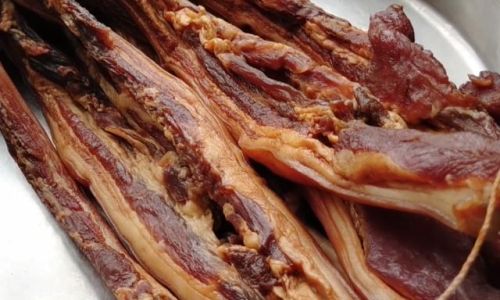
The first step in making delicious and easy-to-prepare preserved pork is selecting the right cut of meat. Pork belly is the most traditional choice for bacon due to its high-fat content, which results in a juicy, flavorful final product. However, you can also use pork shoulder or pork loin for a leaner option. Look for meat that is fresh, with a good marbling of fat, and avoid cuts that have been previously frozen, as this can affect the texture and flavor.
Section 3: Preparing the Meat
Once you’ve chosen your cut, it’s time to prepare the meat. Start by trimming off any excess fat or silver skin to ensure a more uniform texture. This step is crucial for achieving an even cure and cooking process. Next, rinse the meat thoroughly under cold water and pat it dry with paper towels. Moisture can interfere with the curing process, so make sure the meat is completely dry before proceeding.
Section 4: The Curing Process
Curing is the key to making delicious preserved pork. It involves using a mixture of salt, sugar, and spices to draw out moisture and flavor the meat. Here’s a simple and effective cure recipe:
- Ingredients:
- 1/4 cup kosher salt
- 1/4 cup granulated sugar (optional, for a sweeter bacon)
- 2 tablespoons black pepper, freshly ground
- 1 tablespoon smoked paprika
- 1 teaspoon garlic powder
- 1 teaspoon onion powder
- Optional: a pinch of cayenne pepper for a spicy kick
Mix all the ingredients together until well combined. Rub the cure mixture evenly over all surfaces of the meat, ensuring every part is well-coated. Place the seasoned meat in a non-reactive container (such as a glass or ceramic dish) and cover it with plastic wrap, pressing down to create an airtight seal. Alternatively, you can use a vacuum sealer to eliminate any air pockets.
Refrigerate the meat for at least 5 days, turning it over every day to ensure even curing. The longer you cure it, the saltier and more flavorful it will be, but 5 days is a good balance for most tastes.
Section 5: Rinsing and Drying
After the curing period, remove the meat from the refrigerator and rinse off the cure mixture under cold water. Pat the meat dry with paper towels again. At this point, you can let the meat air-dry in the refrigerator for 24 hours to develop a pellicle, a tacky surface that helps the fat render and the spices adhere during cooking.
Section 6: Smoking or Cooking
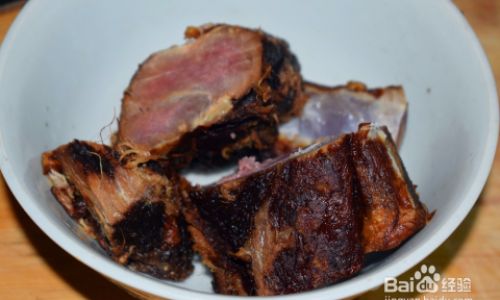
There are several methods to cook your preserved pork, but smoking is the most traditional and adds an extra layer of flavor. If you have a smoker, set it up according to the manufacturer’s instructions, using applewood, hickory, or mesquite chips for a delicious smoky aroma. Smoke the bacon at around 200°F (93°C) for about 2-3 hours, or until it reaches your desired level of doneness.
If you don’t have a smoker, you can bake it in the oven. Preheat your oven to 350°F (175°C) and place the bacon on a wire rack set over a rimmed baking sheet. Bake for about 45-60 minutes, flipping halfway through, until the internal temperature reaches 150°F (65°C) and the fat is rendered but not overly crispy.
Section 7: Cooling and Storing
Once cooked, let the bacon cool completely on a wire rack to prevent it from becoming soggy. Once cooled, you can slice it into strips and store it in an airtight container in the refrigerator for up to a week. For longer storage, wrap the slices tightly in plastic wrap or vacuum-seal them and freeze for up to 3 months.
Conclusion
Making your own preserved pork might seem like a daunting task, but with this simple and straightforward guide, you can enjoy delicious, homemade bacon in no time. By selecting the right cut, preparing the meat properly, and using a well-balanced cure, you’ll be rewarded with a flavorful, juicy product that beats store-bought bacon in every way. Whether you choose to smoke or bake your bacon, the end result will be a culinary delight that elevates any meal. So, why wait? Get started on your preserved pork journey today and savor the taste of homemade excellence.





0 comments