Introduction
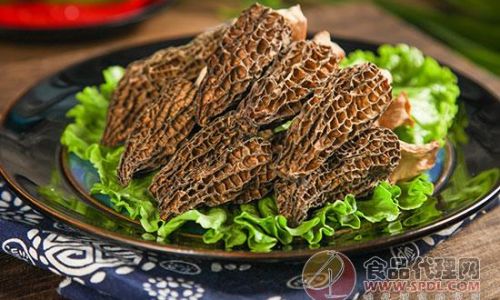
Morel mushrooms, scientifically known as Morchella esculenta, are highly esteemed for their unique flavor, rich aroma, and nutritional benefits. These elusive fungi are often found in symbiotic relationships with trees, particularly in spring and early summer, making them a seasonal delicacy. Their distinctive honeycomb-like caps and hollow stems add a touch of elegance to any dish, from gourmet risottos to elegant salads. However, before you can enjoy their culinary wonders, it’s crucial to know how to clean morel mushrooms properly. This guide aims to provide a comprehensive understanding of the cleaning process, ensuring that you preserve the mushrooms’ delicate texture and flavor while removing any unwanted impurities.
Understanding Morel Mushrooms
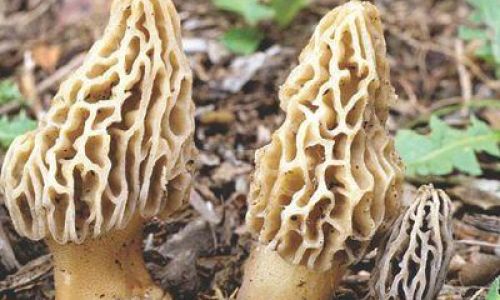
Before diving into the cleaning process, let’s first understand the unique characteristics of morel mushrooms. Morels have a sponge-like texture, with tiny pores on their caps that can trap dirt, debris, and even insects. Their stems, which are often attached to the ground or buried slightly underground, can harbor soil and other contaminants. Therefore, cleaning morels requires a delicate balance between thoroughness and care to avoid damaging their fragile structure.
Why Proper Cleaning is Essential
Proper cleaning of morel mushrooms is not just about aesthetics; it’s a matter of food safety. Improperly cleaned mushrooms can harbor harmful bacteria, mold, or pesticides, posing potential health risks. Moreover, the presence of dirt or debris can affect the taste and texture of your final dish, detracting from the mushrooms’ natural flavor. Therefore, taking the time to clean morels correctly is essential for both culinary excellence and food safety.
Tools and Materials Needed

Before starting the cleaning process, gather the following tools and materials:
- Fresh morel mushrooms
- A soft brush or toothbrush (preferably new and unused for food purposes)
- A bowl of cold water
- A clean kitchen towel or paper towels
- A cutting board
- A sharp knife (optional, for trimming)
Step-by-Step Cleaning Process
-
Inspection and Sorting
Begin by inspecting each morel mushroom carefully. Discard any that are damaged, moldy, or have an unpleasant odor. Sort the mushrooms by size, as larger ones may require more attention during cleaning.
-
Removing Dirt and Debris
Gently shake each mushroom to dislodge any loose dirt or debris. Avoid rinsing them under running water initially, as this can force dirt deeper into the pores. Instead, use a soft brush or toothbrush to gently scrub the caps and stems. Pay close attention to the crevices and pores, ensuring that all dirt is removed.
-
Soaking (If Necessary)
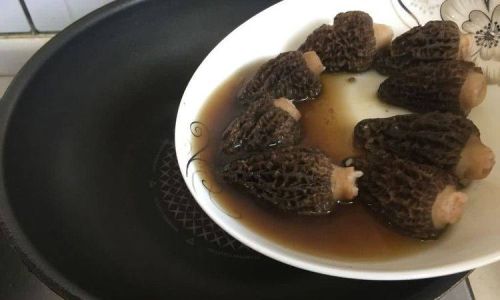
If the mushrooms are particularly dirty or if you’re concerned about pesticides, you can soak them in cold water for a brief period (no longer than 10 minutes). However, be cautious with this step, as soaking can cause the mushrooms to absorb excess water, affecting their texture and flavor. If you choose to soak, use a bowl of cold water and gently swish the mushrooms around. After soaking, lift them out of the water and pat them dry immediately with a clean kitchen towel or paper towels.
-
Trimming the Stems
Once the mushrooms are clean, inspect the stems. Cut off any dirty or woody parts using a sharp knife. The stems are edible and can add flavor to your dishes, but they should be trimmed to remove any unwanted portions.
-
Final Drying
After cleaning and trimming, lay the mushrooms on a clean kitchen towel or paper towels and allow them to air-dry completely. This is crucial to prevent mold growth and to ensure that they cook evenly. Avoid using a cloth or paper towel to rub them dry, as this can damage their delicate texture.
-
Storage
Once dry, store the cleaned morel mushrooms in an airtight container in the refrigerator for up to a week. If you plan to keep them longer, consider freezing them. To freeze, lay the mushrooms in a single layer on a baking sheet and freeze until solid. Then, transfer them to an airtight freezer bag. Frozen morels can be kept for several months.
Tips for Cleaning Morel Mushrooms
-
Avoid Soaking for Too Long: As mentioned earlier, soaking morel mushrooms for too long can cause them to absorb excess water, diluting their flavor and changing their texture. If soaking is necessary, keep it brief and pat the mushrooms dry immediately.
-
Use a Gentle Touch: Morel mushrooms are delicate, so handle them with care. Avoid using abrasive tools or excessive force during cleaning to prevent damaging their structure.
-
Inspect Carefully: Take your time to inspect each mushroom closely. Look for signs of mold, insects, or other contaminants. Discard any mushrooms that don’t meet your quality standards.
-
Use a Clean Environment: Ensure that your workspace is clean and free of contaminants. This will help prevent cross-contamination and ensure that your mushrooms remain safe for consumption.
Conclusion
Cleaning morel mushrooms may seem like a simple task, but it requires attention to detail and a delicate touch to preserve their unique qualities. By following the steps outlined in this guide, you can ensure that your morels are clean, safe, and ready to be transformed into culinary delights. Remember, the key to successful cleaning is patience, gentleness, and thoroughness. With these principles in mind, you’ll be able to enjoy the full flavor and texture of morel mushrooms in your favorite dishes, making every meal a gourmet experience.
In addition to their culinary appeal, morel mushrooms offer numerous health benefits, including antioxidants, vitamins, and minerals. By taking the time to clean them properly, you’re not only enhancing your culinary creations but also promoting a healthier lifestyle. So, the next time you find yourself with a basket of fresh morels, remember these cleaning tips and let your culinary creativity shine. Happy cooking!


0 comments