Introduction
Pickling has been a cherished method of food preservation for centuries, transforming fresh produce into tangy, flavorful delights that can be enjoyed year-round. Among the most versatile vegetables suited for pickling are large peppers, such as bell peppers, poblanos, or banana peppers. Their sturdy flesh and mild to moderate spiciness make them ideal candidates for this age-old technique. Whether you’re a seasoned home cook or a novice in the kitchen, mastering the art of pickling large peppers opens doors to a world of culinary creativity. This guide will walk you through every step of the process, from selecting the finest peppers to storing your finished product, ensuring a rewarding and delicious outcome.
Chapter 1: Selecting the Perfect Peppers
The foundation of exceptional pickled peppers lies in choosing high-quality, fresh produce. When visiting your local farmers’ market or grocery store, prioritize the following:
-
Variety Matters:
- Bell Peppers: Sweet and crunchy, available in green, red, yellow, or orange.
- Poblanos: Mildly spicy with a rich, earthy flavor.
- Banana Peppers: Thin-skinned and tangy, often used in sandwiches or salads.
- Jalapeños: For those who crave heat, these add a fiery kick.
-
Freshness Indicators:
- Look for peppers with glossy, unblemished skin.
- Avoid specimens with wrinkles, soft spots, or discoloration.
- Firmness is key—gently squeeze the pepper; it should yield slightly but not feel mushy.
-
Size Considerations:
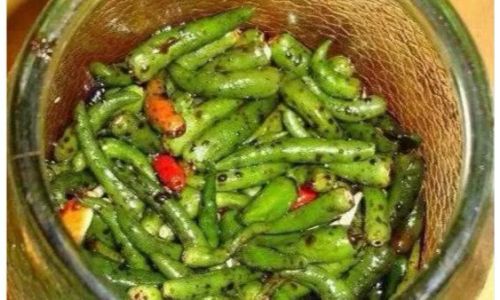
- Larger peppers are easier to handle during preparation.
- Opt for uniform sizes to ensure even pickling.
Chapter 2: Gathering Your Tools and Ingredients
Before diving into the pickling process, assemble the necessary equipment and ingredients.
Essential Tools:
- Clean Glass Jars: Use mason jars or similar heat-safe containers with airtight lids.
- Sharp Knife and Cutting Board: For slicing or chopping peppers.
- Large Pot: For sterilizing jars and preparing the brine.
- Tongs or Jar Lifter: To safely remove hot jars from boiling water.
- Funnel: To pour brine into jars without spills.
Ingredients:
- Vinegar: White vinegar, apple cider vinegar, or rice vinegar work well.
- Water: Filtered or bottled water to prevent cloudiness.
- Salt: Kosher or pickling salt (avoid iodized salt, which may cloud the brine).
- Sugar: White or brown sugar balances acidity.
- Spices: Garlic cloves, peppercorns, bay leaves, mustard seeds, or dill.
- Optional Additives: Fresh herbs (thyme, rosemary), onions, or carrots for layered flavors.
Chapter 3: Preparing the Peppers
Proper preparation ensures the peppers absorb the brine evenly and retain their texture.
-
Washing:
- Rinse peppers under cool water to remove dirt or pesticides.
- Pat dry with a clean towel.
-
Cutting Techniques:
- Whole Peppers: Leave small peppers intact for a decorative touch.
- Sliced: Cut into rings, strips, or halves for quicker pickling.
- De-seeding: Remove seeds and membranes to reduce spiciness (use gloves for hot peppers).
-
Blanching (Optional):
- Briefly immerse peppers in boiling water to soften the skin.
- Transfer to an ice bath to halt cooking.
Chapter 4: Crafting the Brine
The brine is the soul of pickled peppers, infusing them with flavor and acidity.
Basic Brine Recipe:
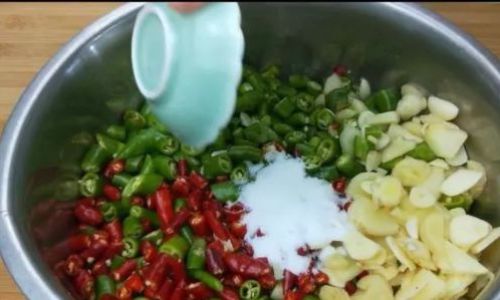
- Ratio: 1:1 vinegar to water (e.g., 2 cups vinegar + 2 cups water).
- Sweetener: 2–4 tablespoons sugar (adjust to taste).
- Salt: 1 tablespoon pickling salt per quart of liquid.
Flavor Variations:
- Spicy Brine: Add red pepper flakes or sliced jalapeños.
- Herbed Brine: Include fresh dill, thyme, or rosemary sprigs.
- Garlic Brine: Toss in 4–6 smashed garlic cloves per jar.
Cooking the Brine:
- Combine vinegar, water, salt, and sugar in a pot.
- Bring to a simmer over medium heat, stirring until salt and sugar dissolve.
- Add spices and herbs, then reduce heat to low.
Chapter 5: Packing the Jars
This step combines artistry with precision to ensure proper preservation.
-
Sterilize Jars:
- Submerge jars and lids in boiling water for 10 minutes.
- Use tongs to remove and drain upside-down on a clean towel.
-
Layering Ingredients:
- Place 1–2 garlic cloves, a bay leaf, and a teaspoon of peppercorns in each jar.
- Pack peppers tightly but leave ½ inch of headspace at the top.
-
Pouring the Brine:
- Ladle hot brine into jars, covering peppers completely.
- Tap jars gently to remove air bubbles.
- Wipe rims with a damp cloth to ensure a tight seal.
Chapter 6: Processing and Sealing
Sealing jars correctly prevents spoilage and extends shelf life.
-
Water Bath Canning:
- Lower filled jars into a pot of boiling water, ensuring 1–2 inches of water cover the lids.
- Process for 10–15 minutes (adjust for altitude).
- Remove jars and let cool undisturbed for 12–24 hours.
-
Testing Seals:
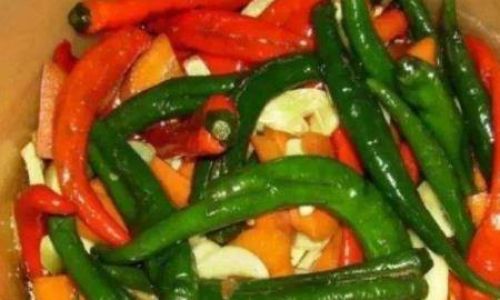
- Press the center of each lid; it should not flex or pop.
- If a seal fails, refrigerate the jar and consume within a month.
Chapter 7: Storage and Aging
Proper storage enhances flavor development over time.
-
Ideal Conditions:
- Store jars in a cool, dark place (pantry or cellar).
- Avoid direct sunlight or fluctuating temperatures.
-
Aging Period:
- Peppers taste best after 2–4 weeks of aging.
- Flavors mellow and deepen with time.
-
Shelf Life:
- Properly sealed jars last 12–18 months.
- Once opened, refrigerate and consume within 2–3 months.
Chapter 8: Creative Variations and Add-Ins
Experimentation is half the fun of pickling. Try these twists:
- Sweet and Spicy: Add honey and crushed red peppers.
- Mediterranean Flair: Include olives, capers, and oregano.
- Asian-Inspired: Use rice vinegar, ginger, and star anise.
- Fermented Peppers: Skip the vinegar and rely on lacto-fermentation for a probiotic-rich result.
Chapter 9: Troubleshooting Common Issues
Even experienced picklers encounter hiccups. Here’s how to fix them:
-
Cloudy Brine:
- Caused by improper sterilization or residual starches.
- Solution: Use fresh spices and ensure jars are scrupulously clean.
-
Mushy Peppers:
- Overcooking the brine or using old produce.
- Solution: Simmer brine gently and test pepper firmness before pickling.
-
Discolored Lids:
Natural oxidation; as long as the seal is intact, the peppers are safe.
Chapter 10: Serving Suggestions
Pickled peppers elevate countless dishes. Try them in:
- Sandwiches: Layer on subs or burgers for a zesty crunch.
- Salads: Toss with greens, feta, and olives.
- Antipasto Platters: Pair with cured meats and cheeses.
- Pizza Toppings: Add a tangy kick to homemade pies.
Recipe Idea: Pickled Pepper Relish
Blend 2 cups pickled peppers, 1 diced onion, and 1 tablespoon olive oil. Serve with grilled sausages or as a condiment for tacos.
Chapter 11: Health Benefits of Pickled Peppers
Beyond their culinary appeal, pickled peppers offer nutritional perks:
- Vitamin C Boost: Peppers retain much of their vitamin content after pickling.
- Probiotics (if fermented): Supports gut health.
- Low in Calories: A guilt-free way to add flavor to meals.
Conclusion: The Joy of Pickling
Pickling large peppers is a rewarding endeavor that bridges tradition and innovation. By mastering these techniques, you’ll not only preserve the harvest but also create a pantry staple that delights the senses. Experiment with flavors, share your creations, and savor the satisfaction of homemade pickles. Whether you’re canning for winter or crafting a gift for a food-loving friend, the art of pickling large peppers is a skill that will serve you—and your taste buds—for years to come.
Final Tip: Label each jar with the date and ingredients. You’ll thank yourself next winter when you’re craving a taste of summer!


0 comments