Introduction

In the realm of fusion cuisine, few dishes have captured the hearts and taste buds of food enthusiasts quite like the Kimchi Beef Bowl. This delightful meal combines the tangy, spicy flavors of Korean kimchi with the tender, juicy texture of beef, all served over a bed of warm, fluffy rice. Whether you’re a seasoned chef or a home cook eager to experiment with new flavors, making a Kimchi Beef Bowl at home can be an incredibly rewarding experience. In this guide, we’ll walk you through every step of the process, ensuring you create a dish that’s as visually appealing as it is delicious.
Section 1: Understanding the Ingredients
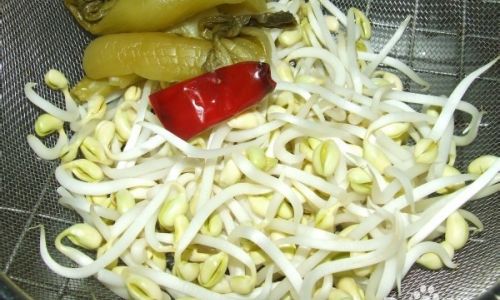
Before diving into the recipe, it’s crucial to familiarize yourself with the key ingredients. Kimchi, the star of this dish, is a fermented vegetable side dish in Korean cuisine, traditionally made with napa cabbage and a variety of spices, including salt, red pepper flakes, garlic, ginger, and fish sauce. Its unique flavor profile—a blend of sourness, sweetness, saltiness, and spiciness—adds depth to the beef bowl.
For the beef, thinly sliced ribeye or sirloin works best, as these cuts are tender and cook quickly, retaining moisture and flavor. Rice, preferably short-grain Japanese rice, forms the base of the bowl, providing a comforting, starchy contrast to the bold flavors of the kimchi and beef.
Other essential ingredients include sesame oil for its nutty aroma, soy sauce and brown sugar to balance the flavors, garlic and ginger for their aromatic properties, and green onions or scallions for garnish. Optionally, you can add a splash of gochujang (Korean chili paste) or sriracha for extra heat.
Section 2: Preparing the Ingredients
-
Kimchi Preparation:

- Start by opening your jar of kimchi. If it’s homemade, ensure it’s well-fermented.
- Drain excess liquid, but retain a bit to use in the cooking process for added flavor.
- Chop the kimchi into bite-sized pieces if it’s not already pre-cut.
-
Beef Preparation:
- Thinly slice your beef against the grain to ensure tenderness.
- In a bowl, marinate the beef with a mixture of soy sauce, sesame oil, brown sugar, minced garlic, and grated ginger. Let it sit for at least 15 minutes to allow the flavors to meld.
-
Rice Preparation:
- Rinse your rice thoroughly under cold water until the water runs clear.
- Cook the rice according to package instructions, usually involving bringing water to a boil, adding the rice, reducing to a simmer, covering, and letting it cook until the water is absorbed.
Section 3: Cooking the Kimchi Beef Bowl
-
Sautéing the Aromatics:
- In a large skillet or wok, heat a tablespoon of sesame oil over medium-high heat.
- Add minced garlic and grated ginger, and sauté until fragrant, about 30 seconds to 1 minute. Be careful not to burn them, as this will make the dish bitter.
-
Cooking the Beef:
Add the marinated beef to the skillet in a single layer, avoiding overcrowding. Cook for about 2-3 minutes per side, or until browned and cooked to your liking. Remove the beef from the skillet and set it aside.
-
Cooking the Kimchi:

- In the same skillet, add a bit more sesame oil if needed.
- Add the chopped kimchi and sauté for about 5-7 minutes, stirring occasionally. The goal is to caramelize the kimchi slightly, enhancing its flavor.
-
Combining Ingredients:
- Return the cooked beef to the skillet with the kimchi. Stir to combine, allowing the beef to absorb some of the kimchi’s juices.
- If you like your dish a bit saucy, you can add a splash of the reserved kimchi liquid or a mixture of soy sauce, brown sugar, and a touch of water to create a glaze.
-
Tasting and Adjusting:
Taste the mixture and adjust seasoning as needed. You may want to add more soy sauce for saltiness, brown sugar for sweetness, or a pinch of red pepper flakes for heat.
Section 4: Serving the Kimchi Beef Bowl
-
Plating:
- Scoop a generous portion of cooked rice into a bowl.
- Spoon the kimchi beef mixture over the rice, ensuring an even distribution.
-
Garnishing:
- Sprinkle chopped green onions or scallions over the top for a fresh, crunchy contrast.
- Optionally, add a drizzle of sesame oil, a sprinkle of sesame seeds, or a dollop of gochujang or sriracha for extra flavor.
-
Serving Suggestions:

- Pair your Kimchi Beef Bowl with a side of steamed vegetables, miso soup, or a simple green salad for a balanced meal.
- For an added touch of indulgence, top with a fried egg or a sprinkle of toasted nori (seaweed).
Section 5: Tips and Tricks for Perfection
- Marinating Time: Don’t skip the marinating step for the beef. It’s crucial for flavor absorption.
- Kimchi Variety: Experiment with different types of kimchi, such as radish or cucumber, to vary the texture and flavor profile.
- Cooking Temperature: Keep an eye on the heat when cooking the beef and kimchi. High heat is essential for caramelization, but too much can burn the ingredients.
- Rice Consistency: For perfect rice, use a rice cooker if you have one, as it maintains a consistent temperature and prevents overcooking.
- Storage: Leftovers can be stored in an airtight container in the refrigerator for up to 3 days. Reheat gently to avoid drying out the rice and beef.
Conclusion
Making a Kimchi Beef Bowl at home is not only a delightful culinary adventure but also a way to bring a touch of Korean flavor into your everyday meals. With its vibrant colors, aromatic spices, and satisfying textures, this dish is sure to become a staple in your recipe book. Whether you’re serving it for a weeknight dinner, a weekend feast, or a special occasion, the Kimchi Beef Bowl promises to deliver a memorable eating experience. So, gather your ingredients, roll up your sleeves, and start cooking—your taste buds are in for a treat!


0 comments