Introduction
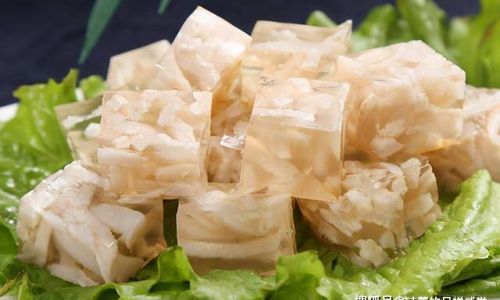
Pork skin jelly, also known as aspic or meat jelly, is a traditional dish enjoyed across various cultures, particularly in Asian and Eastern European cuisines. It’s a delightful blend of flavors and textures, offering a smooth, jelly-like consistency with a rich, savory taste. While the basic concept may seem straightforward—cooking pork skin until it forms a gelatinous mass—achieving truly delicious pork skin jelly requires a blend of precision, patience, and an understanding of key culinary techniques.
In this comprehensive guide, we’ll delve into every aspect of making pork skin jelly, from selecting the right ingredients to perfecting the cooking process and adding flavorful enhancements. By the end, you’ll be equipped with the knowledge and skills to create pork skin jelly that’s not only visually appealing but also bursting with flavor.
Chapter 1: Understanding the Ingredients

1 Pork Skin
The foundation of any pork skin jelly is, of course, the pork skin itself. Quality matters here; fresh, clean pork skin with minimal fat is ideal. Look for pork skin that’s been properly trimmed of excess hair, scales, and fat. If you’re buying it from a butcher or market, ask for advice on the freshest options available.
2 Water
Water is crucial for extracting the gelatin from the pork skin. The ratio of water to pork skin will affect the final consistency of your jelly. Generally, a ratio of about 4-6 cups of water per pound of pork skin is a good starting point, but this can be adjusted based on your personal preference for firmness.
3 Seasonings and Flavorings
The beauty of pork skin jelly lies in its versatility. You can flavor it with a myriad of ingredients to suit your taste. Common seasonings include soy sauce, ginger, garlic, and star anise for an Asian twist, or vinegar, bay leaves, and black pepper for a more European flavor profile. Don’t be afraid to experiment with herbs, spices, and even vegetables to create unique and delicious combinations.
4 Optional Ingredients
For added texture and flavor, consider incorporating other ingredients such as cooked meat (like pork, chicken, or beef), vegetables, or even eggs. These additions can make your jelly more filling and nutritious while providing a delightful contrast in textures.
Chapter 2: Preparation Techniques
1 Cleaning and Trimming
Before you begin cooking, it’s essential to thoroughly clean and trim the pork skin. This involves removing any remaining hair, scales, and excess fat. Use a sharp knife or scissors to trim away any unwanted bits, and rinse the skin thoroughly under cold running water.
2 Blanching

Blanching the pork skin helps to remove impurities and tighten the skin, making it easier to handle during subsequent steps. Place the cleaned skin in a pot of boiling water and cook for about 2-3 minutes. Remove it with a slotted spoon and rinse under cold water to stop the cooking process. Pat the skin dry with paper towels.
3 Shredding or Cubing
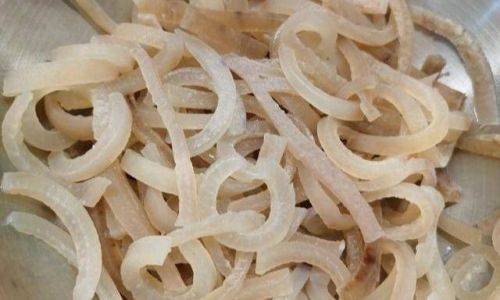
For a smoother jelly, shred the pork skin into thin strips using a sharp knife or kitchen scissors. Alternatively, you can cube it into smaller pieces if you prefer a chunkier texture.
Chapter 3: The Cooking Process
1 Simmering
Now it’s time to cook the pork skin. Place the shredded or cubed skin in a large pot with the water and any seasonings or flavorings you’ve chosen. Bring the mixture to a gentle simmer over medium-low heat. It’s important to maintain a low temperature to ensure the gelatin is slowly extracted without scorching the bottom of the pot.
2 Skimming
As the pork skin cooks, impurities and fat will rise to the surface and form a foam. Use a ladle to skim this foam off regularly. This step is crucial for a clear, clean-tasting jelly.
3 Cooking Time
The cooking time can vary depending on the amount of pork skin and the desired consistency of your jelly. Generally, you’ll need to simmer the mixture for several hours, anywhere from 3 to 6, until the liquid has reduced and thickened slightly. The pork skin should be tender and almost fully dissolved into the liquid.
4 Testing for Gelatin Content
To check if the gelatin has been properly extracted, spoon a small amount of the liquid onto a cold plate and let it cool for a few minutes. If it sets into a jelly-like consistency, it’s ready. If not, continue simmering for a bit longer.

Chapter 4: Flavor Enhancements
1 Adding Aromatics
For an extra layer of flavor, consider adding aromatic ingredients like garlic, ginger, onions, or shallots. These can be sautéed before adding to the pot, or simply simmered with the pork skin. Remember to remove them before the final stages of cooking to avoid a bitter taste.
2 Infusing with Herbs and Spices
Herbs and spices can transform your pork skin jelly from good to great. Whole spices like star anise, cloves, and cinnamon can be tied in a cheesecloth and added to the pot. Fresh or dried herbs like thyme, rosemary, and parsley can also be used, but be mindful of their cooking time as they can become bitter if overcooked.
3 Incorporating Extracts and Essences
For a more complex flavor profile, consider adding extracts or essences like soy sauce, fish sauce, or even a splash of wine or vinegar. These ingredients can add depth and sophistication to your jelly.
Chapter 5: Setting and Serving
1 Cooling and Setting
Once the pork skin jelly has reached the desired consistency, remove it from the heat and let it cool slightly. Pour it into a clean, shallow container or mold. To ensure a smooth surface, cover the jelly with plastic wrap pressed directly onto the surface to prevent a skin from forming. Let it cool to room temperature, then refrigerate for at least 4-6 hours or until fully set.
2 Unmolding
To unmold your jelly, run a knife around the edges of the container or mold to loosen it. Invert the container onto a serving plate and gently tap it to release the jelly. If it’s stubborn, you can run a warm knife or spatula around the edges again to loosen it further.

3 Serving Suggestions
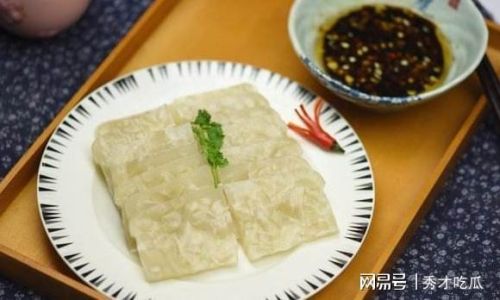
Pork skin jelly is incredibly versatile and can be served in various ways. It can be enjoyed on its own as a light appetizer or snack, or paired with dipping sauces like soy sauce, mustard, or horseradish. It can also be sliced and used as a topping for salads, sandwiches, or even as a filling for ravioli or dumplings.
For a more elegant presentation, consider garnishing your jelly with fresh herbs, edible flowers, or a drizzle of extra virgin olive oil. You can also serve it with a side of pickled vegetables, crusty bread, or a light salad for a balanced meal.
Chapter 6: Troubleshooting and Tips
1 Common Issues and Solutions
- Jelly is too firm: If your jelly is too firm, it may be due to too much cooking time or not enough water. Next time, reduce the cooking time slightly or increase the water ratio.
- Jelly is too soft: Conversely, if your jelly is too soft, it may be because it wasn’t cooked enough or there was too much water. Increase the cooking time or reduce the water ratio.
- Impurities in the jelly: If your jelly has impurities or a cloudy appearance, it may be due to insufficient skimming. Be more vigilant during the simmering process and skim regularly.
- Strong odors or flavors: If your jelly has a strong, unpleasant odor or flavor, it may be due to overcooked aromatics or spices. Be mindful of cooking times and remove them before the final stages of cooking.
2 Tips for Success
- Use fresh, high-quality pork skin for the best results.
- Be patient with the simmering process; rushing it can compromise the texture and flavor of your jelly.
- Regularly skim the surface to ensure a clear, clean-tasting jelly.
- Experiment with different seasonings and flavorings to find what you enjoy the most.
- Store any leftover jelly in an airtight container in the refrigerator for up to a week.
Conclusion
Making pork skin jelly may seem like a daunting task at first, but with the right ingredients, techniques, and a bit of patience, you can create a dish that’s not only delicious but also visually stunning. Whether you’re serving it as a light appetizer, a filling meal component, or a creative garnish, pork skin jelly is sure to impress. So gather your ingredients, roll up your sleeves, and start experimenting with this timeless culinary treat. Happy cooking!


0 comments