Introduction
Steamed buns, or baozi, are a staple in Chinese cuisine, enjoyed by millions for their soft, fluffy exterior and savory, flavorful fillings. Among the various types of fillings, meat fillings are perhaps the most popular, offering a rich, hearty taste that pairs perfectly with the bun’s doughy texture. Whether you’re a seasoned chef or a home cook eager to impress, learning how to make meat filling for steamed buns can elevate your culinary skills and delight your taste buds. This guide will walk you through the process step-by-step, ensuring you create a filling that is both delicious and authentic.
Section 1: Choosing the Right Meat
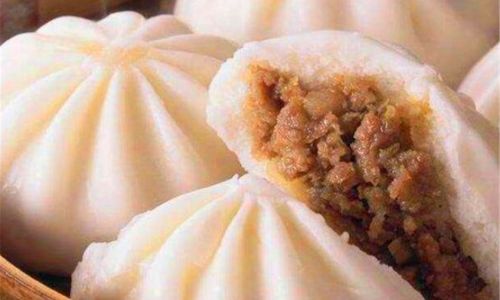
The foundation of any great meat filling is the quality of the meat you use. For traditional steamed buns, pork is the most common choice, but beef, chicken, or even a combination of meats can be used to suit your preferences. Here are some tips for selecting the perfect meat:
-
Freshness Matters: Always opt for fresh, high-quality meat. Avoid frozen or pre-packaged options that may have lost their flavor and texture.
-
Fat Content: A balance of fat and lean meat is crucial. Too much fat can make the filling greasy, while too little can result in a dry, unappealing texture. For pork, a mix of pork shoulder and pork belly often works well.
-
Meat Cuts: Choose cuts that are suitable for grinding or mincing. Shoulder and belly cuts are ideal for their flavor and texture.
Section 2: Preparing the Meat
Once you’ve selected your meat, it’s time to prepare it for the filling:
-
Trimming and Cubing: Begin by trimming any excess fat or sinew from the meat. Cut the meat into small, uniform cubes. This ensures even cooking and a consistent texture in the final filling.
-
Grinding or Mincing: Use a meat grinder or food processor to grind the meat to your desired consistency. If you prefer a coarser texture, pulse the meat in short bursts. For a finer texture, grind it longer.
-
Seasoning Basics: Set the ground meat aside in a large mixing bowl. At this point, you can add some basic seasonings to start building flavor. Salt, pepper, and a pinch of white sugar are good starting points.
Section 3: Adding Aromatics and Flavorings
The true magic of meat fillings lies in the aromatics and flavorings that transform simple ground meat into a culinary delight. Here are some essential ingredients and steps:
-
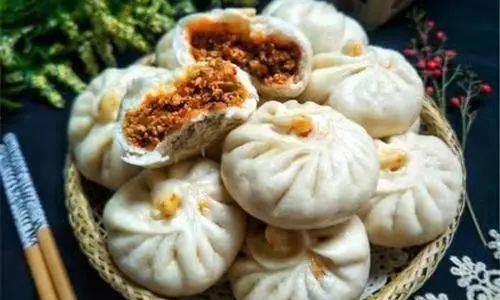
Ginger and Garlic: Finely chop fresh ginger and garlic. These ingredients add a subtle heat and depth of flavor that complements the meat. Add them to the meat along with the basic seasonings.
-
Soy Sauce and Sesame Oil: Soy sauce provides umami and a rich, savory taste. A drizzle of sesame oil enhances the aroma and adds a nutty flavor. Adjust the quantities to taste, but remember that soy sauce can make the filling quite salty, so use it sparingly if you’ve already added salt.
-
Scallions and Green Onions: Finely chopped scallions or green onions add a fresh, slightly sweet note to the filling. They also provide a nice crunch when bitten into.
-
Oyster Sauce and Shaoxing Wine (Optional): For an even more complex flavor profile, consider adding a tablespoon of oyster sauce and a splash of Shaoxing wine. Oyster sauce adds a hint of seafood flavor and a glossy shine to the filling, while Shaoxing wine deepens the overall taste.
-
Water or Broth: To keep the filling moist and juicy, add a little water or chicken/pork broth a tablespoon at a time, mixing well after each addition. This helps to bind the ingredients and ensures the filling stays tender during steaming.
Section 4: Binding the Filling
Binding agents help to hold the filling together, preventing it from becoming too loose or falling apart during steaming. Here are a few options:
-
Cornstarch or Potato Starch: Add a tablespoon of cornstarch or potato starch to the filling. This will help absorb any excess moisture and create a cohesive texture.
-
Egg Whites: For a more tender and cohesive filling, you can also incorporate one or two egg whites. Beat the egg whites lightly before folding them into the meat mixture.
-
Mixing: Use your hands or a spatula to gently mix all the ingredients together until just combined. Avoid over-mixing, which can lead to a tough filling.
Section 5: Adjusting Seasoning and Taste Testing
Before assembling your steamed buns, it’s important to taste the filling and adjust the seasoning as needed. Here’s how:
-
Taste Test: Cook a small portion of the filling in a pan or microwave to test its flavor. This will give you a better sense of how it will taste after steaming.
-
Adjust Seasoning: Based on your taste test, add more salt, soy sauce, sugar, or other seasonings as needed. Remember, the flavors will intensify during steaming, so err on the side of caution with salt.
-
Consistency Check: Ensure the filling is not too wet or too dry. If it’s too wet, add a bit more cornstarch or breadcrumbs. If it’s too dry, add a splash more broth or water.
Section 6: Preparing and Steaming the Buns
Now that your filling is perfect, it’s time to prepare the dough and assemble the buns. While this article focuses on the filling, here’s a brief overview of the next steps:
-
Dough Preparation: Prepare a soft, fluffy dough using flour, water, yeast, and a pinch of sugar. Let it rise until doubled in size.
-
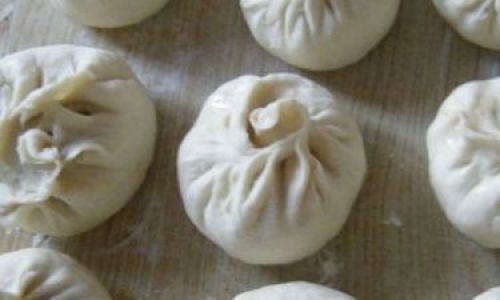
Assembling the Buns: Divide the dough into small portions, flatten each portion, and place a spoonful of filling in the center. Seal the dough around the filling, pinching the edges to create a smooth, sealed bun.
-
Second Rise: Place the assembled buns on a parchment-lined steaming tray, cover with a damp cloth, and let them rise for another 20-30 minutes.
-
Steaming: Steam the buns over boiling water for about 15-20 minutes, or until they are cooked through and have a soft, fluffy texture.
Conclusion
Making meat filling for steamed buns is a rewarding culinary endeavor that combines precision, patience, and creativity. By following the steps outlined in this guide, you’ll be able to create a filling that is bursting with flavor, moist, and tender. Whether you’re serving them as a hearty breakfast, a comforting lunch, or a delightful dinner, these steamed buns are sure to become a family favorite. Happy cooking!


0 comments