Introduction
In the realm of health-conscious individuals, yogurt has emerged as a staple due to its numerous nutritional benefits. Rich in probiotics, protein, calcium, and various vitamins, yogurt not only aids digestion but also boosts the immune system. While store-bought yogurt is convenient, making yogurt at home using a health pot offers a fresher, more customizable option. Health pots, designed specifically for wellness-oriented cooking and brewing, provide an ideal environment for yogurt fermentation. This guide delves into the intricacies of making yogurt in a health pot, from selecting the right ingredients to perfecting the fermentation process.
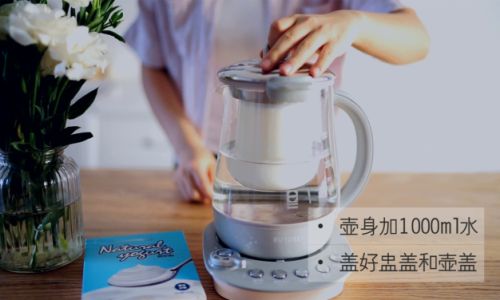
Understanding the Basics of Yogurt Making
Before diving into the specifics of using a health pot for yogurt production, it’s crucial to grasp the fundamental principles behind yogurt making. Yogurt is essentially milk that has been fermented by lactic acid bacteria, primarily Lactobacillus bulgaricus and Streptococcus thermophilus. These bacteria convert the lactose (milk sugar) into lactic acid, which gives yogurt its tangy flavor and thick texture.
Choosing the Right Health Pot
When selecting a health pot for yogurt making, consider the following features:
-
Temperature Control: Yogurt fermentation occurs optimally at temperatures ranging from 100°F to 115°F (38°C to 46°C). A health pot with precise temperature control ensures consistent fermentation, leading to better yogurt quality.
-
Material: Ceramic and stainless steel pots are preferred due to their non-reactive nature, which prevents the leaching of harmful chemicals into the yogurt.
-
Capacity: Choose a pot that suits your yogurt consumption needs. Smaller pots are ideal for individual use or small families, while larger ones are more suitable for bulk production.
-
Ease of Use: Look for a pot with user-friendly controls and a straightforward cleaning process.
-
Additional Features: Some health pots come with preset yogurt-making programs, making the process even simpler.
Ingredients and Equipment
To make yogurt in a health pot, you’ll need:
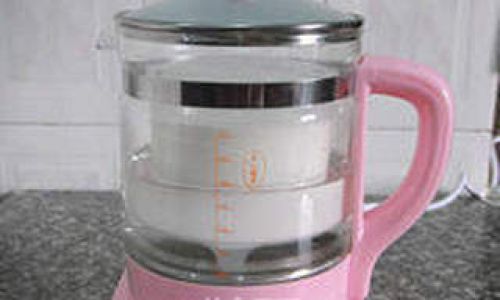
- Milk: Whole, 2%, skim, or non-dairy milk (such as almond, soy, or oat milk) can be used. Full-fat milk produces richer, creamier yogurt.
- Yogurt Starter Culture: This can be store-bought yogurt with active cultures, a yogurt starter kit, or a probiotic capsule. Ensure the starter culture is fresh and contains Lactobacillus bulgaricus and Streptococcus thermophilus.
- Health Pot: As discussed earlier, choose one with the right features.
- Thermometer (optional): For initial temperature checks, especially if your health pot doesn’t have a built-in thermometer.
- Measuring Cups and Spoons: For accurate ingredient measurement.
- Clean Cloth or Towel: To cover the pot during fermentation, preventing contamination while allowing gas exchange.
- Storage Containers: For refrigerating the finished yogurt.
Step-by-Step Yogurt Making Process
-
Preparation of Milk
- Pour the desired amount of milk into the health pot.
- Heat the milk to 180°F (82°C) to sterilize it, killing any harmful bacteria that could interfere with fermentation. Stir occasionally to prevent scorching.
- Once the milk reaches the desired temperature, turn off the heat and let it cool to between 100°F and 115°F (38°C to 46°C). This step is crucial as too-hot milk can kill the yogurt starter culture. You can speed up cooling by placing the pot in a sink of cold water or using an ice bath.
-
Adding the Starter Culture
- Once the milk has cooled to the optimal temperature, add the yogurt starter culture. For store-bought yogurt, use about 2-3 tablespoons per quart of milk. Stir gently to ensure even distribution.
- If using a probiotic capsule, open it and sprinkle the contents over the milk, then stir.
-
Fermentation
- Set the health pot to maintain a constant temperature within the optimal range for yogurt fermentation.
- Cover the pot with a clean cloth or towel to protect it from contaminants while allowing gases to escape.
- Allow the yogurt to ferment for 6-12 hours, depending on your taste preference. Shorter fermentation times yield a tangier, firmer yogurt, while longer times result in a creamier, less tangy product.
-
Cooling and Refrigeration
- Once fermentation is complete, turn off the health pot and let the yogurt cool slightly.
- Transfer the yogurt to clean storage containers. For a thicker consistency, you can strain it through a cheesecloth or yogurt strainer.
- Refrigerate the yogurt for at least 2-4 hours before consuming. This step helps to further develop its flavor and texture.
Troubleshooting Common Issues
Even with the best intentions and equipment, yogurt making can sometimes present challenges. Here are some common issues and their solutions:
-
Yogurt is Too Thin
- Cause: Insufficient fermentation time or milk that was too hot when the starter culture was added.
- Solution: Increase fermentation time or ensure the milk cools to the correct temperature before adding the starter culture.
-
Yogurt is Too Tangy
- Cause: Over-fermentation or milk that was too cold when the starter culture was added.
- Solution: Reduce fermentation time or ensure the milk is within the optimal temperature range before adding the starter culture.
-
Yogurt Has a Grainy Texture
- Cause: Excessive stirring during fermentation or using a starter culture that was too old.
- Solution: Stir gently and avoid disturbing the yogurt once fermentation begins. Use fresh starter culture.
-
Yogurt Separates (Curdling)
- Cause: Milk was heated too high during sterilization or starter culture was not evenly distributed.
- Solution: Ensure milk does not exceed 180°F (82°C) during heating and stir the starter culture thoroughly into the milk.
Customizing Your Yogurt
The beauty of making yogurt at home is the ability to customize it to your liking. Here are some ideas to elevate your yogurt-making experience:
-
Flavors and Sweeteners: Add honey, maple syrup, or a natural sweetener like stevia after fermentation and before refrigeration. For flavored yogurt, incorporate fresh or dried fruits, nuts, seeds, or extracts like vanilla or almond.
-
Textural Variations: For a creamier texture, strain the yogurt through a cheesecloth. For a thicker Greek-style yogurt, strain it for longer periods. Adding chia seeds or flax meal can also provide a thicker consistency and added nutrients.
-
Probiotic Boost: For an extra probiotic boost, consider adding a probiotic supplement or an additional spoonful of active yogurt culture during fermentation.
-
Non-Dairy Options: If you prefer non-dairy yogurt, use almond milk, soy milk, oat milk, or coconut milk as the base. Note that the fermentation process and final texture may vary slightly depending on the milk type.
Conclusion
Making yogurt in a health pot is a rewarding endeavor that not only saves money but also allows for customization and control over ingredients and processes. By understanding the basics of yogurt fermentation and selecting the right health pot, you can enjoy fresh, nutritious yogurt tailored to your taste preferences. With a bit of practice, troubleshooting common issues, and experimenting with customizations, you’ll soon master the art of homemade yogurt making. Whether you’re looking to boost your daily probiotic intake, enjoy a creamy breakfast treat, or simply appreciate the joy of homemade food, making yogurt in a health pot is a delightful and nutritious pursuit. Happy yogurt-making!


0 comments