Introduction
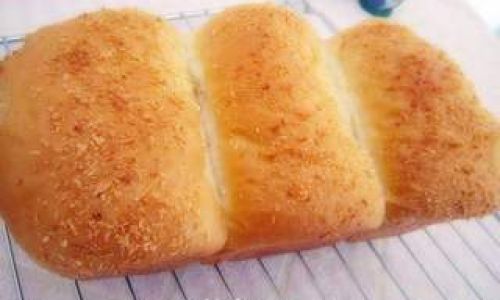
In the realm of baking, there exists a delightful symphony of flavors and textures that can transport one’s taste buds to tropical paradises. Among these culinary wonders, coconut fluff toast bread stands out as a masterpiece, blending the creamy richness of coconut with the soft, airy texture of toast bread. This recipe is not merely a guide; it’s a journey through the art of baking, where precision meets creativity, and the result is a mouthwatering treat that satisfies both the eyes and the palate.
The Ingredients: A Balanced Harmony
Before diving into the steps, let’s first appreciate the ingredients that make this coconut fluff toast bread a reality. Each component plays a crucial role in achieving the perfect balance of taste, texture, and aroma.
- Bread Flour: High-protein bread flour is essential for creating a strong gluten network, which gives the bread its structure and ability to rise.
- Instant Dry Yeast: This active ingredient is responsible for the bread’s leavening process, transforming dough into a light, airy loaf.
- Warm Water: Provides the necessary moisture for yeast activation and dough hydration.
- Granulated Sugar: Not only does it add sweetness, but it also feeds the yeast, promoting fermentation.
- Salt: Enhances flavor and controls the yeast’s activity.
- Unsalted Butter: Adds richness, tenderness, and a slight buttery aroma to the bread.
- Large Eggs: Contribute to the bread’s structure, moisture, and richness.
- Milk Powder: Optional but highly recommended for a richer, creamier taste and texture.
- Coconut Milk: The star ingredient, providing a tropical flavor and creamy consistency.
- Desiccated Coconut (Coconut Flakes): Adds texture and a burst of coconut flavor in every bite.
- Bread Improver (Optional): Enhances dough strength, fermentation stability, and loaf volume.
Equipment: The Tools of the Trade
- Stand Mixer: A must-have for efficient dough mixing and kneading.
- Measuring Cups and Spoons: Ensure accurate ingredient quantities.
- Dough Hook: Attachable to the stand mixer for kneading.
- Bowls: For mixing and proofing the dough.
- Plastic Wrap: Keeps the dough moist during proofing.
- Rolling Pin: For shaping the dough.
- Loaf Pan: Provides structure to the final loaf.
- Oven: The magic happens here.
- Cooling Rack: Allows the bread to cool evenly after baking.
Step-by-Step Guide: Crafting Coconut Fluff Toast Bread
Step 1: Activate the Yeast
Begin by activating the yeast. In a small bowl, combine warm water (around 110°F or 45°C), a pinch of sugar, and the instant dry yeast. Stir gently and let it sit for about 5-10 minutes until frothy and bubbly. This indicates that the yeast is active and ready to leaven your dough.
Step 2: Prepare the Dry Ingredients
In the bowl of your stand mixer, whisk together the bread flour, a tablespoon of granulated sugar, and a teaspoon of salt. If using bread improver, add it at this stage. Set aside.
Step 3: Mix Wet Ingredients
In a separate bowl, combine the coconut milk (make sure it’s at room temperature), melted unsalted butter, and two large eggs. Whisk until fully combined. The mixture should be smooth and free of lumps.
Step 4: Combine Ingredients
With the mixer fitted with the dough hook, pour the wet ingredients into the bowl of dry ingredients. Pour in the activated yeast mixture as well. Mix on low speed until the ingredients come together into a shaggy dough. Gradually increase the speed to medium and knead for about 8-10 minutes, or until the dough is smooth, elastic, and clears the sides of the bowl.
Step 5: Incorporate Desiccated Coconut
Once the dough has reached the windowpane stage (a small piece of dough stretched thinly should be translucent without tearing), add the desiccated coconut flakes. Mix on low speed until evenly distributed throughout the dough. Be careful not to overmix, as this can cause the dough to become too dense.
Step 6: First Proof
Transfer the dough to a lightly greased bowl, cover with plastic wrap, and let it proof in a warm, draft-free place for about 1-1.5 hours, or until it has doubled in size. The dough should be puffy and touch slightly springy when gently pressed.
Step 7: Shape the Dough
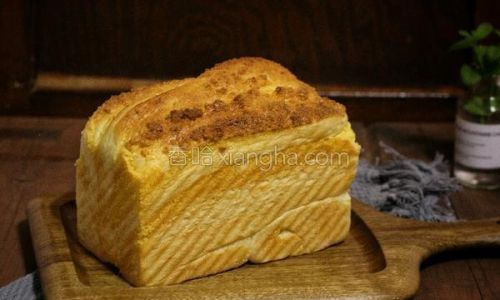
Gently deflate the dough by pressing down on it with your拳头, then turn it out onto a lightly floured surface. Shape it into a log, then use a rolling pin to flatten it into a rectangular shape about 1/2 inch thick. Fold the dough in thirds, like folding a letter, then rotate it 90 degrees. Repeat the flattening and folding process once more. This helps to create layers in the dough, enhancing its final texture.
Step 8: Final Shape and Second Proof
Shape the dough into a loaf by tucking the ends under and placing it seam-side down in a greased loaf pan. Cover loosely with plastic wrap and let it proof for a second time, this time for about 45 minutes to an hour, or until it has risen just above the edge of the pan and feels light and airy.
Step 9: Preheat the Oven
While the dough is proofing for the second time, preheat your oven to 350°F (175°C). If you have an oven thermometer, use it to ensure accurate temperature.
Step 10: Bake the Bread
Once the dough has finished proofing, remove the plastic wrap and place the loaf pan in the preheated oven. Bake for about 30-35 minutes, or until the bread is golden brown and sounds hollow when tapped on the bottom. An instant-read thermometer inserted into the center should read between 190-200°F (88-93°C).
Step 11: Cool and Slice
Remove the loaf from the oven and let it cool in the pan for about 10 minutes. This allows the bread to set and prevents it from collapsing. After 10 minutes, transfer the loaf to a wire cooling rack to cool completely. Cooling is crucial as it allows the bread’s flavors to develop and the crumb to firm up.

Once fully cooled, use a sharp serrated knife to slice the bread. The slices should be even, with a soft, fluffy interior and a slightly crisp crust.
Serving and Enjoying Your Coconut Fluff Toast Bread
Your coconut fluff toast bread is now ready to be enjoyed in numerous ways. It’s perfect on its own, spread with a little butter or jam, or toasted to golden perfection. For a tropical twist, try spreading it with a mixture of cream cheese and shredded coconut. It also pairs wonderfully with a cup of hot coffee or tea, making it an ideal breakfast or afternoon snack.
Storage Tips
To keep your coconut fluff toast bread fresh, store it in an airtight container at room temperature for up to 3 days. For longer storage, wrap it tightly in plastic wrap or aluminum foil and freeze for up to 2 months. To thaw, place the wrapped loaf in the refrigerator overnight, then let it sit at room temperature for a few hours before slicing.
Conclusion
Mastering the art of coconut fluff toast bread is a rewarding endeavor that combines science, creativity, and patience. With this recipe as your guide, you’ll be able to create a loaf that’s not only visually stunning but also bursting with flavor and texture. Whether you’re a seasoned baker or a novice in the kitchen, this recipe promises a delightful journey through the world of baking, culminating in a tropical treat that’s sure to delight your taste buds and impress your loved ones. Happy baking!



0 comments