Introduction
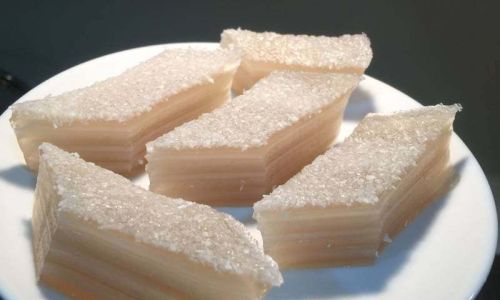
In the realm of Southeast Asian desserts, coconut milk thousand-layer cake, also known as coconut layer cake or “kueh lapis” in Indonesian and Malaysian cuisine, stands as a timeless classic. This exquisite dessert is characterized by its intricate layers of delicate, moist, and fragrant coconut milk-infused cake, separated by thin sheets of caramelized sugar or sometimes, additional coconut milk layers. The result is a visually stunning treat that not only tantalizes the senses with its intricate layered appearance but also delights the palate with its harmonious blend of sweet, creamy, and slightly caramelized flavors.
The art of making coconut layer cake is both a science and a craft, requiring precision, patience, and a keen eye for detail. Each layer must be cooked to perfection, neither too thick nor too thin, to ensure that the final cake retains its moist texture and delicate layers. In this comprehensive guide, we will delve into the step-by-step process of crafting this beloved dessert, from preparing the essential ingredients to achieving the perfect layering technique.
Ingredients and Equipment
Before embarking on your coconut layer cake journey, ensure you have the following ingredients and equipment ready:
Ingredients:
- 400ml thick coconut milk (preferably homemade for maximum flavor)
- 250g granulated sugar
- 200g rice flour
- 50g cornstarch
- 1/2 tsp salt
- A few drops of pandan essence (optional, for an aromatic touch)
- 1/4 cup water (for caramelizing, if making caramel layers)
Equipment:
- A large mixing bowl
- A whisk or electric mixer
- A non-stick frying pan or crepe pan (preferably with a flat bottom and sloping sides)
- A spatula or palette knife
- Measuring cups and spoons
- Parchment paper
- A cooling rack
- A sharp knife
Step-by-Step Guide
Preparing the Coconut Milk Mixture
Begin by gathering all your ingredients and ensuring they are at room temperature. In a large mixing bowl, combine the coconut milk, sugar, rice flour, cornstarch, salt, and pandan essence (if using). Use a whisk or an electric mixer to blend the mixture until it is smooth and free of lumps. This step is crucial as it ensures that each layer of your cake will be even and without imperfections.
Preparing the Pan
Heat your non-stick frying pan over medium heat. Lightly grease it with a bit of oil or a piece of parchment paper to prevent sticking. Ensure the pan is not too hot; you want it to be warm enough to cook the mixture evenly but not so hot that it burns the first layer instantly.
Cooking the Layers
Pour a small ladleful (about 1/4 cup) of the coconut milk mixture into the heated pan. Swirl the pan gently to ensure the mixture covers the bottom evenly. Allow the layer to cook undisturbed until the edges start to curl and the surface appears set but still slightly translucent. This should take around 2-3 minutes depending on the heat of your stove.
Once the layer is set, use a spatula to carefully lift it out of the pan and place it onto a piece of parchment paper laid out on a cooling rack. Repeat this process with the remaining coconut milk mixture, ensuring each layer is cooked separately and stacked onto the parchment paper. Be patient; this is a time-consuming process, but the result is worth it.
Optional Caramel Layers
If you prefer to add caramel layers between your coconut milk layers, make a simple caramel by heating 1/4 cup of water and 1/4 cup of sugar in a small saucepan until the sugar dissolves and turns a deep amber color. Carefully pour a thin layer of caramel onto the parchment paper before adding the next coconut milk layer. The caramel will harden quickly, creating a delightful contrast in texture and flavor.
Stacking and Cooling
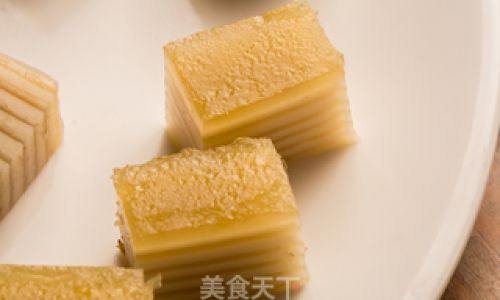
Once all the layers are cooked and cooled slightly, you can begin stacking them. Start with a layer of coconut milk, followed by a layer of caramel (if using), and continue alternating until all layers are used up. Press the layers gently but firmly together to ensure they adhere without tearing.
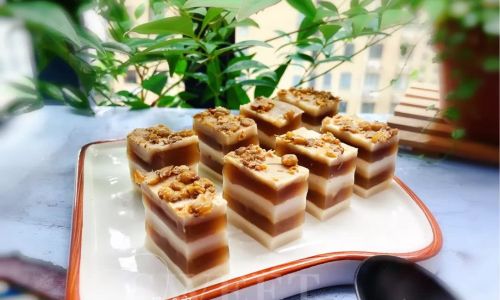
Wrap the stacked cake tightly in parchment paper and then in plastic wrap. Place it on a flat surface and let it cool completely at room temperature. For best results, refrigerate the cake overnight to allow the layers to set and the flavors to meld together.
Slicing and Serving
When you are ready to serve your coconut layer cake, use a sharp knife to slice it into portions. A serrated knife works best as it can cut through the layers without crushing them. Serve the cake chilled, perhaps with a dollop of whipped cream or a scoop of vanilla ice cream on the side to enhance its creamy, sweet flavor.
Tips and Tricks for Perfect Layers
- Consistency is Key: The consistency of your coconut milk mixture is crucial. It should be pourable but not too runny. Adjust the ratio of coconut milk to flour and cornstarch if necessary to achieve the perfect consistency.
- Temperature Control: Maintaining a consistent cooking temperature is vital. Too high will burn the layers, while too low will make them soggy. Use a medium heat and be patient.
- Even Cooking: Ensure each layer is cooked evenly by swirling the pan gently and avoiding stirring the mixture once it’s in the pan.
- Patient Cooling: Allow each layer to cool completely before stacking. This prevents the layers from sticking together and ensures a clean slice when serving.
- Creative Variations: Feel free to experiment with different flavors and ingredients. Adding a hint of pandan extract, vanilla, or even a sprinkle of ground nuts can elevate your coconut layer cake to new heights.
Conclusion
Making coconut layer cake is a labor of love that rewards you with a beautiful, delicious dessert. While the process may seem daunting at first, with practice and patience, you’ll soon master the art of crafting perfect layers that will impress friends and family alike. Remember, the beauty of this dessert lies not just in its appearance but also in the harmonious blend of flavors that come together in each bite. So, gather your ingredients, roll up your sleeves, and embark on a culinary journey that promises sweet rewards. Enjoy the process and savor the fruits of your labor with loved ones.


0 comments