Table of content
Pickled eggs are a delightful and versatile snack enjoyed across various cultures. Whether you’re looking for a tangy appetizer, a quick breakfast on the go, or a unique addition to your charcuterie board, pickled eggs offer a delightful burst of flavor in each bite. While the concept may seem simple, mastering the art of pickling eggs requires attention to detail and a bit of patience. This comprehensive guide will walk you through every step of the process, ensuring you end up with perfectly pickled eggs that are both delicious and visually appealing.
Understanding the Basics of Pickling
Before diving into the specifics of making pickled eggs, it’s essential to understand the basics of pickling. Pickling is a preservation technique that involves immersing food in a brine solution, often containing vinegar, salt, and spices. This acidic environment inhibits the growth of harmful bacteria, thereby extending the shelf life of the food while also adding flavor.
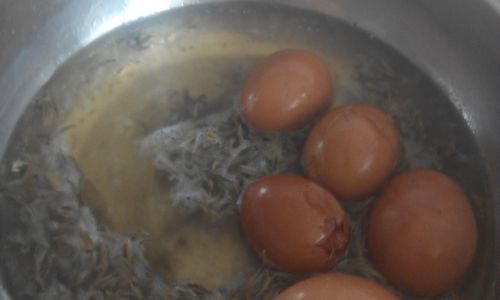
When it comes to pickling eggs, hard-boiled eggs are typically used as the base. The eggs are first cooked until the yolks and whites are firm, then peeled and submerged in a pickling brine. The brine can vary greatly in terms of ingredients and flavors, allowing for endless customization options.
Ingredients and Equipment
Before starting, gather all the necessary ingredients and equipment to ensure a smooth and efficient pickling process.
Ingredients:
- Fresh large eggs (12-24, depending on your needs)
- Distilled white vinegar or apple cider vinegar (enough to cover the eggs)
- Water (equal parts to vinegar)
- Sugar (optional, for balancing acidity)
- Salt (kosher or pickling salt)
- Spices and herbs (such as bay leaves, black peppercorns, garlic cloves, red pepper flakes, dill, or mustard seeds)
- Optional flavorings (like beer, hard cider, or a splash of hot sauce for extra kick)
Equipment:
- Large pot for boiling eggs
- Slotted spoon or spoon with holes for removing eggs
- Ice water bath
- Peeling knife or regular knife for peeling eggs
- Sterilized glass jars or containers with lids for storing pickled eggs
- Measuring cups and spoons
- Funnel (optional, for easy pouring of brine into jars)
Step-by-Step Guide to Making Pickled Eggs
Step 1: Preparing the Eggs
-
Inspection and Cleaning: Start by inspecting each egg for cracks or dirt. Gently wash them under cold running water to remove any surface contaminants. Pat the eggs dry with a clean paper towel.
-
Boiling Water: Fill a large pot with enough water to fully submerge the eggs and bring it to a rolling boil over high heat.
-
Adding Eggs: Carefully lower the eggs into the boiling water using a slotted spoon to avoid cracking them.
-
Timing: Boil the eggs for exactly 9-12 minutes, depending on your preference for yolk texture. For fully set yolks, aim for 12 minutes; for creamier yolks, 9-10 minutes is sufficient.
-
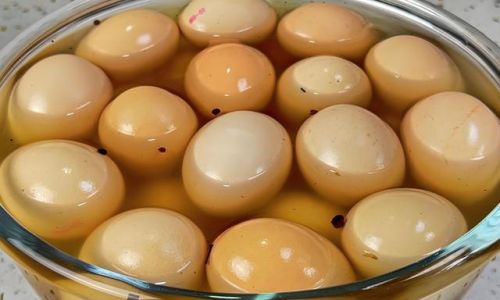
Ice Water Bath: Once the eggs are cooked, immediately transfer them to an ice water bath using the slotted spoon. This stops the cooking process and helps to separate the eggshell from the white, making peeling easier.
Step 2: Peeling the Eggs
-
Cooling: Allow the eggs to sit in the ice water bath for at least 10 minutes or until they are completely cool.
-
Peeling Technique: Gently tap the eggs all over with the back of a spoon or knife to create small cracks in the shell. Roll the egg between your hands to loosen the shell further. Peel the shell off starting from the larger end. If any bits of shell remain, use the peeling knife to carefully remove them without damaging the egg white.
Step 3: Preparing the Pickling Brine
-
Combining Ingredients: In a large pot, combine equal parts vinegar and water. The exact amount will depend on the size of your jar and how many eggs you are pickling. For a standard batch, 1 cup of vinegar and 1 cup of water is a good starting point.
-
Seasoning: Add sugar and salt to taste. A general guideline is 1-2 tablespoons of sugar and 2-3 tablespoons of salt per cup of liquid. Adjust according to your preference for sweetness and saltiness.
-
Spices and Herbs: Add your chosen spices and herbs to the pot. This is where you can really customize the flavor of your pickled eggs. For a classic pickling mix, consider bay leaves, black peppercorns, and garlic cloves. For a more adventurous flavor, try adding dill, mustard seeds, or red pepper flakes.
-
Simmering: Bring the mixture to a simmer over medium heat, stirring occasionally to ensure the sugar and salt are fully dissolved. Allow it to simmer for about 5 minutes to meld the flavors.
-
Cooling: Remove the pot from heat and let the brine cool to room temperature. You can also speed up the cooling process by placing the pot in an ice water bath.

Step 4: Pickling the Eggs
-
Jar Preparation: While the brine is cooling, sterilize your glass jars and lids by washing them in hot, soapy water and rinsing thoroughly. You can also run them through the dishwasher on the sanitize setting.
-
Packing the Eggs: Carefully place the peeled eggs into the sterilized jars. Pack them tightly but not so much that they are crushed.
-
Pouring the Brine: Once the brine has cooled, pour it over the eggs in the jars, ensuring they are fully submerged. Use a funnel if necessary to avoid spills.
-
Sealing and Storing: Secure the lids tightly and label the jars with the date and any special ingredients used. Store the pickled eggs in the refrigerator for at least 24 hours before enjoying to allow the flavors to fully develop.
Step 5: Serving and Enjoying
-
Waiting Period: Ideally, let the pickled eggs sit in the refrigerator for 3-7 days to allow the flavors to meld and deepen. The longer they sit, the stronger the pickled flavor will be.
-
Serving: To serve, use a clean spoon to remove the eggs from the jar. You can enjoy them as is, or slice them in half for a more visually appealing presentation.
-
Creative Uses: Pickled eggs are incredibly versatile. They can be served as a standalone appetizer, added to salads, or used as a topping for burgers, avocado toast, or even deviled eggs.
Troubleshooting and Tips
-
Cracking Eggs During Boiling: To prevent eggs from cracking, make sure they are added to boiling water gently and not dropped from a height. Using older eggs can also reduce the risk of cracking, as their shells are more porous and easier to peel.
-
Tough Whites: Overcooking can lead to tough, rubbery egg whites. Always use a timer and immediately transfer eggs to an ice water bath once they are done boiling.
-
Peeling Difficulties: Fresh eggs are harder to peel due to their tight-fitting shells. Using eggs that are a week or two old can make peeling easier. Additionally, the ice water bath helps loosen the shell.
-
Adjusting Flavors: If you find the brine too tangy, you can reduce the amount of vinegar or add more sugar. Conversely, for a more intense pickled flavor, increase the vinegar content or let the eggs sit longer in the brine.
-
Storage: Pickled eggs can be stored in the refrigerator for up to a month, but their flavor will continue to develop and intensify over time.
Conclusion
Making pickled eggs at home is a rewarding culinary endeavor that allows you to customize flavors and enjoy a delicious snack anytime you want. By following this comprehensive guide, you’ll be able to create perfectly pickled eggs that are bursting with flavor and ready to elevate your mealtime experience. Whether you’re serving them at a party, enjoying them as a quick breakfast, or incorporating them into a more elaborate dish, pickled eggs are sure to become a staple in your kitchen. Happy pickling!


0 comments