Table of content
Introduction
Sun-dried fish blocks, a traditional food preservation technique, have been practiced for centuries across various cultures, particularly in coastal regions where fish is abundant. This method not only extends the shelf life of fish but also enhances its flavor, creating a unique and delicious product. Whether you’re looking to preserve your catch, add a unique ingredient to your culinary repertoire, or simply enjoy the taste of sun-dried fish, making your own sun-dried fish blocks is a rewarding endeavor. In this comprehensive guide, we’ll walk you through the entire process, from selecting the right fish to storing the final product.
Step 1: Choosing the Right Fish
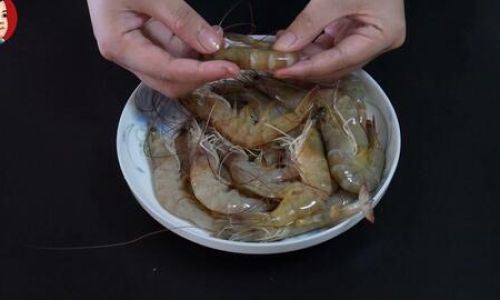
The first and most crucial step in making sun-dried fish blocks is selecting the right type of fish. Ideally, you should use firm-fleshed, oily fish species that hold up well to drying. Common choices include salmon, mackerel, tuna, and even certain types of trout. Avoid fish with a high water content or delicate texture, as they may not dry well and may spoil more easily.

Freshness is key. Ensure your fish is very fresh, ideally caught within the last 24 hours. If you’re purchasing fish, look for fish with bright, firm flesh, clear eyes, and a fresh, mild odor. Avoid fish with slimy textures, dull colors, or strong, unpleasant odors.
Step 2: Preparing the Fish
Once you have your fish, it’s time to prepare it for drying. Start by gutting and scaling the fish if necessary. Remove any fins, heads, and tails, as these can harbor bacteria and make the drying process more challenging.
Next, wash the fish thoroughly under cold running water to remove any blood, scales, or debris. Pat the fish dry with clean paper towels or a clean cloth. It’s important to remove as much moisture as possible before starting the drying process.
Step 3: Filleting and Cutting
For sun-dried fish blocks, you’ll want to cut the fish into manageable pieces. Fillet the fish if it’s not already done, removing the bones and skin if desired. If you prefer to keep the skin on, ensure it’s scaled and cleaned thoroughly.
Cut the fillets into even, rectangular blocks, about 1-2 inches thick. Uniform thickness is crucial for even drying. If you’re working with smaller fish, you may not need to cut them into blocks; whole fish can be dried as long as they’re gutted and cleaned.
Step 4: Brining (Optional)
Brining is an optional step that can help preserve the fish and enhance its flavor. It also helps to firm up the flesh, making it less likely to spoil during the drying process.
To make a simple brine, combine 1 cup of kosher salt with 1 gallon of water. Submerge the fish blocks in the brine for 2-4 hours, depending on their size and thickness. After brining, rinse the fish blocks thoroughly under cold water and pat them dry.
Step 5: Seasoning
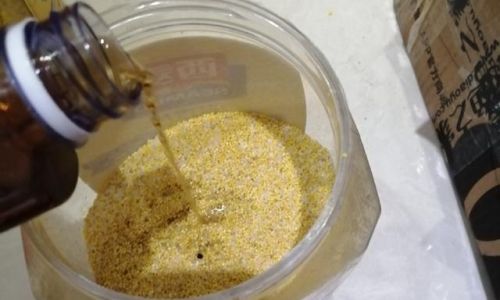
Before drying, season the fish blocks to your liking. Salt is a must to help preserve the fish and draw out moisture, but you can also add other spices and herbs for added flavor. Popular choices include black pepper, garlic powder, paprika, and dill.

Rub the seasoning evenly onto all surfaces of the fish blocks, ensuring they’re well-coated. This will help create a flavorful crust as the fish dries.
Step 6: Drying the Fish
Now it’s time to start the drying process. There are several methods you can use, but sun-drying is the most traditional and effective.
Sun-Drying
Choose a spot that receives direct sunlight for most of the day and is protected from wind and animals. Lay the fish blocks on clean, wire racks or mesh trays to allow air to circulate freely around them. Space the blocks out so they’re not touching each other.
The drying process can take anywhere from 2-7 days, depending on the weather, the thickness of the fish blocks, and your personal preference for dryness. Ideally, the temperature should be warm (around 70-85°F) and the humidity low.
Check the fish blocks daily, turning them over occasionally to ensure even drying. They should become firm to the touch and have a slightly darker, more concentrated color. Be careful not to over-dry them, as this can make them too hard and difficult to chew.
Alternative Drying Methods
If sun-drying isn’t an option, you can use a food dehydrator or an oven set to a very low temperature (around 150°F or 65°C) with the door slightly ajar to allow moisture to escape. In a dehydrator, the process can take 8-12 hours, while in an oven, it may take longer, depending on the settings and the size of the fish blocks.
Step 7: Testing for Dryness
To test if the fish blocks are dry enough, press them gently with your finger. They should feel firm and slightly elastic, but not hard or brittle. The surface should be dry to the touch, with no visible moisture.
Another way to test is to cut a small piece and check its interior. It should be dry and slightly translucent, with no remaining moisture pockets.

Step 8: Storing the Sun-Dried Fish Blocks
Once the fish blocks are fully dried, they need to be stored properly to prevent mold and maintain their quality.
Wrap each block individually in plastic wrap or parchment paper, then place them in an airtight container or vacuum-seal them. Store the containers in a cool, dark place, such as a pantry or cupboard. Properly stored, sun-dried fish blocks can last for several months.
For longer-term storage, you can freeze the fish blocks. Wrap them tightly and place them in a freezer-safe container or bag. They can be kept in the freezer for up to a year.
Conclusion
Making sun-dried fish blocks is a time-consuming process, but the end result is well worth the effort. With the right techniques and ingredients, you can create a delicious, preserved food that’s perfect for snacking, cooking, or adding to various dishes. Whether you’re preserving your catch or simply exploring new culinary possibilities, sun-dried fish blocks offer a unique and flavorful addition to your kitchen.
Remember, the key to successful sun-dried fish blocks is patience, attention to detail, and a good understanding of the drying process. With practice, you’ll be able to create beautiful, delicious fish blocks that you can enjoy throughout the year. Happy drying!


0 comments