Introduction
Rice cakes, known by various names across cultures—such as mochi in Japan, nian gao in China, and tteok in Korea—hold a revered place in culinary traditions worldwide. These soft, chewy delicacies, often served during festivals, weddings, and family gatherings, symbolize unity, prosperity, and respect for ancestral practices. Crafting traditional rice cakes is a labor-intensive yet rewarding process that connects modern cooks to centuries-old techniques. This article explores the intricate steps involved in making authentic rice cakes, from selecting the finest ingredients to mastering the art of steaming and shaping. By adhering to time-honored methods, enthusiasts can savor the unadulterated flavors and textures that have delighted generations.
The Foundations: Ingredients and Tools
The cornerstone of any rice cake lies in its ingredients. Traditional recipes prioritize simplicity and quality, relying on three primary components:
- Glutinous Rice (Sticky Rice): This short-grain variety, scientifically termed Oryza sativa var. glutinosa, is essential for its high starch content, which imparts the signature chewiness.
- Water: Pure, filtered water is used for soaking and cooking to avoid impurities that might alter the taste or texture.
- Sweeteners (Optional): Depending on regional preferences, ingredients like brown sugar, honey, or date palm syrup may be added to enhance flavor.
Tools of the Trade
While modern kitchens may utilize electric grinders or food processors, traditional methods demand specialized tools:
- Stone Mortar and Pestle: Used for grinding soaked rice into a fine paste, preserving the grain’s natural oils and aroma.
- Bamboo Steamer: A porous, eco-friendly vessel that allows steam to circulate evenly, preventing sogginess.
- Wooden Molds: Carved with intricate patterns, these molds shape the rice dough into festive designs.
- Cheesecloth or Muslin: Essential for lining steamers and preventing sticking.
Step 1: Soaking the Rice
The journey begins by rinsing 500 grams of glutinous rice under cold water until the liquid runs clear. This step removes excess starch and debris. Transfer the rice to a large bowl and cover it with 750 ml of water, ensuring the grains are submerged by at least 2.5 cm. Allow the rice to soak for 6–8 hours, or overnight, at room temperature. Soaking softens the grains, reducing cooking time and ensuring a smooth, uniform texture.
Step 2: Grinding the Rice
Traditionally, the soaked rice is drained and ground in a stone mortar. This laborious process requires patience, as the grains must be pounded gradually to avoid overheating the mixture, which can result in a gummy consistency. For home cooks, a high-speed blender or food processor offers a convenient alternative. Process the rice in small batches, adding 1–2 tablespoons of water per batch to facilitate blending. The goal is to achieve a thick, paste-like consistency resembling wet sand. Avoid over-processing, as excessive heat can compromise the texture.
Step 3: Preparing the Dough
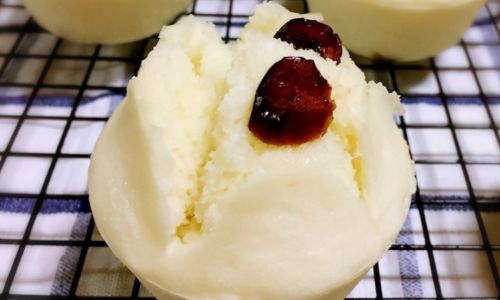
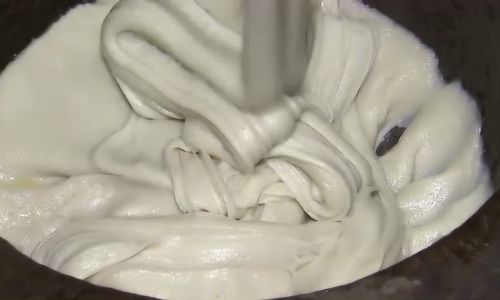
Transfer the rice paste to a large mixing bowl. If adding sweeteners, dissolve 100 grams of brown sugar or honey in 50 ml of warm water and incorporate it into the mixture. Knead the dough vigorously for 8–10 minutes until it becomes smooth, elastic, and slightly sticky. This step develops the gluten-like proteins in the rice, ensuring the cake holds its shape during steaming.
Step 4: Steaming the Dough
Line a bamboo steamer with cheesecloth, leaving enough fabric to drape over the sides. Fill a wok or large pot with water, ensuring the steamer sits at least 5 cm above the water level to prevent boiling water from touching the dough. Bring the water to a rolling boil, then reduce the heat to medium.
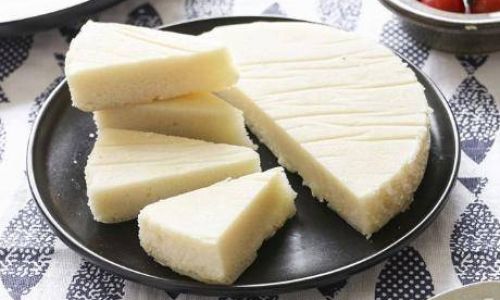
Place the rice dough in the steamer, spreading it evenly to a thickness of 2.5–5 cm. Cover the steamer with its lid and cook for 45–60 minutes, depending on the dough’s thickness. Check for doneness by inserting a skewer into the center; if it emerges clean, the cake is ready. For larger batches, rotate the steamer halfway through cooking to ensure even heat distribution.
Step 5: Shaping and Cooling
Once steamed, the rice cake transforms into a glossy, translucent mass. Immediately transfer it to a lightly oiled wooden board or marble slab to prevent sticking. Using oiled hands or a rolling pin, flatten the dough to a uniform thickness of 1–2 cm.
Traditional shaping techniques vary by region:
- Cutting: Use a sharp knife dipped in cold water to slice the cake into squares, diamonds, or strips.
- Molding: Press the warm dough into carved wooden molds lined with banana leaves, then tap gently to release intricately patterned pieces.
- Rolling: For cylindrical varieties like Korean tteok, roll the dough into logs and slice into bite-sized rounds.
Allow the shaped cakes to cool completely at room temperature. Resist the temptation to refrigerate them prematurely, as condensation can soften the texture.
Step 6: Finishing Touches
Traditional rice cakes often feature complementary toppings or fillings:
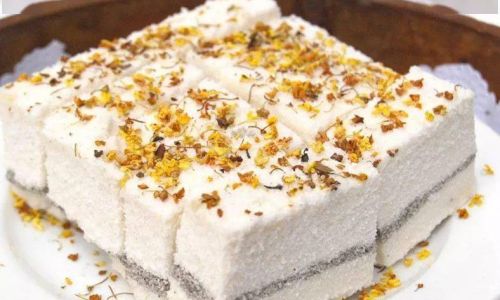
- Sweet Variations: Roll cooled cakes in toasted sesame seeds, shredded coconut, or crushed peanuts. For a decadent touch, brush with honey and sprinkle with cinnamon.
- Savory Options: Stuff cakes with seasoned mung bean paste, red bean paste, or minced meat before steaming.
- Colorful Accents: Infuse the dough with natural dyes derived from pandan leaves (green), turmeric (yellow), or beet juice (pink) for visual appeal.
Cultural Significance and Regional Variations
Rice cakes transcend their culinary role, embodying cultural narratives and seasonal rhythms:
- Lunar New Year: In China, nian gao (年糕) symbolizes progress and growth, its name a homophone for “higher year.” Families gift these cakes to wish loved ones prosperity.
- Japanese New Year: Mochi is pounded in ceremonial rituals called mochitsuki, believed to purify the home and invite divine blessings.
- Korean Harvest Festivals: Songpyeon (송편), half-moon-shaped rice cakes stuffed with sesame or chestnut, are exchanged during Chuseok to honor ancestors.
Preservation and Modern Adaptations
While traditional rice cakes are best enjoyed fresh, they can be stored for later use:

- Refrigeration: Wrap tightly in plastic wrap and consume within 3–5 days. Reheat by steaming or pan-frying to restore softness.
- Freezing: For extended storage, freeze individual portions. Thaw in the refrigerator overnight before reheating.
Modern cooks often experiment with gluten-free flours, low-sugar alternatives, or vegan ingredients to cater to dietary preferences. However, purists argue that substitutions compromise authenticity, emphasizing the importance of sourcing heirloom rice varieties and adhering to classical techniques.
Troubleshooting Common Issues
- Gummy Texture: Over-processing the dough or insufficient steaming can cause stickiness. Ensure thorough kneading and use a reliable thermometer to maintain steady heat.
- Cracked Surface: Rapid cooling or uneven steaming leads to cracks. Cover the cake with a damp cloth while cooling to retain moisture.
- Bland Flavor: Under-seasoning is a common pitfall. Taste the dough before steaming and adjust sweetness or saltiness as needed.
Conclusion
Crafting traditional rice cakes is an act of cultural stewardship, a dialogue between past and present that honors the wisdom of ancestral cooks. While modern gadgets streamline the process, the soul of the dish lies in meticulous attention to detail—the rhythm of pounding rice, the dance of steam, and the satisfaction of shaping dough into edible art. Whether enjoyed during a festive feast or shared as a humble snack, these cakes remain a testament to the enduring power of tradition. By mastering these techniques, we not only preserve a culinary legacy but also nourish our connection to the global tapestry of human heritage.


0 comments