Table of content
Taro balls, or yùyuán in Mandarin, are beloved chewy treats originating from Taiwanese cuisine. These vibrant, bouncy spheres—often purple, yellow, or white—are a staple in bubble tea, shaved ice desserts, and sweet soups. While store-bought versions are convenient, making taro balls at home allows you to control the sweetness, texture, and flavors, resulting in a truly personalized dessert experience. This guide will walk you through the entire process of crafting handmade taro balls from scratch, including tips for achieving the perfect consistency, creative variations, and serving suggestions.
Ingredients: The Foundation of Flavor
To create authentic taro balls, you’ll need a handful of simple ingredients. The star of the show is taro root, a starchy tuber with a mild, nutty flavor. For visual appeal and added complexity, consider incorporating sweet potatoes or purple sweet potatoes. Here’s a breakdown of the essentials:

- Taro Root (500g): Peel and chop into even cubes for steaming.
- Sweet Potato (200g, optional): Adds natural sweetness and a golden hue.
- Purple Sweet Potato (200g, optional): Imparts a striking violet color.
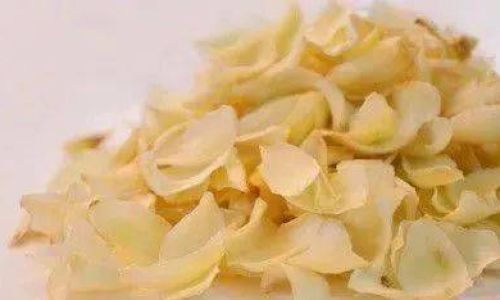
- Tapioca Starch (400–500g): The key to achieving a chewy texture.
- Granulated Sugar (50–80g): Adjust to taste.
- Water (as needed): For steaming and adjusting dough consistency.
Optional Additions:
- Food Coloring: For brighter hues (e.g., pink, green).
- Flavor Extracts: Pandan, coconut, or almond extract.
- Toppings: Toasted sesame seeds, crushed peanuts, or coconut flakes.
Tools You’ll Need
Making taro balls requires minimal equipment, but the right tools can streamline the process:

- Steamer Basket or Pot: To cook the taro and sweet potatoes.
- Mixing Bowls: For combining ingredients.
- Potato Masher or Fork: For smashing the cooked vegetables.
- Kitchen Scale: Ensures accurate measurements.
- Bench Scraper or Knife: To cut the dough into pieces.
- Baking Tray: For resting the dough before cooking.
Step-by-Step Process
Preparing the Vegetables
- Steam, Don’t Boil: Place the chopped taro and sweet potatoes in a steamer basket over boiling water. Steaming preserves moisture and prevents sogginess, which is crucial for dough consistency. Cook for 15–20 minutes or until tender when pierced with a fork.
- Mash While Hot: Transfer the steamed vegetables to a large mixing bowl. Use a potato masher or fork to break them into a smooth purée. Avoid overmixing, as excessive heat can make the dough sticky.
Creating the Dough
- Sweeten and Starch: Add sugar to the mashed vegetables and mix until dissolved. Gradually incorporate tapioca starch, starting with 400g. The dough should be pliable but not sticky. If it cracks, add 1–2 tablespoons of water; if it sticks to your hands, sprinkle more starch.
- Color Variations: For multi-colored taro balls, divide the dough into portions and knead in food coloring or purées (e.g., matcha powder for green, beet juice for pink).
Shaping the Balls
- Roll into Logs: Dust a clean surface with tapioca starch. Divide the dough into golf ball-sized portions and roll each into a 1-inch-thick log.
- Cut into Pieces: Use a bench scraper or knife to slice the log into ½-inch segments. Lightly dust the pieces with starch to prevent sticking.
- Optional Textures: For a rustic look, press each piece with a fork to create ridges. Alternatively, roll them into perfect spheres.
Cooking the Taro Balls
- Boil in Batches: Bring a large pot of water to a rolling boil. Add the taro balls in small batches to avoid overcrowding. Stir gently to prevent sticking.
- Test for Doneness: The balls will float to the surface within 2–3 minutes. Remove them with a slotted spoon and immediately transfer to an ice bath to halt cooking. This step ensures a chewy, not gummy, texture.
Final Touches
- Drain and Coat: Once cooled, drain the taro balls and toss them in a bit of tapioca starch to absorb excess moisture. This also prevents clumping during storage.
Tips for Perfect Taro Balls
- Adjust Starch Carefully: The amount of tapioca starch needed varies based on the vegetables’ moisture content. Start with 400g and add more incrementally.
- Avoid Overcooking: Overboiled taro balls become mushy and lose their shape. Remove them as soon as they float.
- Freeze for Convenience: Cooked taro balls can be frozen for up to three months. Spread them on a baking sheet, freeze until solid, then transfer to an airtight container.
- Customize Sweetness: For a less sugary treat, reduce the sugar by 20–30%. Conversely, add honey or condensed milk to the dough for richness.
Creative Variations
- Flavored Dough: Mix in 1–2 teaspoons of cocoa powder, black sesame paste, or mango purée for unique flavors.
- Stuffed Taro Balls: Encase a small cube of cheese, red bean paste, or taro cube inside each ball for a surprise center.
- Gluten-Free Options: Substitute tapioca starch with a 1:1 ratio of sweet potato starch or rice flour for a slightly different texture.
Serving Suggestions
Taro balls shine in both hot and cold desserts. Here are some classic pairings:
- Bubble Tea: Add cooked taro balls to milk tea with tapioca pearls.
- Shaved Ice: Top a mountain of shaved ice with taro balls, sweetened condensed milk, and fresh fruit.
- Sweet Soup: Simmer taro balls in a coconut milk broth with sago pearls and mango chunks.
- Ice Cream Sundae: Layer taro balls with vanilla ice cream, caramel sauce, and toasted coconut.
Storage and Shelf Life
- Uncooked Dough: Wrap tightly in plastic wrap and refrigerate for up to two days. Freeze for longer storage.
- Cooked Taro Balls: Store in an airtight container in the refrigerator for 3–4 days. Reheat in boiling water for 1–2 minutes before serving.
The Cultural Significance of Taro Balls
In Taiwan, taro balls are more than just dessert—they’re a symbol of culinary craftsmanship. Street vendors in night markets like Taipei’s Shilin Night Market have perfected the art of balancing sweetness, chewiness, and texture. By making taro balls at home, you’re not just preparing a treat; you’re connecting with a tradition that values patience, precision, and the joy of sharing food with loved ones.

Troubleshooting Common Issues
- Dough Too Sticky: Add 1–2 tablespoons of tapioca starch and knead until smooth.
- Taro Balls Disintegrate When Boiled: The dough likely lacked sufficient starch. Increase the ratio next time.
- Dull Color: Steam purple sweet potatoes separately to retain their vibrant hue. Avoid overmixing the dough.
Conclusion
Making handmade taro balls is a labor of love that rewards you with a versatile, crowd-pleasing dessert. Whether you prefer them nestled in a bowl of milk tea or floating in a pool of coconut syrup, these chewy orbs offer endless opportunities for creativity. Experiment with flavors, colors, and textures to craft a signature recipe that reflects your taste. So, roll up your sleeves, embrace the sticky dough, and savor the satisfaction of biting into a taro ball you made from scratch. Your future dessert creations—and your guests—will thank you.


0 comments