Table of content
Introduction
Creamy cheese foam, often referred to as cheese milk cap or simply cheese foam, is a delightful topping that enhances the flavor and texture of various beverages and desserts. Its rich, velvety texture and tangy, cheesy taste make it a favorite among coffee and tea lovers, as well as those who appreciate a good dessert. While it may seem like a complex culinary creation, making cheese foam at home is actually quite straightforward with the right ingredients and techniques. In this comprehensive guide, we’ll walk you through the entire process, from selecting the best ingredients to achieving the perfect consistency. By the end, you’ll be able to whip up a batch of creamy cheese foam that rivals even the finest cafes.
Understanding the Basics
Before diving into the recipe, it’s essential to understand the fundamental components of cheese foam. Primarily, it consists of three key ingredients: cheese, cream, and a sweetener (optional). The type of cheese you choose will significantly impact the final flavor and texture. Common options include cream cheese, mascarpone, and cheddar, each contributing its unique characteristics. Cream provides the rich, silky mouthfeel, while a sweetener like sugar or honey balances out the tanginess of the cheese.
Additionally, stabilizers like cornstarch or powdered milk can be used to ensure the foam holds its shape and doesn’t deflate too quickly. However, these are optional and can be omitted if you prefer a more natural, albeit less stable, foam.
Gathering Your Ingredients
Cheese
- Cream Cheese: This is a versatile option that offers a balance of creaminess and tang. It blends well and creates a smooth foam.
- Mascarpone: Known for its luxurious texture and mild flavor, mascarpone makes an excellent choice for those who prefer a less tangy foam.
- Cheddar or Other Hard Cheeses: While less common, hard cheeses can be used to add a sharp, savory note to your foam. They require more effort to blend smoothly.
Cream
- Heavy Whipping Cream: Provides the richness and stability needed for a thick, creamy foam.
- Light Cream or Half-and-Half: Can be used for a lighter version but may result in a less stable foam.
Sweetener (Optional)
- Granulated Sugar: Classic and easy to dissolve.
- Powdered Sugar: Dissolves more evenly and can help with stability.
- Honey or Maple Syrup: Adds a touch of natural sweetness and flavor depth.
Stabilizers (Optional)
- Cornstarch: Helps thicken the mixture and stabilize the foam.
- Powdered Milk: Adds body and helps retain the foam’s structure.
Tools and Equipment
- Electric Mixer or Blender: Essential for achieving a smooth, well-blended mixture.
- Whipping Siphon with Nitrous Oxide Chargers: For professional-quality foam with a light, airy texture (optional but recommended for best results).
- Mixing Bowls: For preparing and combining ingredients.
- Spatula: For folding and mixing ingredients gently.
- Measuring Cups and Spoons: For accuracy in portioning ingredients.
Step-by-Step Recipe
Step 1: Preparation
Begin by ensuring all your ingredients are at room temperature. This helps with blending and ensures a smoother texture. If using a whipping siphon, make sure it’s clean and ready for use.

Step 2: Combining Ingredients
-
Cheese and Cream: In a mixing bowl, combine your chosen cheese with an equal amount of heavy whipping cream. For example, if you’re using 100 grams of cream cheese, use 100 milliliters of heavy cream.
-
Sweetener: Add a tablespoon or two of your preferred sweetener, adjusting to taste. If using powdered sugar, you can add it directly to the mixture. Granulated sugar should be dissolved in a small amount of cream or water before adding to avoid grittiness.
-
Stabilizers: If using cornstarch or powdered milk, add a teaspoon of either to the mixture. This will help thicken and stabilize the foam.
Step 3: Blending
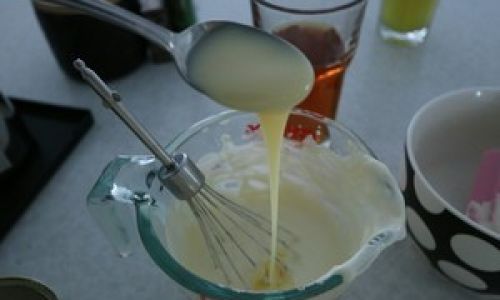
Using an electric mixer or blender, blend the ingredients on medium speed until smooth and well combined. This may take a few minutes depending on the power of your blender and the type of cheese used. Scrape down the sides occasionally to ensure everything is evenly mixed.
Step 4: Whipping (Optional for Extra Airiness)
For an extra light and airy texture, transfer the mixture to a whipping siphon. Charge it with nitrous oxide according to the manufacturer’s instructions and shake gently to distribute the gas. Refrigerate for at least 15 minutes to allow the foam to set.
If you don’t have a whipping siphon, you can still achieve a foam-like consistency by whipping the mixture with an electric mixer on high speed for a few minutes until it starts to thicken and form soft peaks. Be careful not to over-whip, as this can cause the mixture to separate.
Step 5: Serving
Once your cheese foam is ready, it’s time to enjoy it! Here are a few ways to serve it:
-
On Drinks: Pour your favorite hot or iced beverage into a cup and top with a generous layer of cheese foam. Use a spoon to create a pretty swirl on top.
-
With Desserts: Serve it over pancakes, waffles, or ice cream for a decadent treat.
-
As a Dip: Pair it with fruits, cookies, or pretzels for a unique and delicious snack.
Troubleshooting Tips
-
Lumpy Foam: If your foam is lumpy or has chunks of cheese, it likely wasn’t blended enough. Blend on a higher speed for longer until completely smooth.

-
Too Runny: If the foam is too thin, it may be because you used too much cream or not enough stabilizer. Add a bit more cheese or cornstarch and blend again.
-
Too Sweet: Adjust the amount of sweetener in your next batch to taste. Remember, a little goes a long way.
-
Deflated Foam: If your foam deflates quickly, it may lack stabilizers. Try adding cornstarch or powdered milk next time. Using a whipping siphon also helps retain airiness.
Storage and Shelf Life
Homemade cheese foam is best enjoyed immediately for maximum freshness and flavor. However, if you have leftovers, you can store them in an airtight container in the refrigerator for up to 2 days. Note that the foam may lose some of its airiness and texture over time. To rejuvenate it, gently whisk it with a fork or spoon before serving.
Creative Variations
Once you’ve mastered the basic recipe, feel free to experiment with different flavors and ingredients to create unique variations:
-
Herbed Cheese Foam: Add a pinch of fresh herbs like dill, parsley, or chives for a savory twist.
-
Spiced Cheese Foam: Incorporate a dash of cinnamon, nutmeg, or cardamom for a warm, festive flavor.
-
Fruit-Infused Cheese Foam: Blend in pureed fruits like strawberry, mango, or blueberry for a fruity twist.
-
Chocolate Cheese Foam: Add a tablespoon of cocoa powder for a decadent, chocolatey foam.
Conclusion
Making creamy cheese foam at home is a rewarding culinary endeavor that can elevate your beverages and desserts to new heights. With the right ingredients, tools, and techniques, you can create a professional-quality foam that’s as delicious as it is visually appealing. Whether you’re a home chef looking to impress family and friends or a coffee enthusiast seeking the perfect topping, this guide has provided you with the knowledge and skills to succeed. Happy whipping!


0 comments