Black beans, a staple in global cuisines, are prized for their earthy flavor, nutritional density, and versatility. When paired with vinegar—a tangy, acidic ingredient—they transform into a dish that balances richness and brightness. However, achieving perfectly tender yet intact black beans while incorporating vinegar can be challenging. Many home cooks struggle with mushy textures, as the acidity of vinegar interferes with the beans’ natural softening process. This article explores the science behind this culinary conundrum and provides a step-by-step method to master vinegar-infused black beans that retain their shape and bite.
Understanding the Chemistry of Bean Cooking
Before diving into recipes, it’s essential to grasp why beans soften—and why vinegar complicates this process. Black beans, like all legumes, contain pectin, a complex carbohydrate that binds their cell walls. During cooking, heat breaks down pectin, causing the beans to swell and soften. However, acidic ingredients like vinegar lower the pH of the cooking liquid, which slows pectin degradation. If introduced too early, vinegar can prevent the beans from ever reaching tenderness, resulting in a crunchy, undercooked texture. Conversely, if added late, the beans may already be overcooked, leading to a mushy consistency. The key lies in timing and technique.
Step 1: Selecting and Preparing the Beans
Quality Matters: Begin with dried black beans. Avoid canned varieties, as they are pre-cooked and will disintegrate when reheated with vinegar. Opt for fresh, high-quality beans with smooth, unbroken skins. Older beans may take longer to cook and are more prone to splitting.
Soaking: To Soak or Not to Soak?
Traditional wisdom advocates soaking beans to reduce cooking time and improve digestibility. However, soaking can also leach nutrients and flavor. For vinegar-infused beans, a compromise works best:
- Quick Soak Method: Rinse 1 cup of beans under cold water. Place them in a pot, cover with 2 inches of water, and bring to a boil. Remove from heat, cover, and let sit for 1 hour. Drain.
- Overnight Soak: Rinse beans, cover with cold water, and soak for 8–12 hours. Drain and rinse again.
Why this matters: Soaking hydrates the beans, ensuring even cooking. However, over-soaking can make them overly tender before cooking begins.
Step 2: The Initial Cooking Phase (Without Vinegar)
Cooking Liquid: Use fresh water or broth. Avoid salty liquids, as salt can toughen bean skins. For 1 cup of soaked beans, add 4 cups of liquid.
Simmer, Don’t Boil: Bring the liquid to a gentle simmer over medium heat. Skim off any foam that rises to the surface. Maintain a steady simmer—never a rolling boil—to prevent skin breakage.
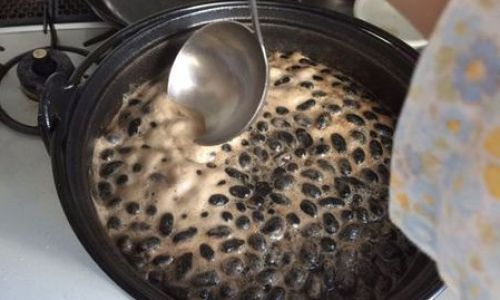
Cooking Time: Soaked beans typically take 45–60 minutes to become tender. Test for doneness by mashing a bean against the pot’s side; it should yield easily but retain its shape.
Critical Insight: Cooking beans without vinegar first ensures they reach optimal tenderness before acid is introduced.
Step 3: Introducing Vinegar at the Right Moment
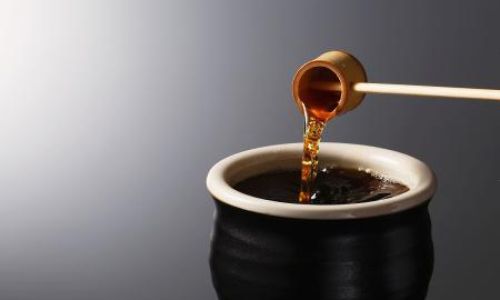
Timing is Everything: Add vinegar only when the beans are 90% cooked. Adding it too early will halt softening; adding it too late risks overcooking.
Vinegar Selection:
- Rice Vinegar: Mild and slightly sweet, ideal for a subtle tang.
- Apple Cider Vinegar: Fruity and acidic, pairs well with savory dishes.
- Red Wine Vinegar: Bold and robust, suitable for hearty stews.
Quantity: Start with 1–2 tablespoons of vinegar per cup of dried beans. Adjust to taste.
Method:
- Once the beans are nearly tender, stir in the vinegar.
- Reduce heat to low and simmer gently for 5–10 minutes. This allows the flavors to meld without overcooking the beans.
Step 4: Simmering and Seasoning
Gentle Heat: After adding vinegar, maintain a low simmer. Avoid stirring vigorously, as this can break the beans. Instead, tilt the pot and swirl the liquid gently.
Seasoning: Add aromatics (garlic, ginger, onions) or herbs (bay leaves, thyme) during the final simmer. Salt should be added sparingly at this stage, as it can draw moisture from the beans.
Flavor Infusion: For deeper complexity, consider:
- Sautéing aromatics in oil before adding to the beans.
- Adding a teaspoon of sugar or honey to balance the vinegar’s acidity.
- Incorporating smoked paprika or cumin for a smoky finish.
Step 5: Cooling and Storing
Natural Release: Allow the beans to cool in their cooking liquid. This prevents them from drying out and becoming crumbly.
Storage: Transfer cooled beans and liquid to an airtight container. Refrigerate for up to 5 days or freeze for 3 months. The starch in the beans will thicken the liquid, creating a rich, flavorful broth.
Troubleshooting Common Issues
-
Mushy Beans:
- Cause: Overcooking or adding vinegar too late.
- Fix: Reduce cooking time by 10–15 minutes next time. Add vinegar when beans are still slightly firm.
-
Undercooked Beans:
- Cause: Adding vinegar too early or insufficient simmering time.
- Fix: Soak beans longer or use a pressure cooker to jumpstart tenderizing.
-
Tough Skins:
- Cause: High heat or insufficient soaking.
- Fix: Simmer gently and ensure beans are fully hydrated before cooking.
-
Bland Flavor:
- Cause: Adding vinegar without complementary seasonings.
- Fix: Layer flavors with aromatics, herbs, and a pinch of sweetness.
Advanced Techniques for Perfect Beans
Pressure Cooker Method:
- Soak beans as usual.
- Cook in a pressure cooker with water (no vinegar) for 15–20 minutes.
- Release pressure naturally, add vinegar, and simmer for 5 minutes.
Baking Soda Trick:
- Add 1/8 teaspoon of baking soda to the cooking liquid to soften beans faster. However, this can lead to mushiness if overused.
Vinegar Marinade:
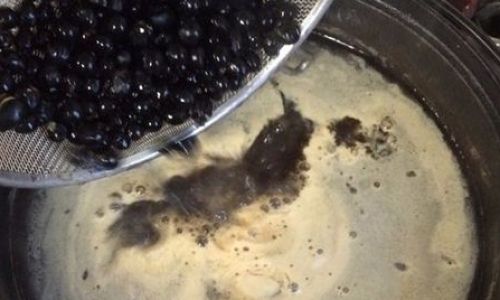
- For cold bean salads, marinate cooked beans in vinegar-oil dressing for 30 minutes before serving. This avoids prolonged cooking with acid.
Culinary Applications
Vinegar-infused black beans are incredibly versatile:
- Salads: Toss with cherry tomatoes, cilantro, and avocado.
- Soups: Add to miso broth or tortilla soup.
- Dips: Mash with roasted garlic and olive oil.
- Sides: Serve alongside grilled meats or rice.
The Science Behind Perfect Texture
The interaction between vinegar and beans is a delicate dance of pH and pectin. By delaying vinegar addition, you allow pectin to break down fully, ensuring tenderness. The vinegar’s acidity then preserves the beans’ structure, preventing them from becoming waterlogged. This method mirrors traditional Japanese kuromame (sweet black beans), where vinegar is added late to maintain firmness.
Conclusion
Cooking vinegar-infused black beans without sacrificing texture requires patience, precision, and an understanding of culinary chemistry. By soaking beans properly, cooking them gently, and introducing vinegar at the right moment, you can achieve a dish that marries tenderness and tang. Experiment with vinegars, seasonings, and cooking methods to find your perfect balance. Whether served hot or cold, these beans are a testament to the art of simplicity—where a single ingredient, added with care, elevates a humble legume into a culinary masterpiece.


0 comments